The Room – Game Introduction
The Room is a puzzle adventure game from Fireproof Games, wherein you will need to solve very intricate puzzles in order to reach the end of several rooms along the way. Gamezebo’s walkthrough will provide you with detailed images, tips, information, and hints on how to play your best game.
General Tips
- Swipe the screen to move the camera around.
- Double tap on items to zoom in on them for interaction.
- Pinch on screen to zoom in or out.
- You can replay chapters later on if you want to try your hand at any particular chapter later on.
- If you’re proud of completing chapters or the entire game, you can share your achievements on Facebook or Twitter at the end of each chapter and at the end of the game.
- If you find yourself completely stuck, maybe try manipulating something in your inventory or moving to another part of the puzzle. Completing steps out of order can sometimes screw you up.
- The usage of the eyepiece is also a common point where you might find yourself stuck. Tap on it to be shown secret items and areas you may never have seen otherwise.
- The question mark in the upper left corner of the screen will provide you with vague hints if you don’t know what to do.
- Tilting and moving your device is a necessity in The Room. When the guide calls for this, pick up your device and physically tilt it as instructed.
Chapter 1
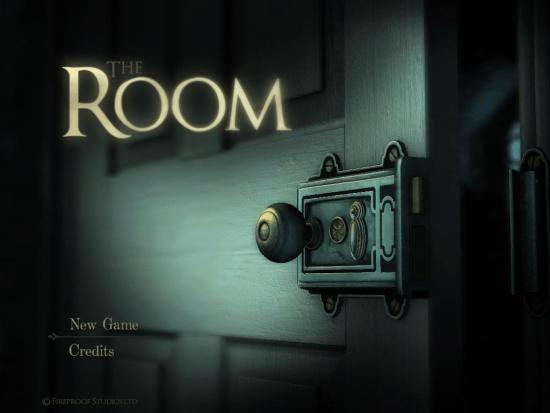
- From the Main Menu screen, tap New Game.
- Move the camera with your finger to look at the top of the safe.
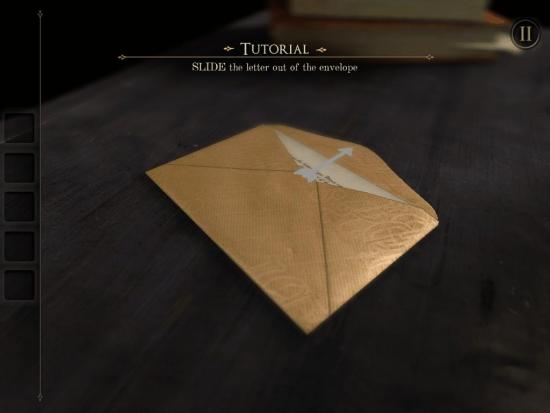
- Double tap on ENVELOPE.
- Slide LETTER out of ENVELOPE.
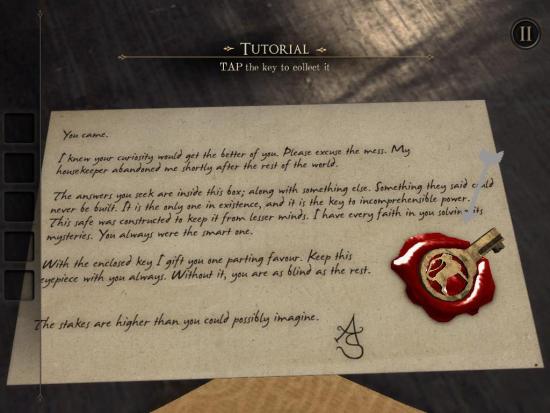
- Tap on KEY to collect it.
- Rotate the top of TRINKET BOX to locate KEYHOLE.
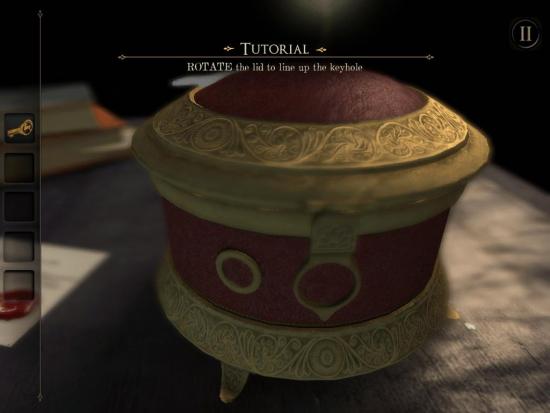
- Drag KEY into KEYHOLE.
- Turn KEY clockwise.
- Open LID of TRINKET BOX.
- Tap on EYEPIECE to collect.
- Tap on EYEPIECE icon on right of screen.
- Tap on EYEPIECE to remove.
- Double tap on NOTE.
- Pinch NOTE to zoom out.
- Pan camera to bottom of SAFE.
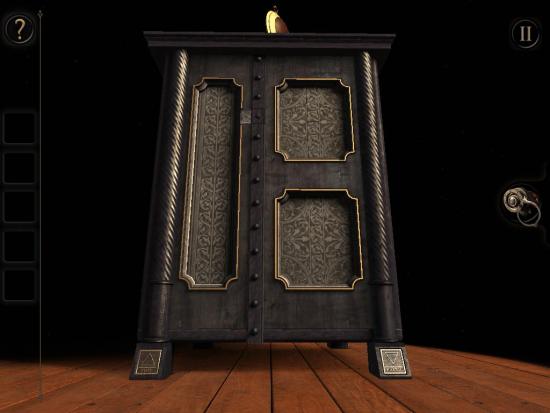
- Find FIRE SYMBOL on SAFE LEG.
- Pinch to zoom on FIRE SYMBOL.
- Tap on FIRE SYMBOL.
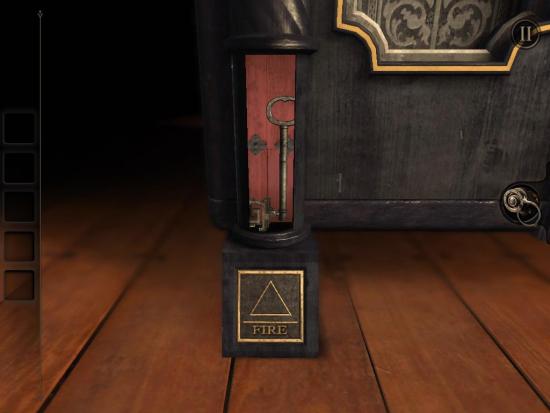
- Collect FIRE SYMBOL KEY.
- Tap on FIRE SYMBOL KEY in inventory.
- Rotate end of FIRE SYMBOL KEY clockwise.
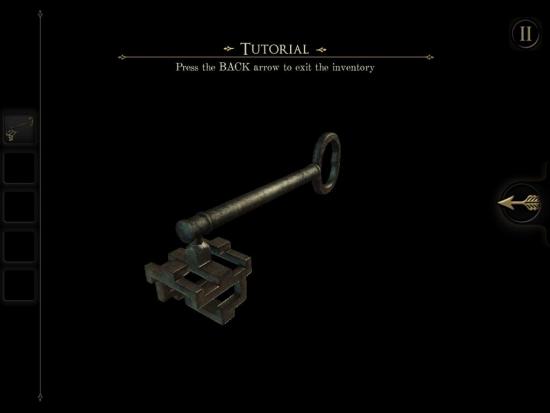
- Tap BACK ARROW.
- Zoom view out to side of SAFE.
- Pinch to zoom in on PECULIAR MARKING on SAFE.
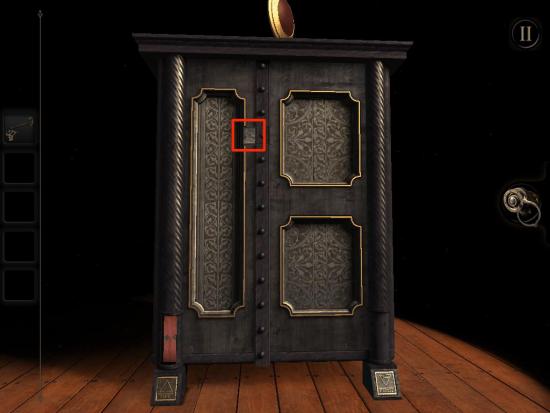
- Drag SCRATCHED PANEL to left.
- Drag FIRE SYMBOL KEY to KEYHOLE.
- Rotate FIRE SYMBOL KEY clockwise.
- Collect METAL PLATE.
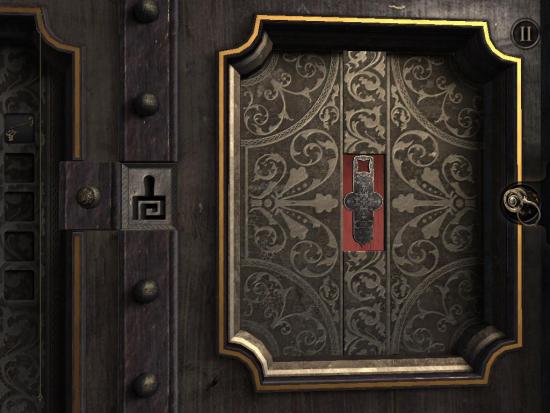
- Rotate view left to find TALISMAN LOGO.
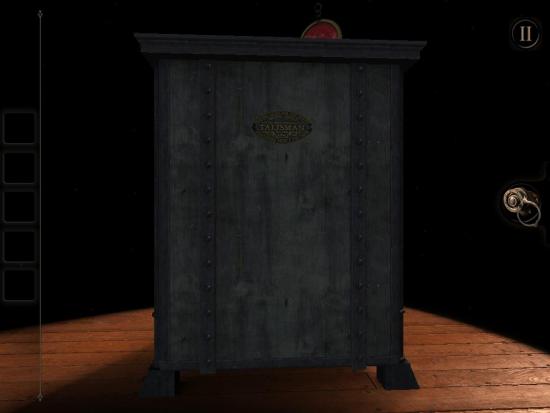
- Zoom in on TALISMAN LOGO.
- Drag METAL PLATE to STAR SCREW on TALISMAN LOGO.
- Turn METAL PLATE counter clockwise.
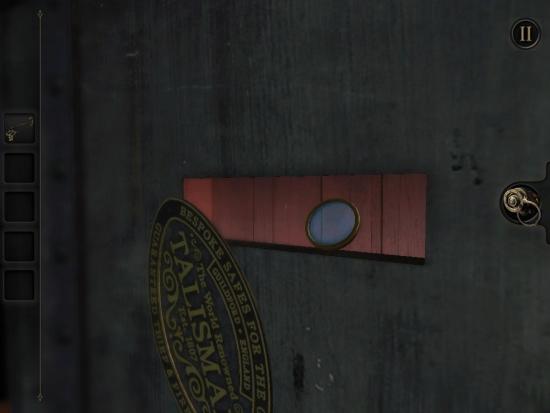
- Collect LENS.
- Tap EYEPIECE ICON.
- Rotate view to CIRCULAR PANEL on SAFE.
- Zoom on SCRATCH MARKS.
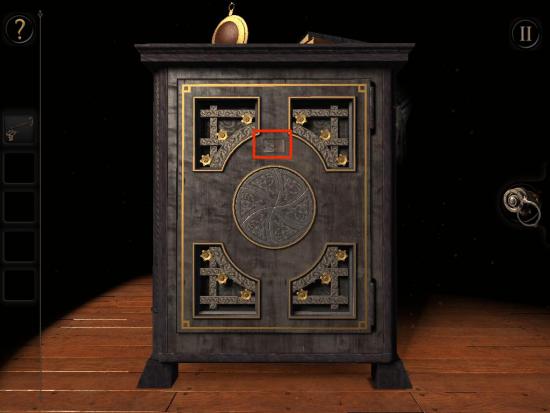
- Slide SCRATCH MARKED PANEL left.
- Tap on FIRE SYMBOL KEY in inventory.
- Rotate front of FIRE SYMBOL KEY.
- Exit inventory.
- Drag FIRE SYMBOL KEY to KEYHOLE.
- Turn FIRE SYMBOL KEY clockwise to reveal GOLD PLATES.
- Tap on EYEPIECE ICON to reveal BLUE MARKINGS on GOLD PLATES.
- Rotate BLUE MARKINGS to create TRIANGLE SYMBOL as seen below.
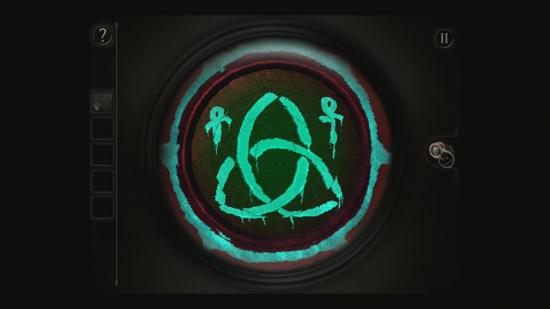
- Open SAFE DOOR.
Chapter 2
- Zoom out to view PYRAMID BOX.
- Swipe right to view GOLD PILLAR.
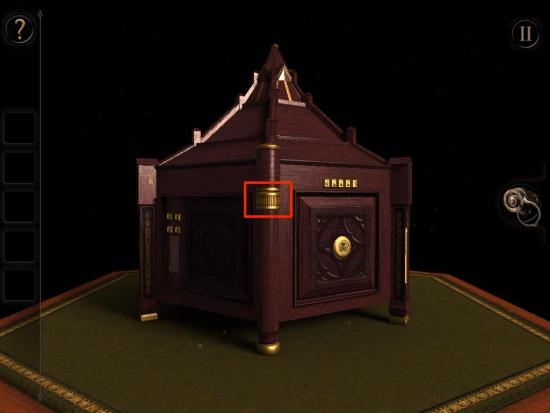
- Zoom in on GOLD PILLAR.
- Swipe left to unscrew GOLD PILLAR.
- Tap on MINIATURE MICROSCOPE.
- Zoom out.
- Swipe right to find GOLD PILLAR 2.
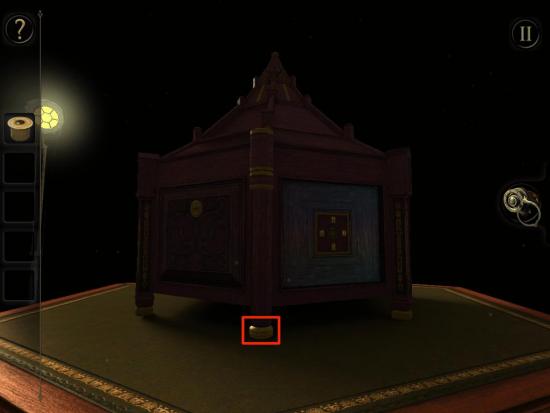
- Zoom in on GOLD PILLAR 2.
- Swipe left o reveal COTTON PIECE.
- Zoom out.
- Tap on MINIATURE MICROSCOPE in inventory.
- Rotate MINIATURE MICROSCOPE counter clockwise to expand.
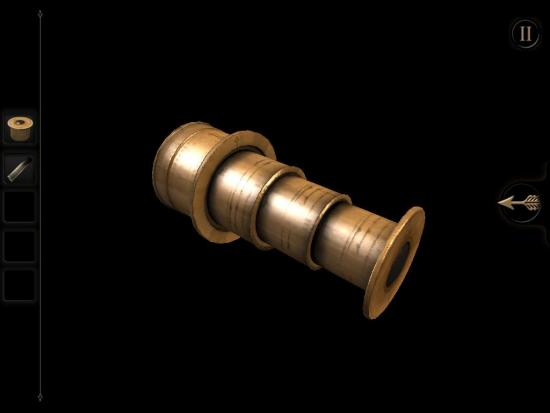
- Rotate to BLUE NUMER PANEL on PYRAMID BOX.
- Zoom in on BLUE NUMBER PANEL.
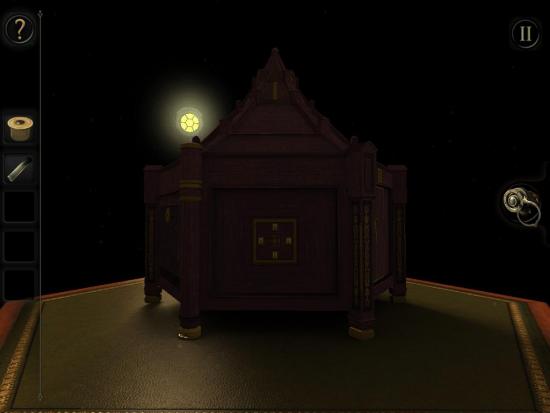
- Tap on EYEPIECE ICON.
- Rotate GREEN BOX to reveal FOUR NUMBERS.
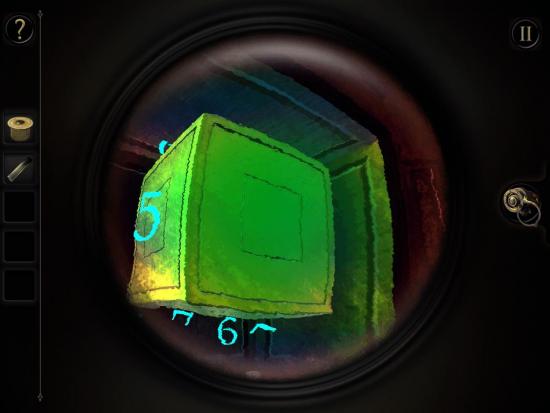
- Enter in FOUR NUMBERS as seen below.
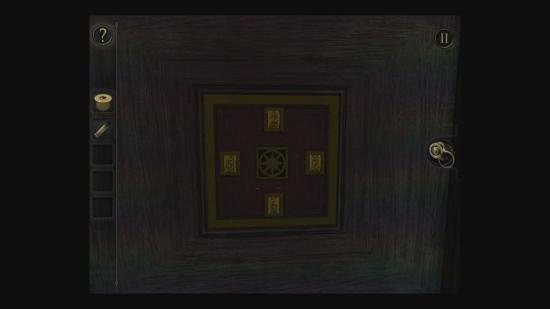
- Flip SWITCH down.
- Zoom in on LIGHTER.
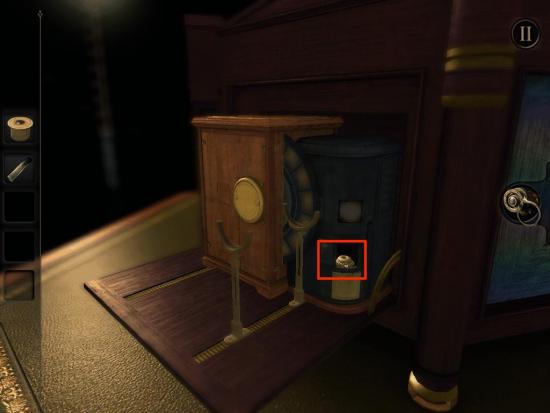
- Place COTTON PIECE in LIGHTER.
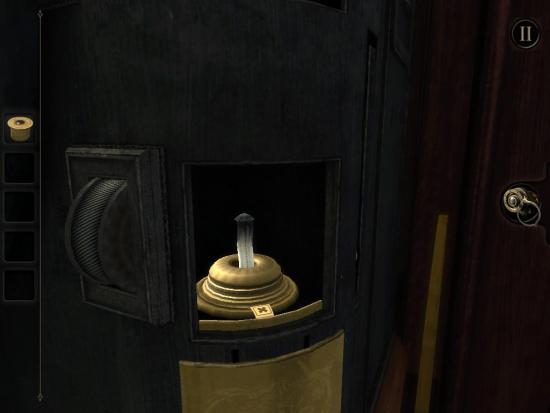
- Flip IGNITER.
- Drag LEVER up.
- Zoom out.
- Zoom in on STAND.
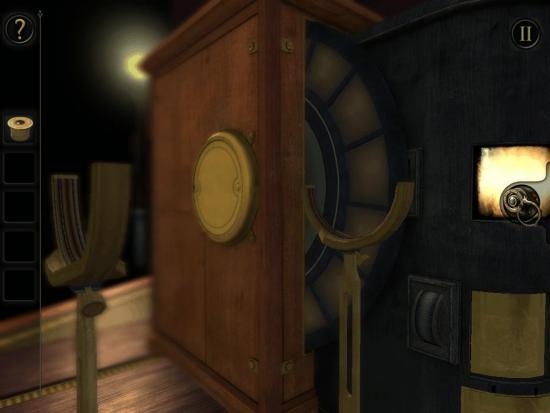
- Drag MINIATURE MICROSCOPE to STAND.
- Zoom out.
- Slide left to DECORATIVE PILLAR.
- Zoom in on DECORATIVE PILLAR.
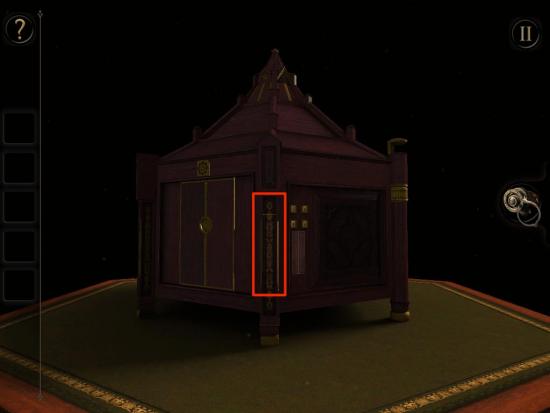
- Tap on DECORATIVE PILLAR to reveal BOOK.
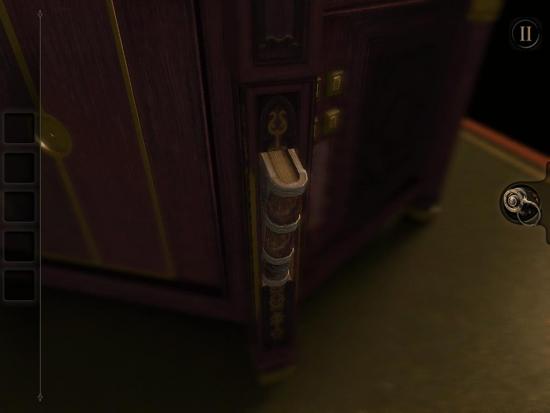
- Tap on BOOK.
- Tap on BOOK in inventory.
- Rotate DISCS in order on BOOK to open BOOK as seen below.
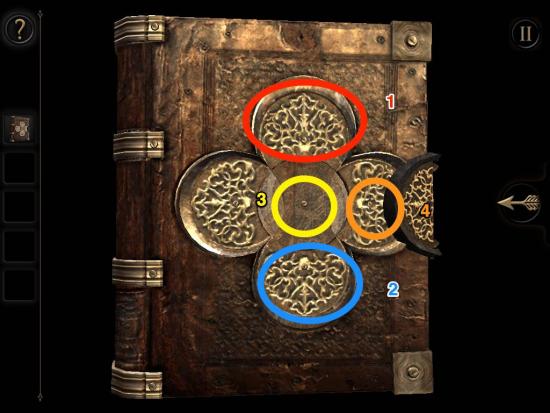
- Tap on WIND to collect.
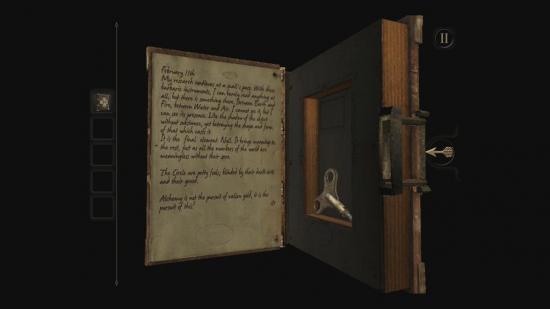
- Leave inventory.
- Zoom out.
- Swipe to right to BROWN BOX next to STAND.
- Zoom in on left of BROWN BOX next to STAND.
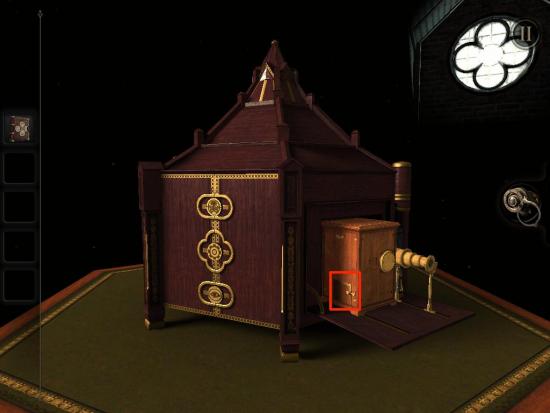
- Lift HATCH to open DOOR.
- Drag WIND into GEAR HOLE.
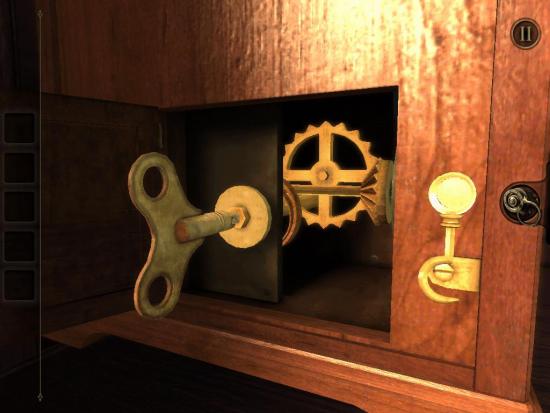
- Turn WIND clockwise.
- Tap EYEPIECE ICON.
- Zoom in on MINIATURE MICROSCOPE.
- Zoom in on MINIATURE MICROSCOPE LENS.

- Tap to leave LENS VIEW.
- Tap on EYEPIECE ICON.
- Rotate DISCS to form RAM SKULL as seen below.
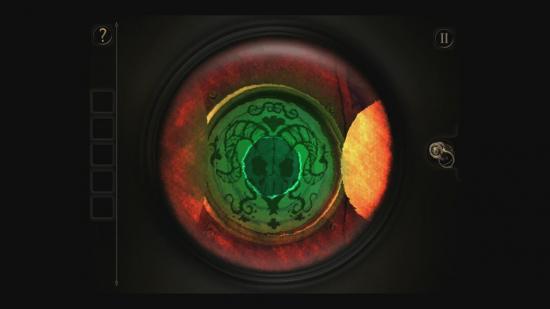
- Tap on L TILE to collect.
- Zoom out.
- Swipe to LETTER PANEL side of PYRAMID BOX.
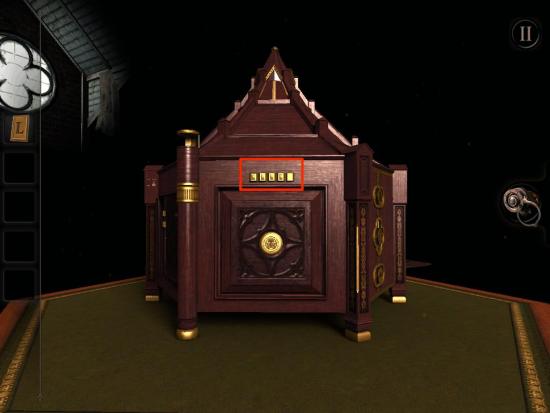
- Zoom in on LETTER PANEL.
- Drag L TILE to LETTER PANEL.
- Spell TRIAL on LETTER PANEL.
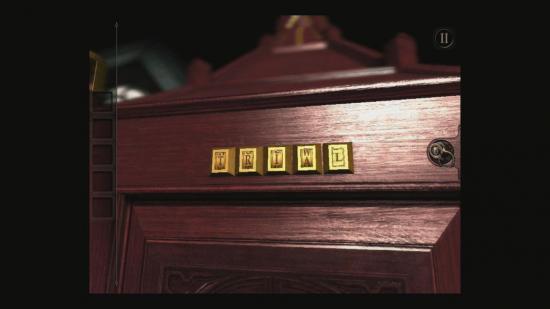
- LOCK 1 will open.
- Zoom out.
- Double tap on top of EXTENDED PANEL.
- Slide KNOB left.
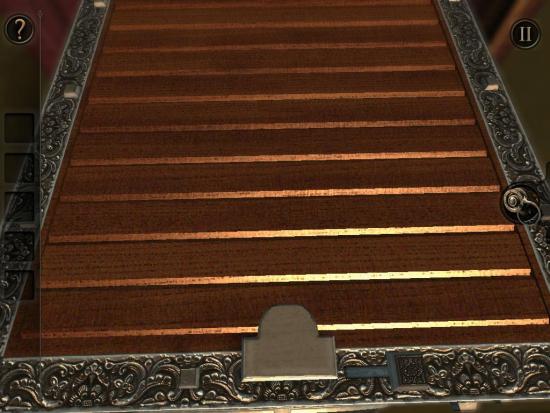
- Physically tilt YOUR DEVICE to manipulate BALLS to light up.
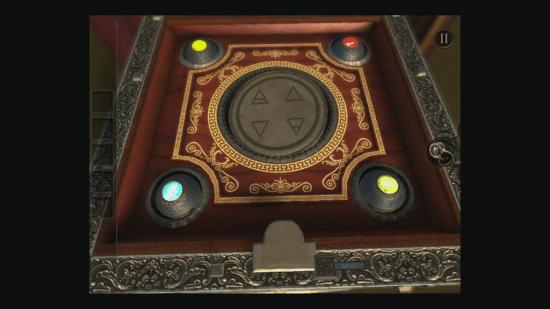
- Tap on EYEPIECE ICON.
- Swipe to create SYMBOL as seen below.
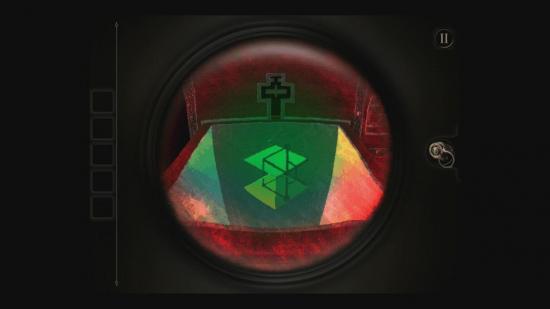
- Zoom out.
- Swipe to find FOUR SYMBOL PANEL.
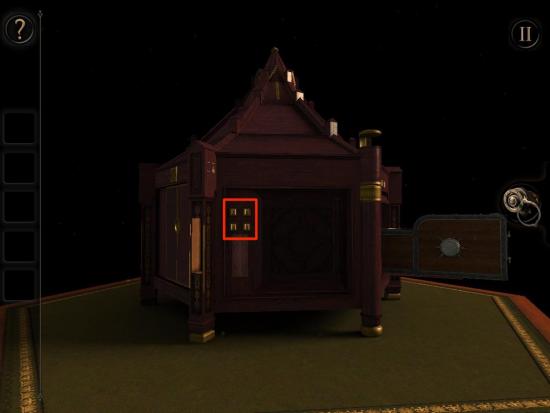
- Zoom in on FOUR SYMBOLS.
- Flip SYMBOLS as to match image below.
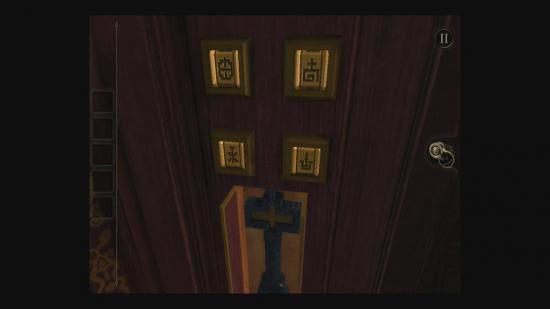
- Tap on CROSS KEY to collect.
- Zoom out.
- Swipe to EXTENDED PANEL.
- Zoom in on KEYHOLE on right side of EXTENDED PANEL.
- Drag CROSS KEY to KEYHOLE.
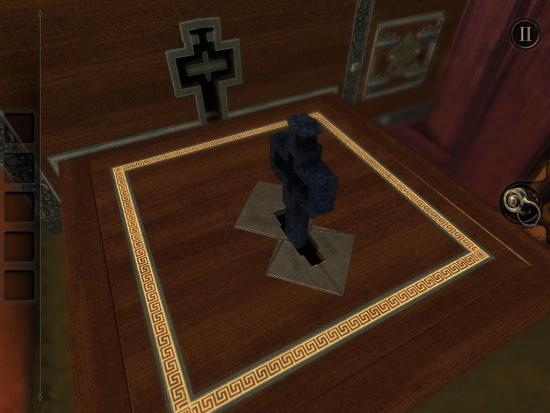
- Turn CROSS KEY clockwise.
- Zoom in on HANDLE to right.
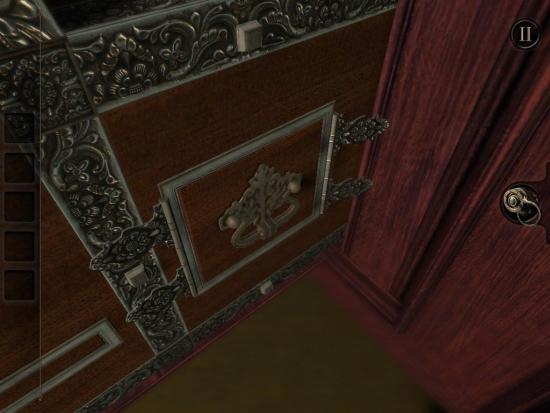
- Pull DRAWER out.
- Take CABINET KEY.
- Zoom out.
- Zoom to front of EXTENDED PANEL.
- Drag CABINET KEY to KEYHOLE.
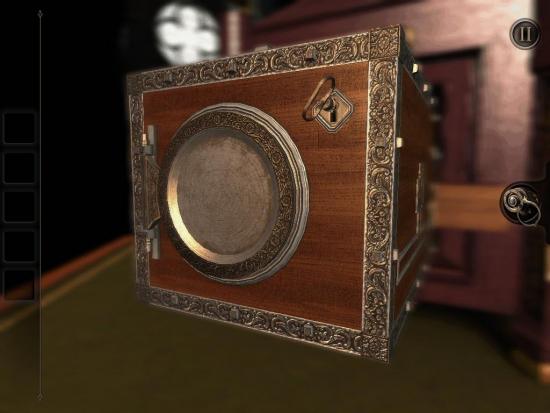
- Turn CABINET KEY clockwise.
- Tap STAR to collect.
- Zoom out.
- Rotate to back of PYRAMID BOX.
- Zoom in on TOP PILLAR.
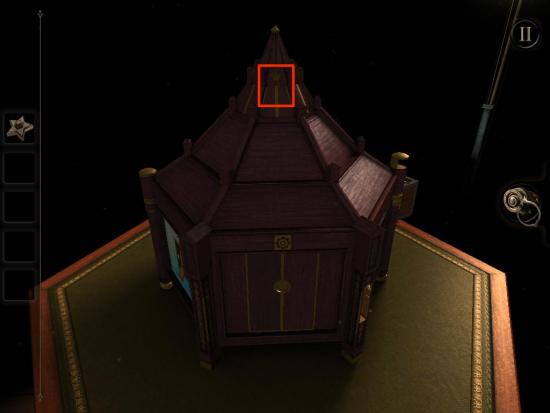
- Drag STAR to STAR INDENTATION.
- Rotate view to METAL RING.
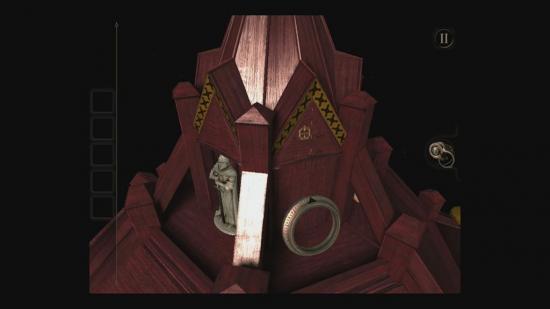
- Tap on METAL RING to collect.
- Zoom out.
- Zoom in to LEFT SIDE of EXTENDED PANEL.
- Drag METAL RING to DIAL.
- Turn DIAL in order as seen below, starting with innermost (Pink) and ending with outermost (Yellow).
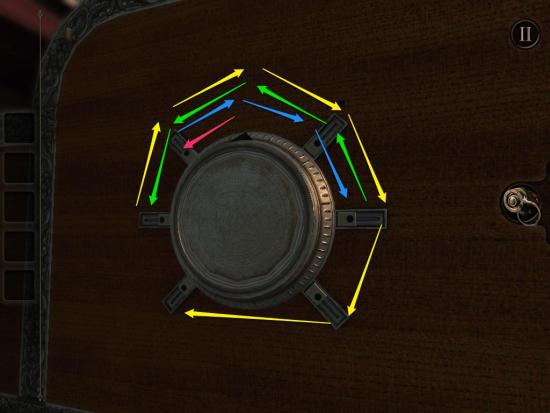
- Use two fingers to slide SWITCHES up.
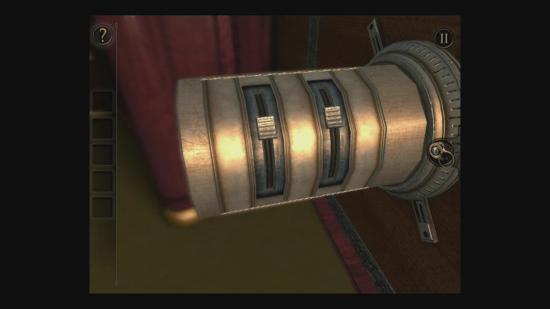
- Take LARGE KEY.
- Zoom out.
- Zoom to front of EXTENDED PANEL.
- Drag LARGE KEY to EXTENDED PANEL.
- Rotate LARGE KEY to match KEYHOLE.
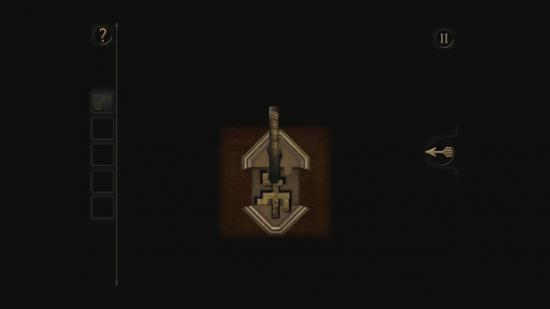
- Once matched, hit BACK ARROW.
- Drag LARGE KEY to KEYHOLE.
- Turn LARGE KEY clockwise.
- Tap on CIRCULAR PLATE to collect.
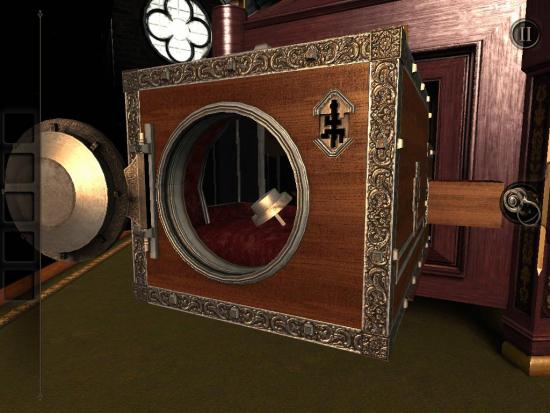
- Zoom out.
- Swipe to DOUBLE DOOR PANEL on PYRAMID BOX.
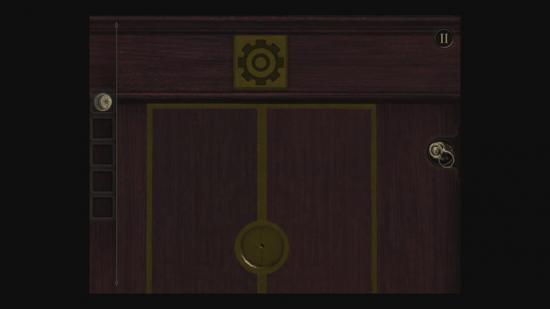
- Zoom in on CIRCULAR PANEL INDENT.
- Drag CIRCULAR PLATE to CIRCULAR PANEL INDENT.
- LOCK 2 will open.
- DOUBLE DOOR PANEL will open.
- Zoom out.
- Zoom to left of CLOCK PANEL.
- Drag WHITE SWITCH left.
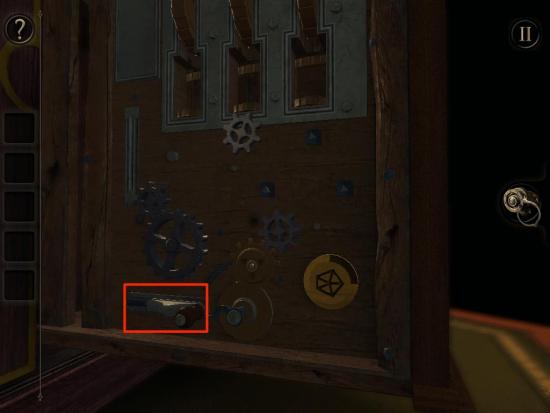
- Turn CRANK clockwise to move PANEL up.
- Top of PYRAMID BOX will expand.
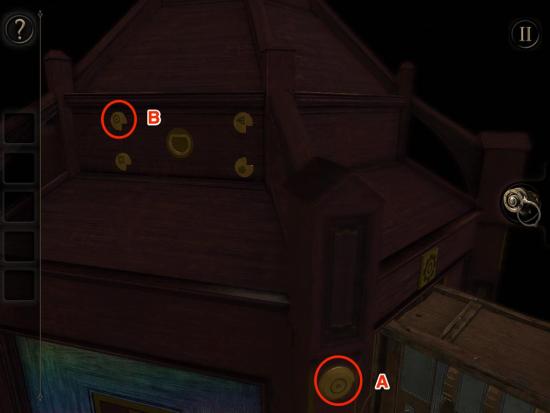
- Rotate BOTTOM DIAL (A) until DIAL (B) matches picture below.
- Zoom out.
- Zoom in on top of PYRAMID BOX.
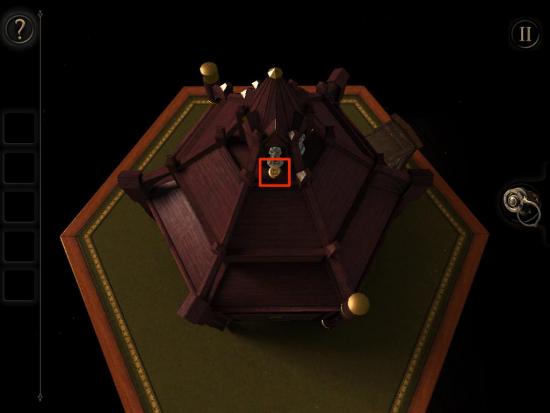
- Rotate SQUARE DIAL to match image below.
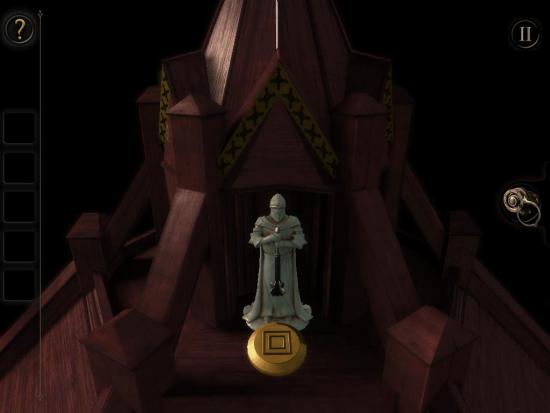
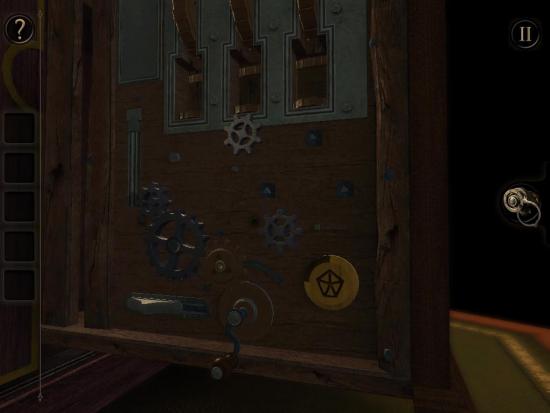
- Zoom to LEFT SIDE of CLOCK PANEL.
- Rotate STAR DIAL to match image below.
- Zoom out.
- Swipe to RIGHT SIDE of CLOCK PANEL.
- Slide TRIANGLE PANEL up and hold.
- With other finger, rotate TRIANGLE DIAL to match image below.
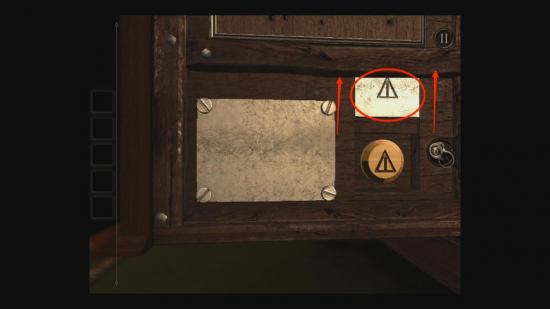
- Zoom in on DIAL PANEL on top of PYRAMID BOX.
- Slide DRAWER out.
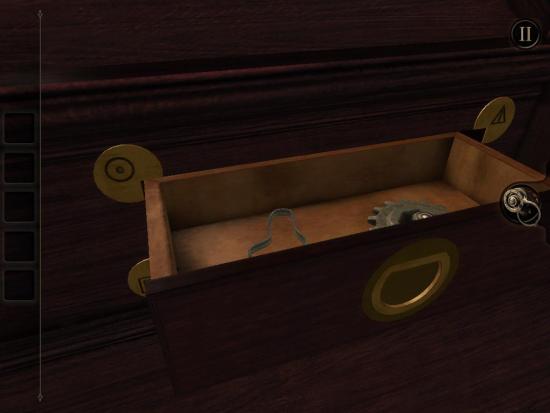
- Tap on ELASTIC BAND and COG to collect.
- Zoom out.
- Swipe to LEFT SIDE of CLOCK PANEL.
- Drag COG to GEAR PANEL as seen below.
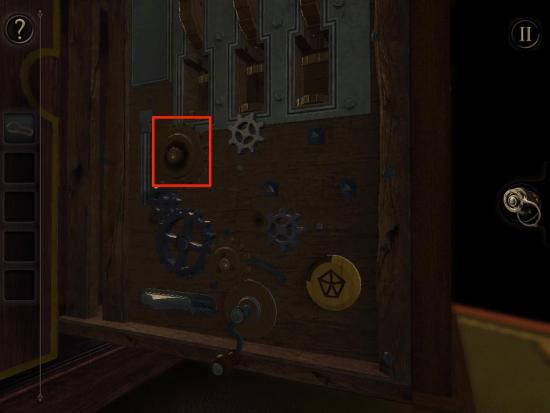
- Spin CRANK counter clockwise to raise CYLINDER.
- Tap on SCREWDRIVER to collect.
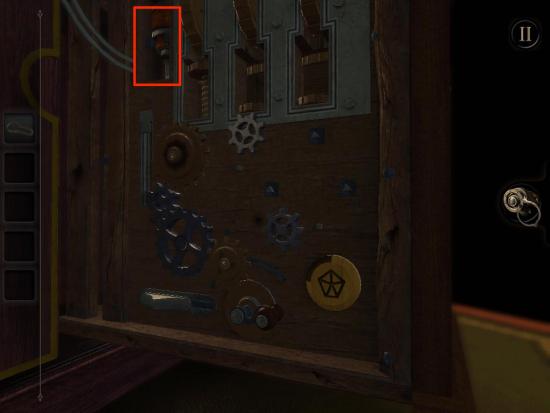
- Zoom out.
- Swipe to RIGHT SIDE of CLOCK PANEL.
- Drag SCREWDRIVER to FOUR SCREWS.
- Rotate SCREWDRIVER counter clockwise to remove FOUR SCREWS.
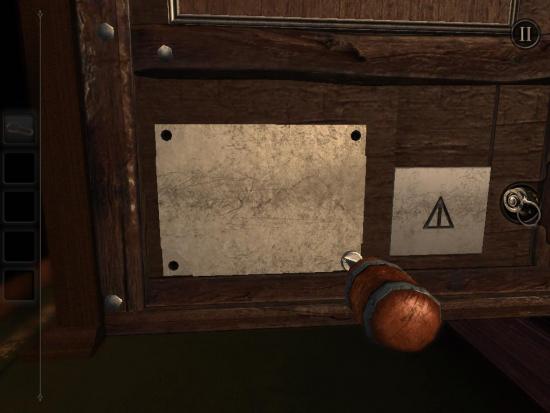
- Tap on BUTTONS with two fingers to stop GEARS from moving. GEARS must stop with a square opening as seen below.
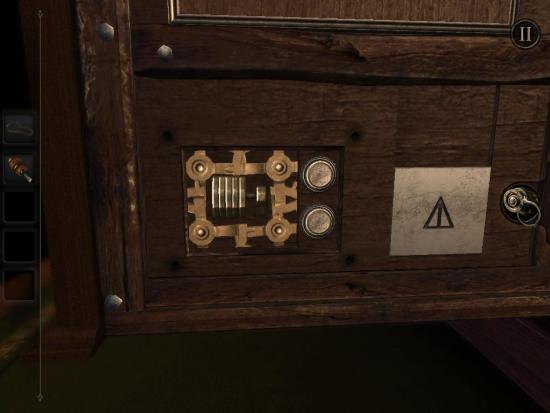
- Tap on FOLDING KEY to collect.
- Zoom out.
- Zoom into KEY PANEL on top of PYRAMID BOX.
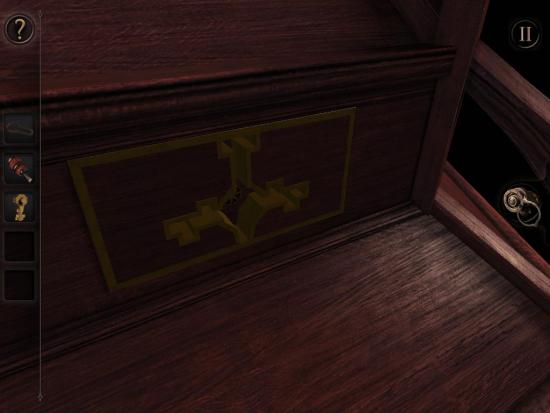
- Tap on FOLDING KEY in Inventory.
- Rotate FOLDING KEY to match KEY PANEL as seen below.
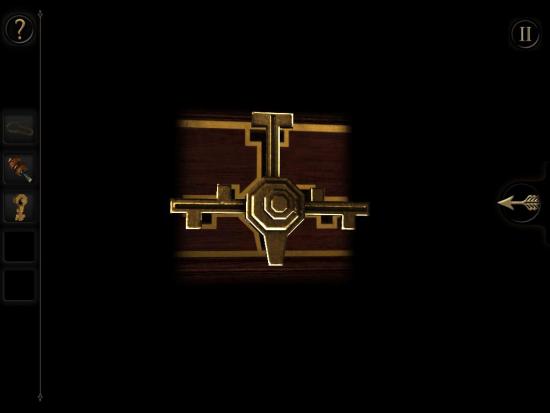
- Tap BACK ARROW.
- Drag FOLDING KEY to KEY PANEL.
- Collect SMALL COG and MEDIUM COG.
- Zoom out.
- Zoom to GEAR PANEL on CLOCK PANEL.
- Drag MEDIUM COG and SMALL COG to GEAR PANEL as seen below.
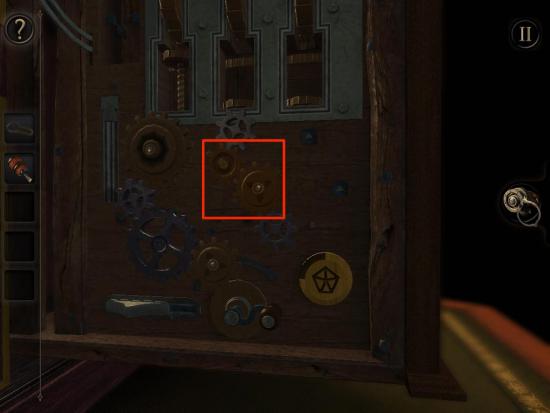
- Flip WHITE SWITCH right.
- Turn CRANK clockwise to raise CYLINDER.
- Tap on MEDIUM COG 2 to collect.
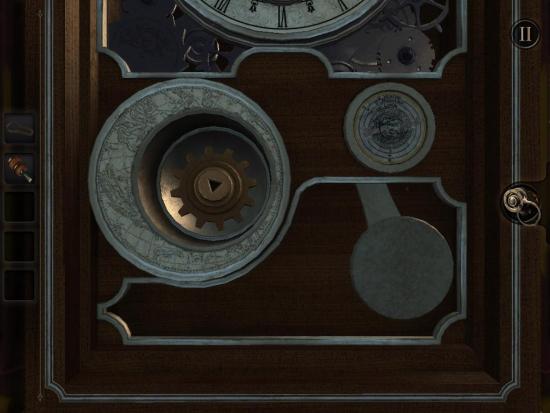
- Zoom out.
- Zoom in on GEAR PANEL.
- Remove MEDIUM COG and SMALL COG.
- Drag MEDIUM COG 1, MEDIUM COG 2, and SMALL COG to GEAR PANEL.
- Drag ELASTIC BAND to GEAR PANEL as seen below.
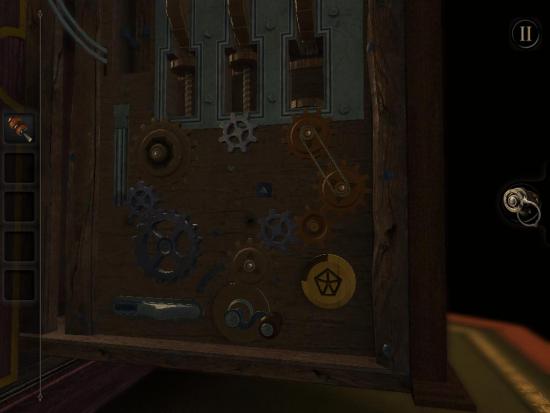
- Rotate CRANK clockwise to raise CYLINDER.
- Tap BUTTON on CLOCK FACE to move COG.
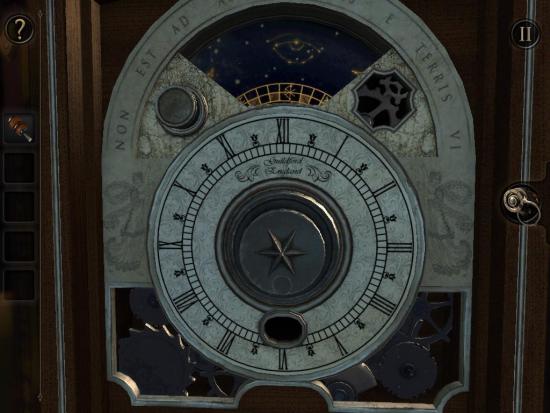
- Tap on STEEL TUBE to collect.
- Tap on STEEL TUBE in inventory.
- Remove top of STEEL TUBE to collect SMALL KEY.
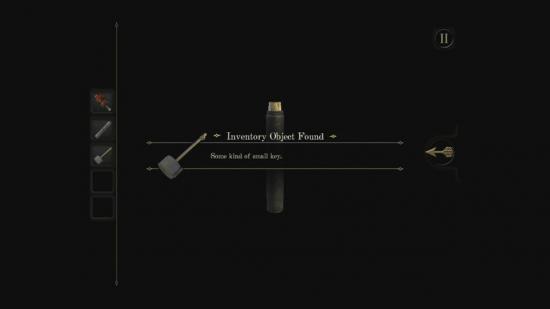
- Remove OLD PHOTOGRAPH from STEEL TUBE.
- Exit inventory.
- Zoom out.
- Zoom in on RIGHT SIDE of CLOCK PANEL.
- Drag SMALL KEY to SMALL KEYHOLE.
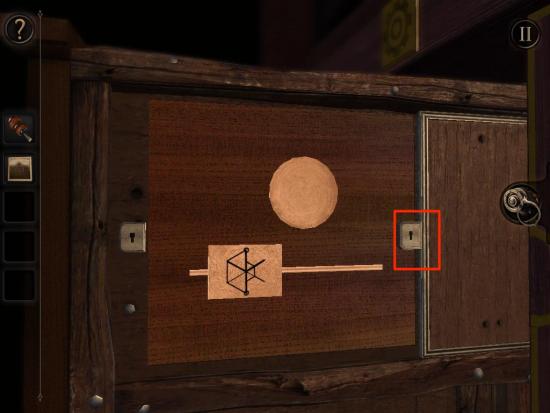
- Turn SMALL KEY clockwise.
- Tap on EYEPIECE ICON.
- Tilt VIEW, CYLINDER and BLOCK to create SYMBOL as seen below.
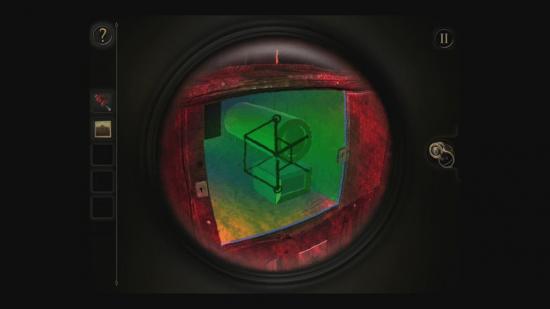
- Tap on SHIELD to collect.
- Zoom out.
- Zoom to GOLD STATUE on top of PYRAMID BOX.
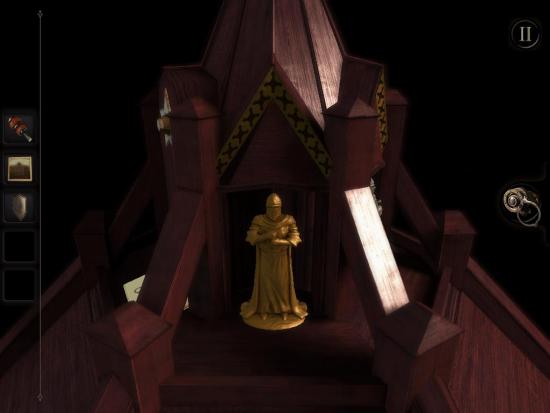
- Drag SHEILD to GOLD STATUE.
- Collect GEMSTONE.
- Zoom out.
- Zoom to CLOCK FACE.
- Drag GEMSTONE to bottom of CLOCK FACE.
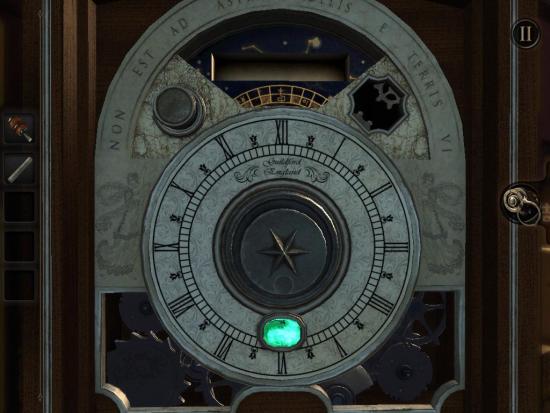
- Tap on EYEPIECE ICON.
- Turn CLOCK DIAL in center until clock reads 6:05 as seen below.
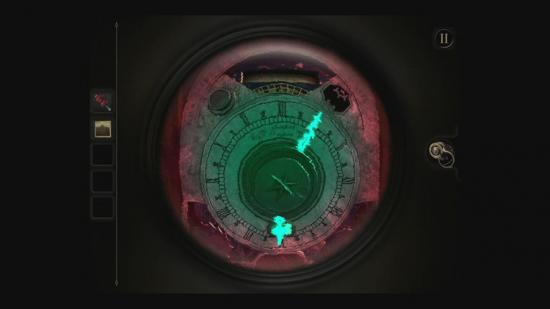
- LOCK 3 will open.
Chapter 3
- Zoom into TALISMAN LOGO on left side of OCTOGONAL BOX.
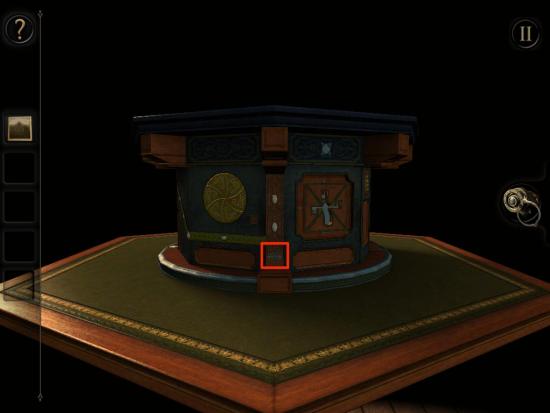
- Slide TALISMAN LOGO left.
- Pull SWITCH down.
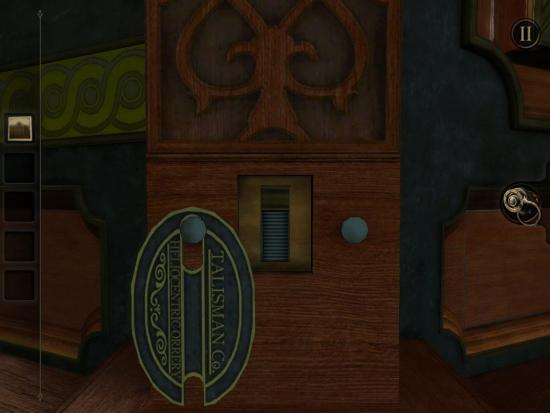
- Tap on PUZZLE BOX to collect.
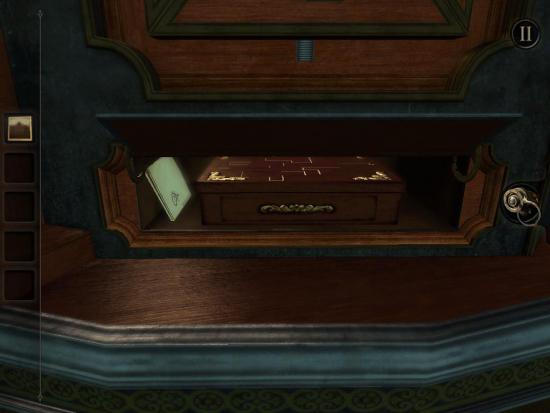
- Tap on PUZZLE BOX in inventory.
- Swipe camera view to top of PUZZLE BOX.
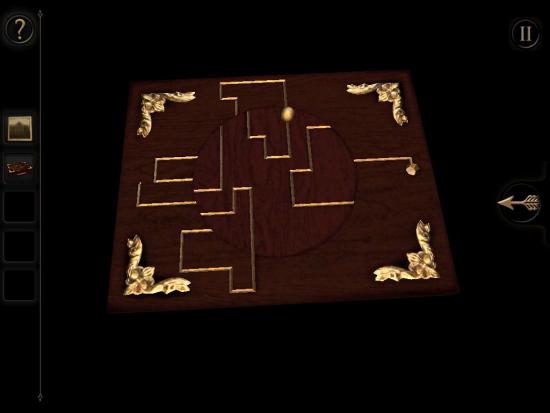
- Drag GOLD BALL on PUZZLE BOX to CENTER AREA.
- Rotate CENTER AREA clockwise one quarter.
- Drag GOLD BALL out of CENTER AREA.
- Rotate CENTER AREA clockwise one quarter turn.
- Drag GOLD BALL into CENTER AREA.
- Rotate CENTER AREA clockwise three quarter turns.
- Drag GOLD BALL out of CENTER AREA.
- Rotate CENTER AREA counter-clockwise one quarter turn.
- Drag GOLD BALL to CENTER AREA.
- Rotate CENTER AREA counter-clockwise one quarter turn.
- Drag GOLD BALL to end of PUZZLE BOX.
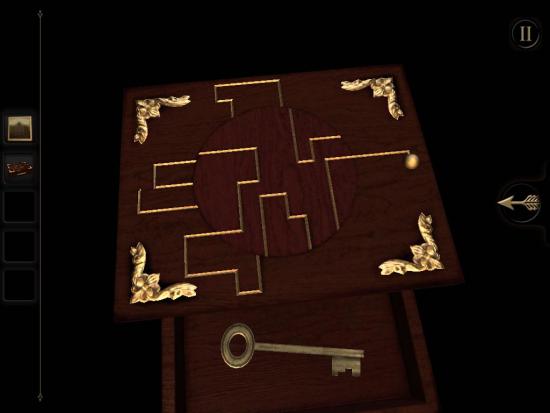
- Tap on ORDINARY KEY to collect.
- Tap on BACK ARROW to exit inventory.
- Zoom out.
- Swipe to GLOBE PANEL on OCTOGONAL BOX.
- Zoom in on WOODGRAIN PANEL next to GLOBE PANEL.
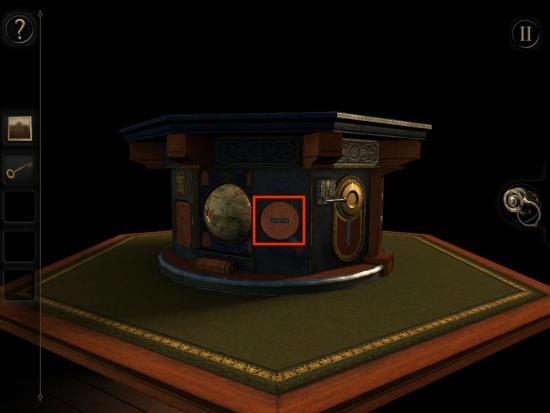
- Tap on EYEPIECE ICON.
- Rotate INNER CIRCLE counter-clockwise one quarter turn.
- Slide LEFT SWITCH to left.
- Rotate INNER CIRCLE counter-clockwise to match outer slot on bottom right.
- Slide LEFT SWITCH out of INNER CIRCLE.
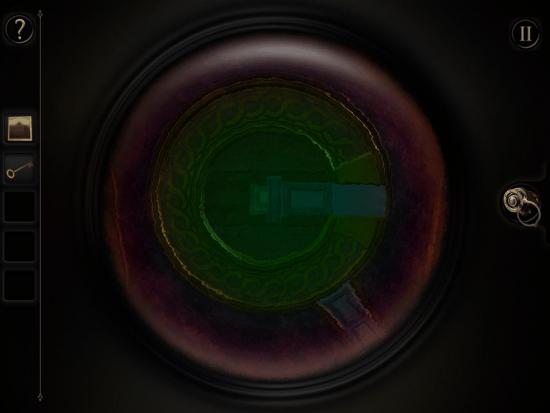
- Rotate INNER CIRCLE counter-clockwise to match with RIGHT SWITCH.
- Move RIGHT SWITCH right.
- Tap on EYEPIECE ICON.
- Zoom in on ORNATE KEYHOLE to right of WOODGRAIN PANEL.
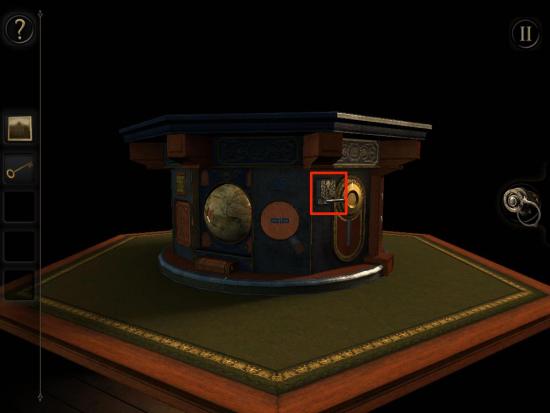
- Drag ORDINARY KEY to ORNATE KEYHOLE.
- Rotate ORDINARY KEY clockwise to release LOCK.
- Spin DIAL clockwise and counter-clockwise as seen in image below.
- Follow colors from innermost (Red) to outermost (Orange) in order.
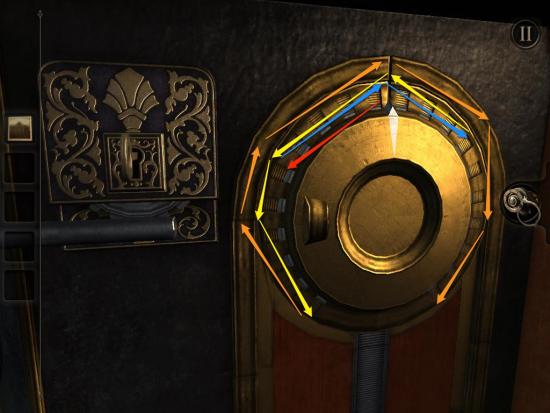
- Drag OLD PHOTOGRAPH to FRAME.
- Tap on SQUARE PEG below FRAME to collect.
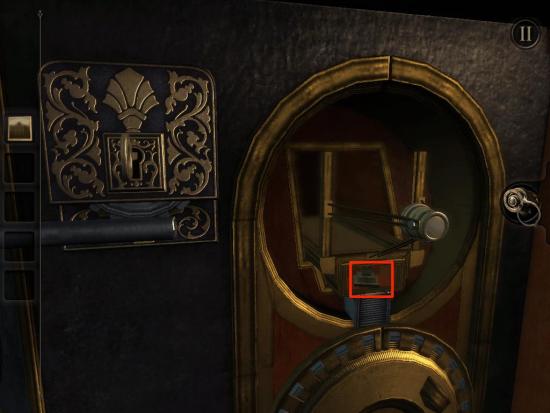
- Tap on EYEPIECE ICON.
- Double tap on LENS.
- Video will show word SIGIL.
- Tap on EYEPIECE ICON.
- Zoom out.
- Zoom in on WOODGRAIN PANEL.
- Drag SQUARE PEG to SQUARE HOLE.
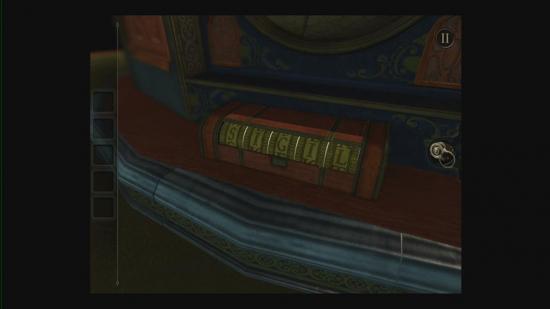
- Enter word SIGIL.
- Tap on BLUE CRYSTAL to collect.
- Zoom out.
- Swipe to back of OCTOGONAL BOX as seen below.
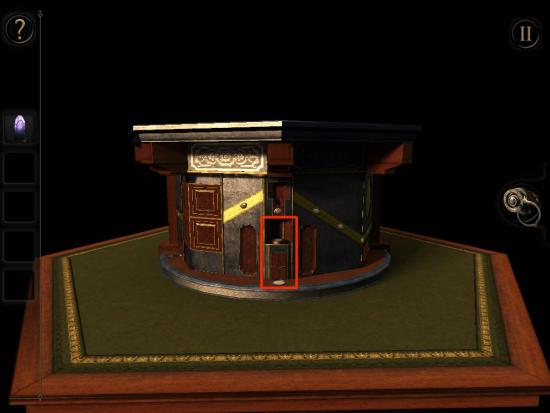
- Zoom in on CREVACE.
- Drag BLUE CRYSTAL to SYMBOL BELOW CREVACE.
- Turn LIGHT DIAL left until COMPARTMENT opens.
- Tap on FLYWHEEL to collect.
- Zoom out.
- Swipe left to FOURSQUARED PANEL.
- Zoom in on bottom left of FOURSQUARED PANEL.
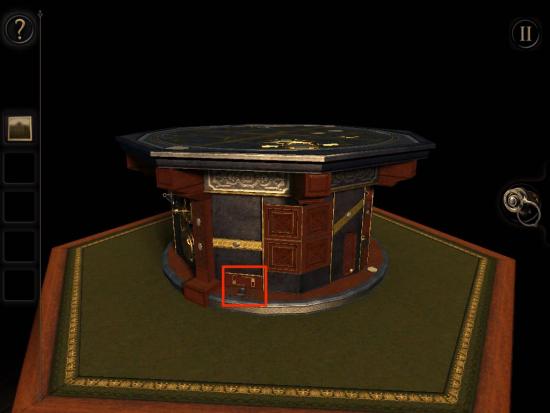
- Drag FLYWHEEL to OPENING.
- Slide SWITCHES right simultaneously.
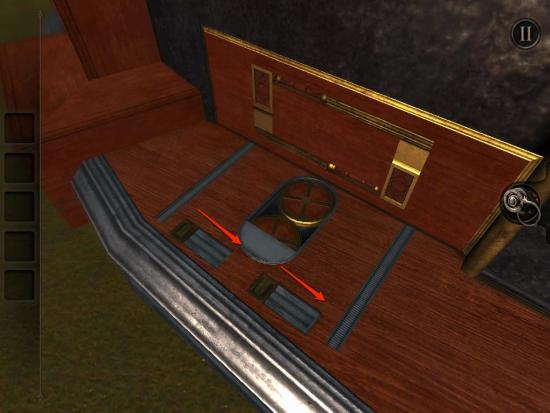
- HANDLE will appear.
- Pull HANDLE.
- Tap on LIGHT REFLECTOR to collect.
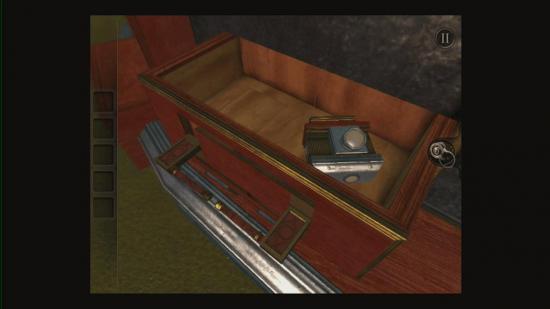
- Tap on SECRET PANEL.
- Tap on MAP PIECE to collect.
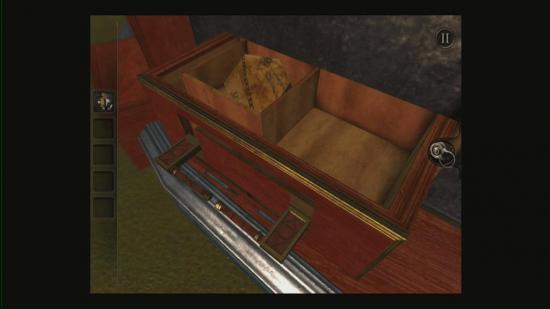
- Zoom out.
- Swipe to CREVACE on side of OCTOGONAL BOX.
- Zoom in on LIGHT BEAM.
- Drag LIGHT REFLECTOR to LIGHT BEAM.
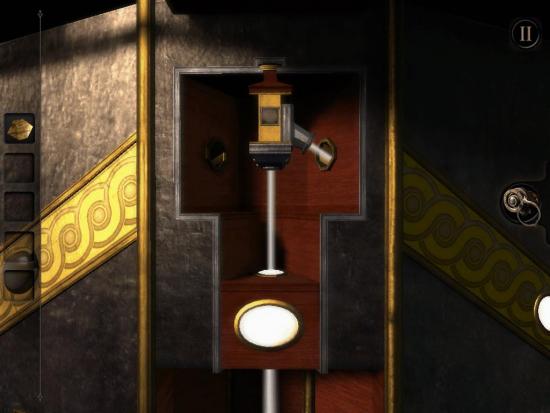
- Tap on RIGHT BUTTON.
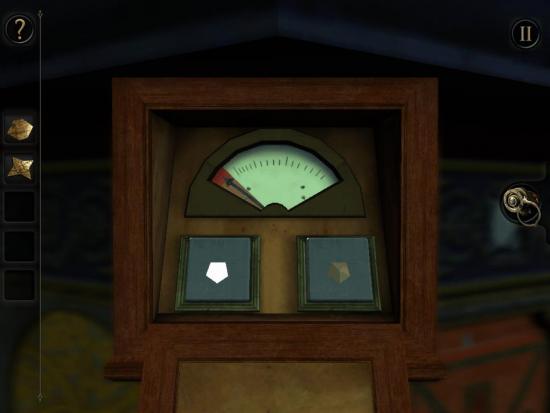
- Quickly zoom out and tap on THREE VISIBLE BUTTONS around OCTOGONAL BOX.
- Zoom in on STAR SHAPED MAP PIECE.
- Tap on STAR SHAPED MAP PIECE to collect.
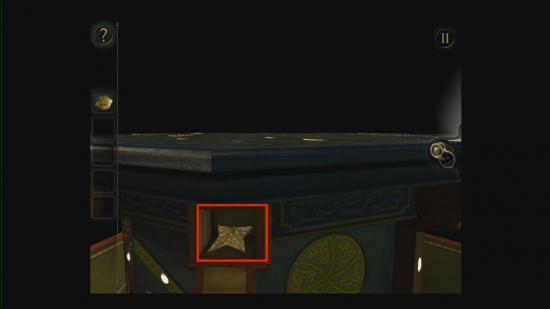
- Zoom out.
- Swipe view to ORIGINAL BUTTON.
- Tap on LEFT BUTTON.
- Quickly zoom out and tap on THREE VISIBLE BUTTONS around OCTOGONAL BOX.
- Zoom in on FOLDING KEY.
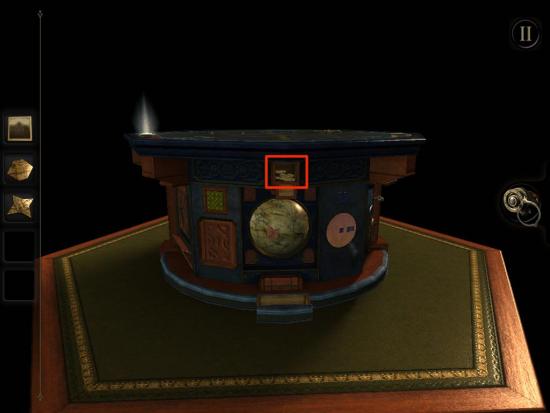
- Tap on FOLDING KEY to collect.
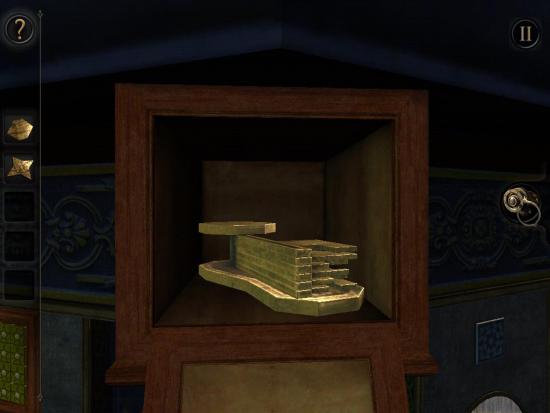
- Zoom out.
- Swipe to FOLDING KEYHOLE.
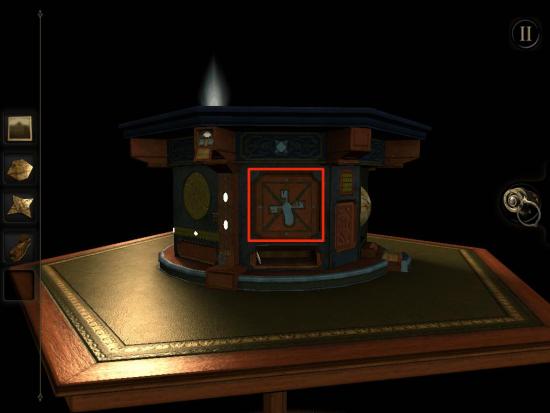
- Drag FOLDING KEY to FOLDING KEYHOLE.
- Unfold FOLDING KEY to match KEYHOLE SHAPE as seen below.
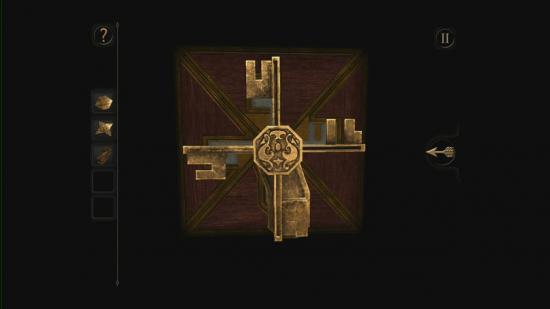
- Tap on BACK ARROW to exit.
- Drag FOLDING KEY to FOLDING KEYHOLE.
- Tap on REFLECTING DEVICE to collect.
- Zoom out.
- Zoom in on LIGHT BEAM.
- Drag REFLECTING DEVICE to LIGHT BEAM.
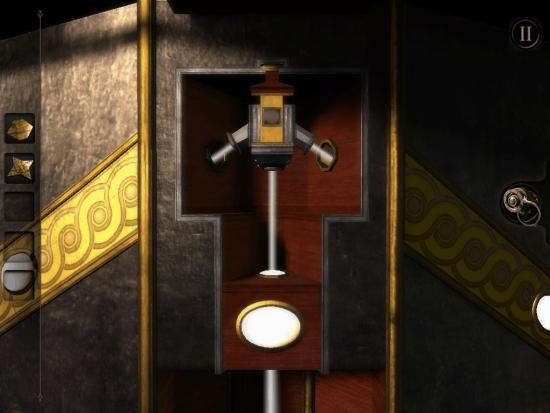
- Tap on EYEPIECE ICON.
- Slide SWITCHES to bounce LIGHT BEAM as seen in the image below.
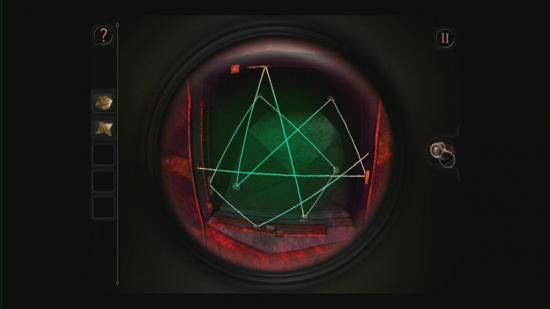
- Tap on ODDLY SHAPED MAP PIECE to collect.
- Zoom out.
- Zoom in on GLOBE PANEL.
- Drag MAP PIECES to GLOBE to match.
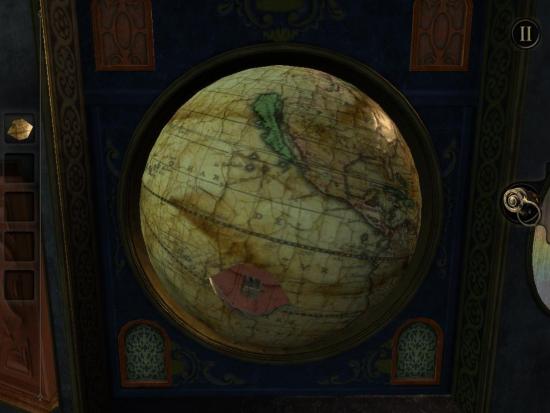
- Tap on CRANK to collect.
- Zoom out.
- Swipe to CIRCULAR PANEL on OCTOGONAL BOX.
- Zoom in on CIRCLE.
- Drag CRANK to CRANK HOLE.
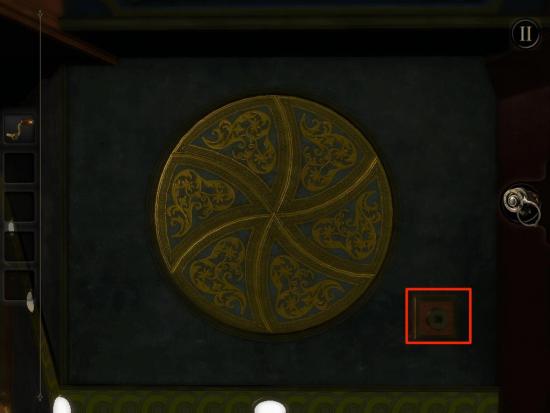
- Rotate CRANK clockwise to open CIRCLE.
- Tap on EYEPIECE ICON.
- Rotate VIEW and INNER DIAL to form SYMBOL as seen below.
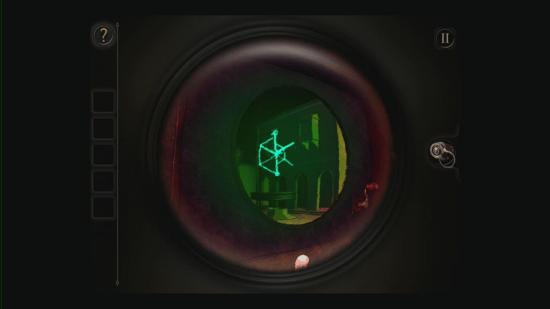
- Tap on WOODEN BOX to collect.
- Tap on WOODEN BOX in inventory.
- Move view to bottom of WOODEN BOX.
- Rotate CENTER LINES to lineup with OUTER LINES.
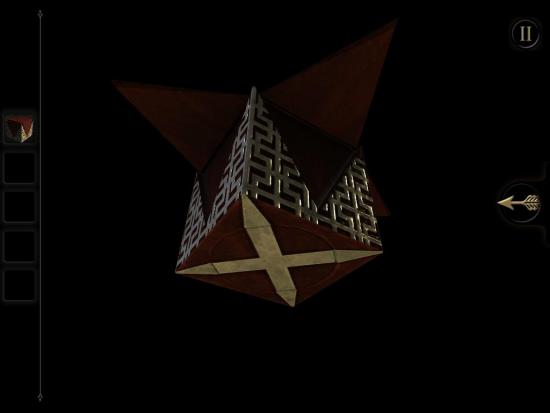
- Tap on BACK ARROW to exit inventory.
- Scroll to FOLDING KEYHOLE PANEL.
- Zoom in on INDENTATION above FOLDING KEYHOLE.
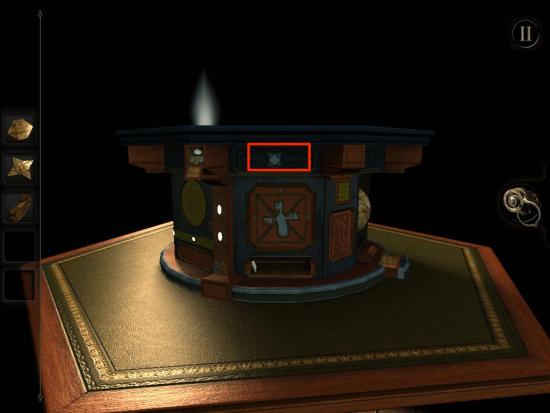
- Drag WOODEN BOX to INDENTATION.
- Tap on TELESCOPE LENS.
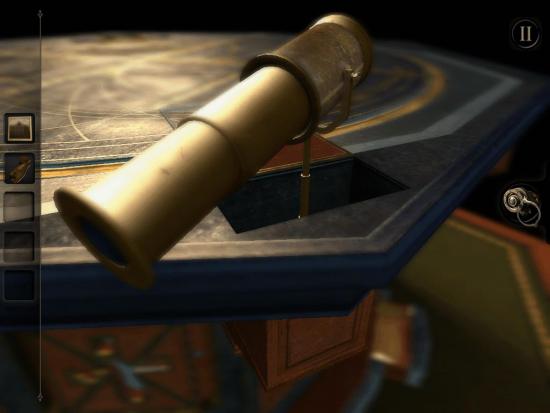
- Zoom out.
- Zoom in on SMALL STAR PANEL below TELESCOPE.
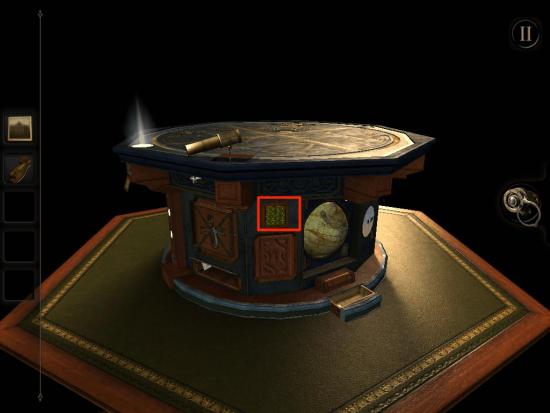
- Tap on STARS to match image seen below.
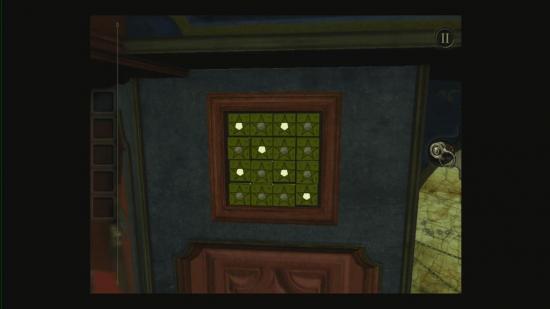
- Tap SQUARE MAP PIECE to collect.
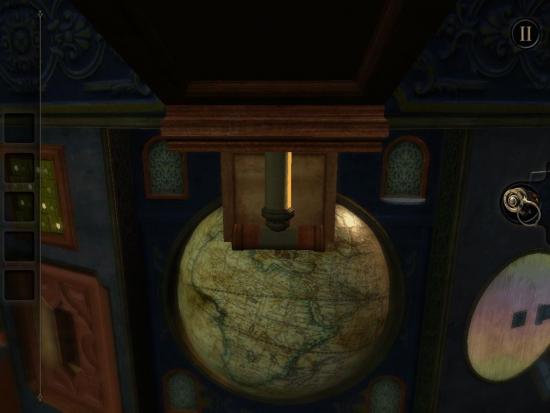
- Zoom in on GLOBE.
- Drag SQUARE MAP PIECE to GLOBE.
- Pull HANDLE down.
Chapter 4
- Zoom in on BLUE WIRE PANEL on top of OCTOGONAL BOX.
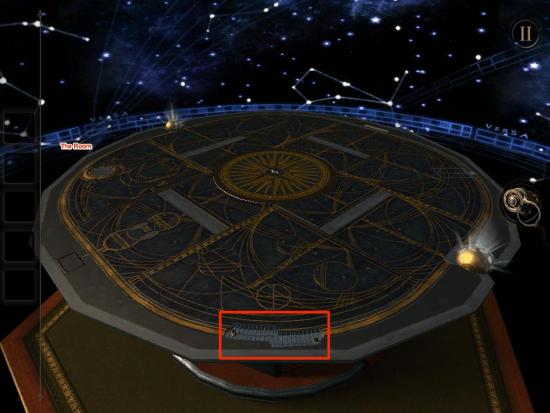
- Tilt YOUR DEVICE so both STARS light up in center of BLUE WIRE PANEL.
- Tap on CRANK to collect.
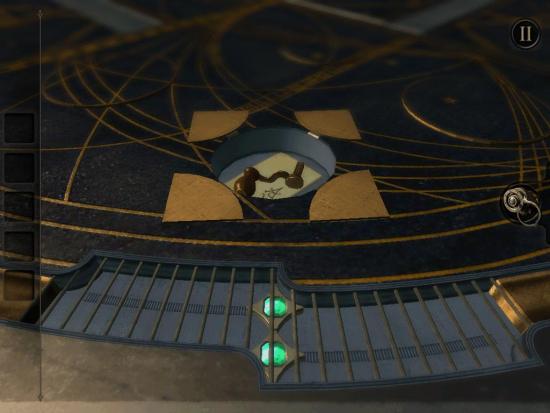
- Zoom out.
- Swipe left to RECTANGLE PANEL as seen below.
- Zoom in on RECTANGLE PANEL.
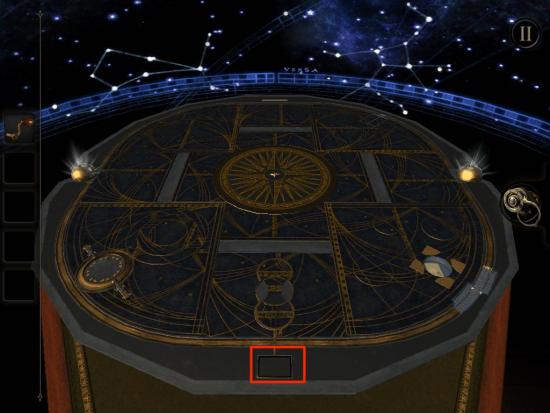
- Tap on RECTANGLE PANEL.
- Drag CRANK to RECTANGLE PANEL.
- Turn CRANK clockwise until it stops.
- Tap on BUTTON.
- Zoom out.
- Swipe view to WOODEN WALL.
- Tap on EYEPIECE ICON.
- Rotate VIEW and SWORD DIAL to recreate image seen below.
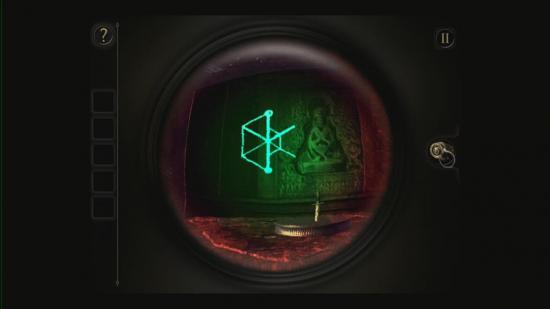
- Tap on DAGGER to collect.
- Zoom out.
- Double tap on CENTER of OCTOGONAL BOX.
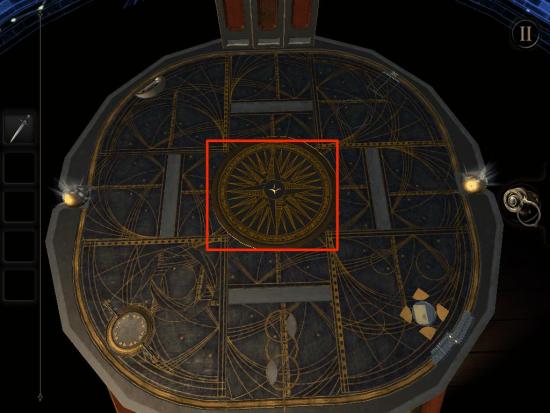
- Drag DAGGER to CENTER of OCTOGONAL BOX.
- Activate SQUARES to form image as seen below.
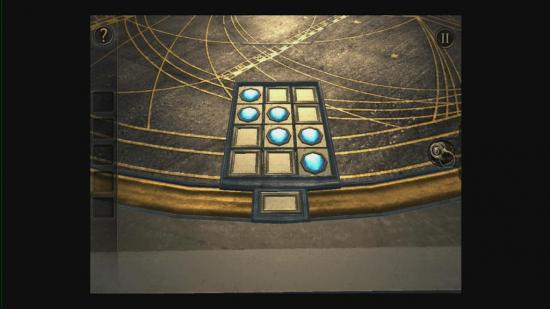
- Tap on BOTTOM RECTANGLE.
- Tap on BUTTON.
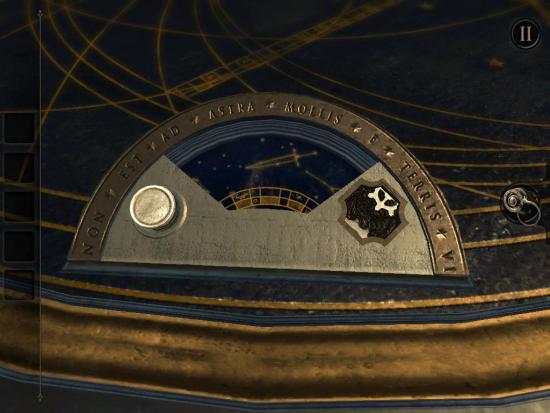
- Zoom out.
- Swipe to SQUARE BUTTON PANEL.
- Activate SQUARES to form image as seen below.
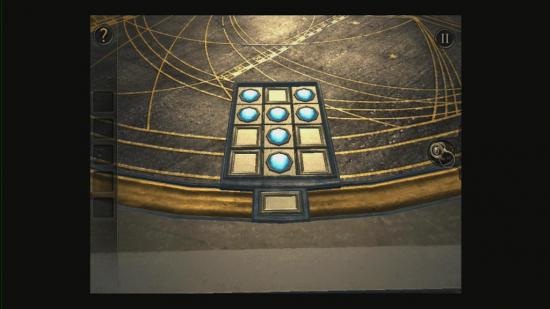
- Tap BOTTOM RECTANGLE.
- Tap on EYEPIECE ICON.
- Rotate VIEW to from image as seen below.
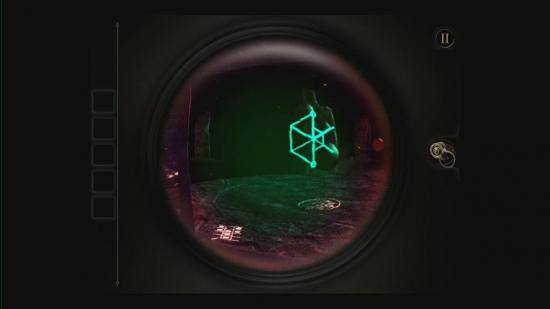
- Tap on AMULET to collect.
- Zoom out.
- Swipe to AMULET INDENTATION.
- Zoom in on AMULET INDENTATION.
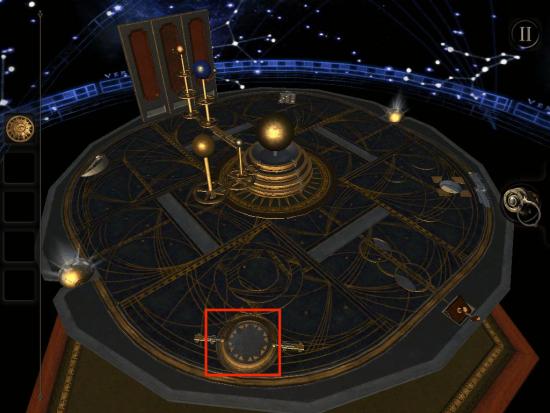
- Drag AMULET to AMULET INDENTATION.
- Zoom out.
- Swipe to SQUARE BUTTON PANEL.
- Activate SQUARE BUTTONS as seen below.
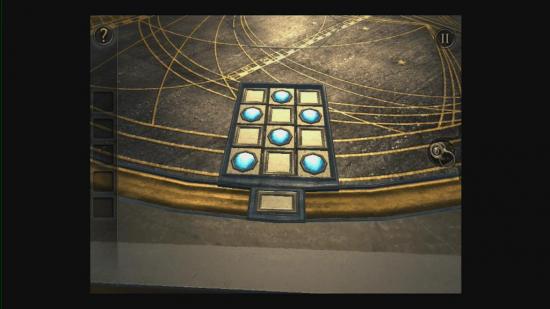
- Tap on BOTTOM RECTANGLE.
- Tap on ENERGY SOURCE to collect.
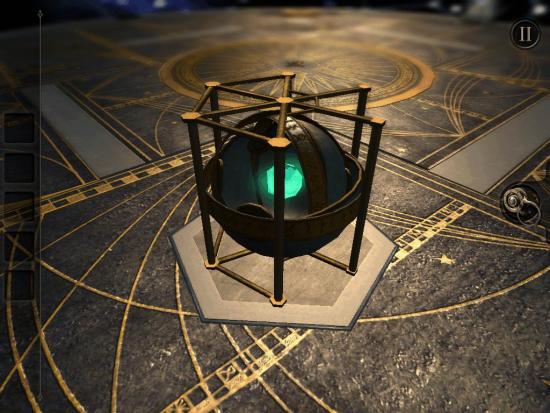
- Tap on BUTTON.
- Swipe to WOODEN WALL.
- Double tap on WOODEN WALL.
- Tap on EYEPIECE ICON.
- Zoom in on CENTER BOX.
- Rotate view to find PANEL as seen below.
- Rotate THREE DISCS to form PATTERN as seen below.
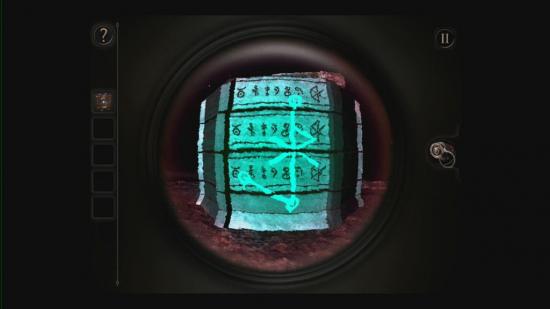
- Drag ENERGY SOURCE to PLATFORM.
Epilogue
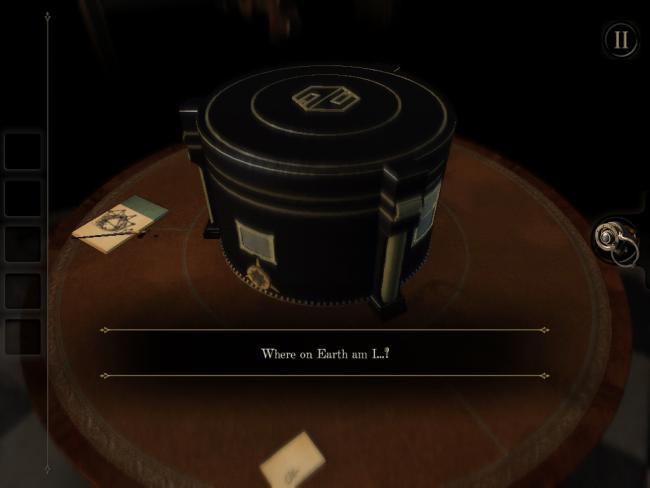
- Zoom out on BOX
- Rotate view to SMALL GOLDEN SQUARE SWITCH
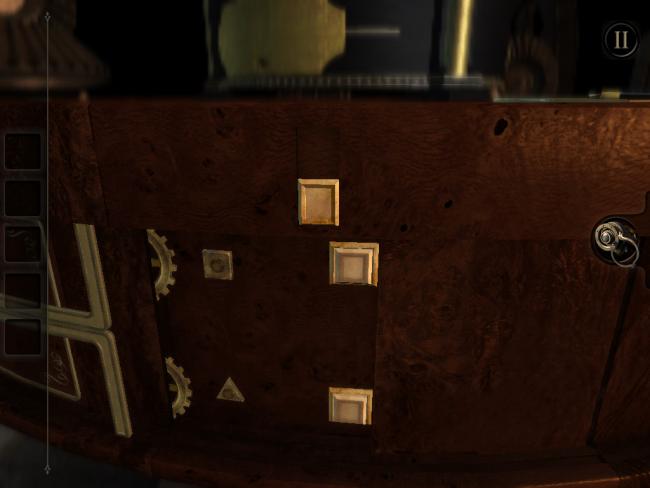
- Pull SWITCH down to open COMPARTMENT
- Zoom out
- Rotate view to SYMBOL ROW
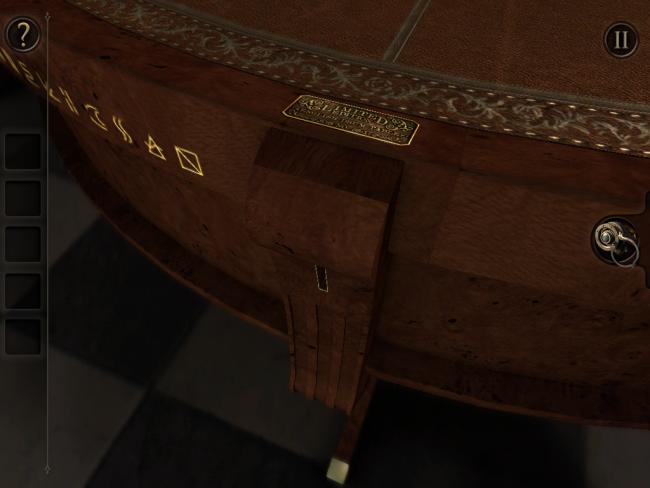
- Zoom in on SYMBOL ROW
- Pull down WOODEN SWITCH
- Zoom out
- Tap EYEPIECE ICON
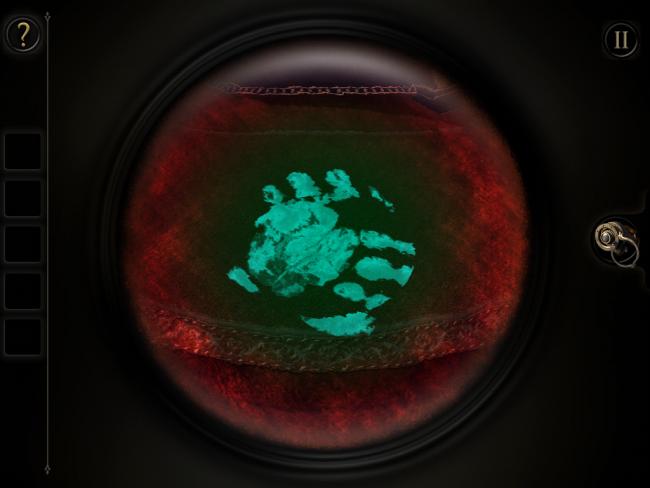
- Rotate view to HANDPRINT
- Zoom in on HANDPRINT
- Rotate HANDPRINT counter-clockwise until aligned
- Tap EYEPIECE ICON
- Zoom out
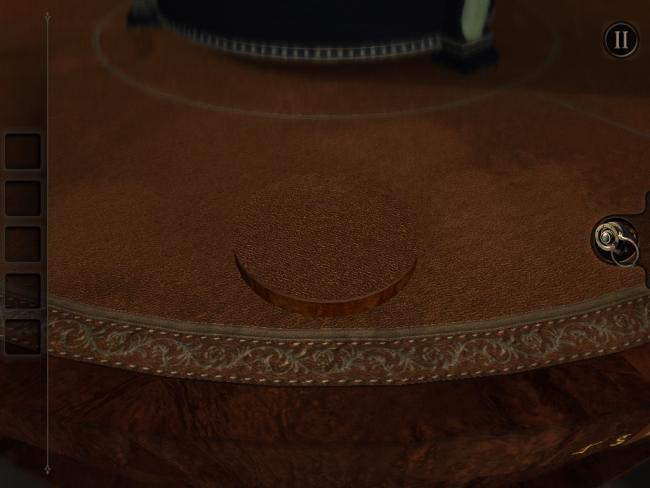
- Zoom in on RAISED CIRCULAR PANEL
- Rotate to SWITCH
- Push SWITCH right
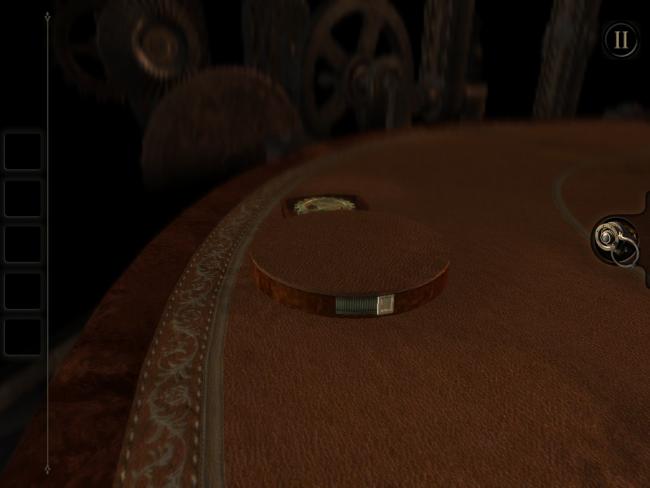
- Rotate view to SMALL GEAR
- Tap on SMALL GEAR to pickup
- Zoom out
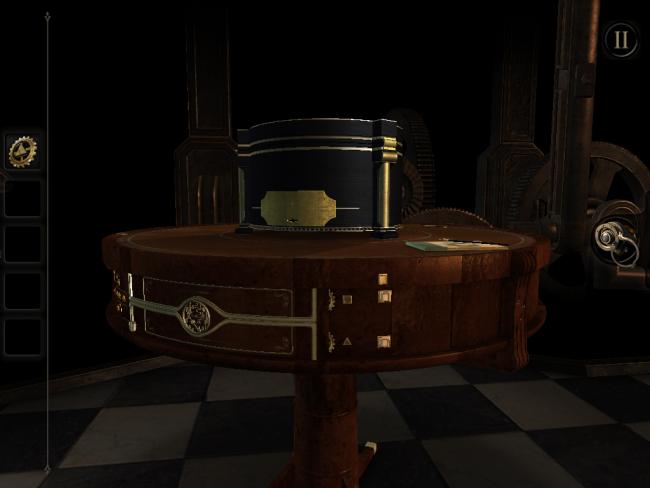
- Rotate view to COMPARTMENT
- Zoom in on COMPARTMENT
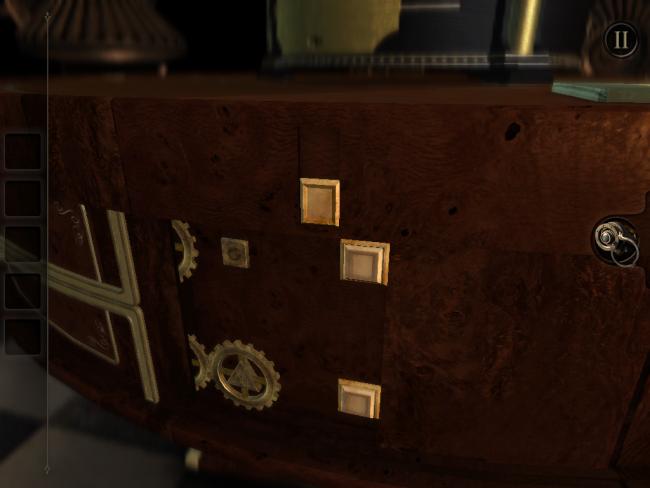
- Drag SMALL GEAR to BOTTOM TRIANGLE PEG
- Zoom out
- Tap SWITCH next to TRIANGLE PEG
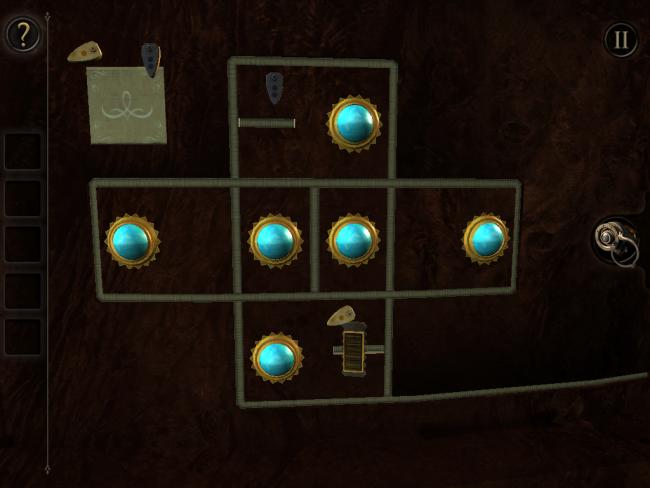
- Drag SLIDER through PUZZLE to make all GEARS BLUE
- Drag SLIDER to TAN or GRAY PICK to release LATCH
- Drag SLIDER through PUZZLE again and choose OTHER PICK to open SWITCH DOOR
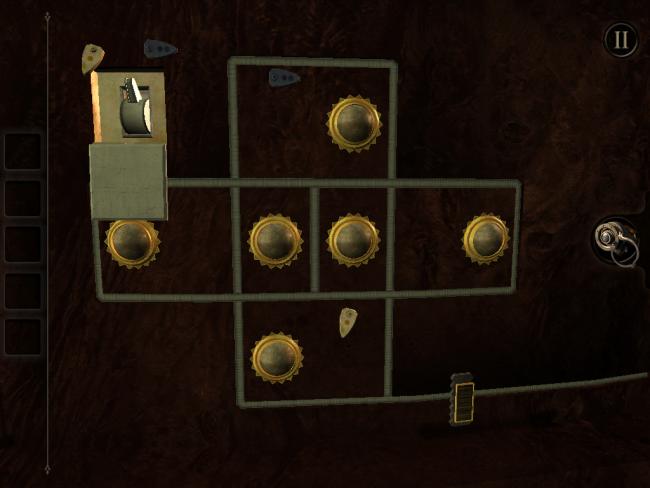
- Flip SWITCH down
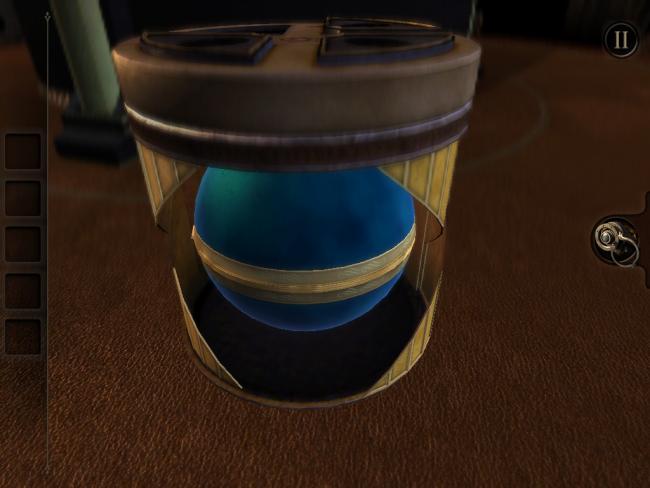
- Tap on BLUE METAL ORB to collect
- Tap on BLUE METAL ORB in INVENTORY
- Move camera to top of ORB
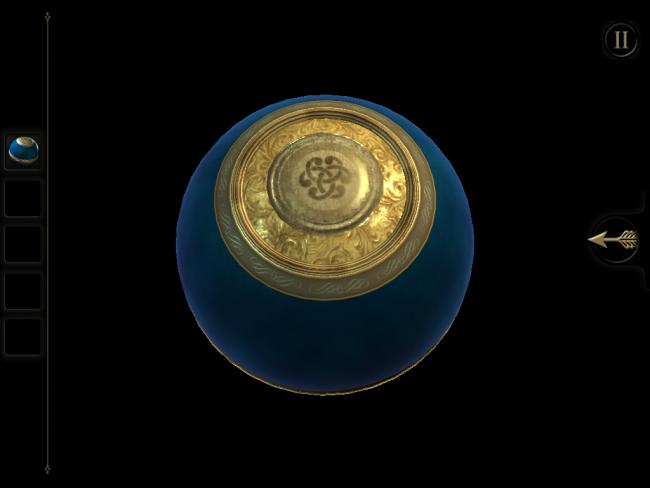
- Slide top of ORB to find SYMBOL PLATE
- Tap on SYMBOL PLATE
- Drag on ORB to open
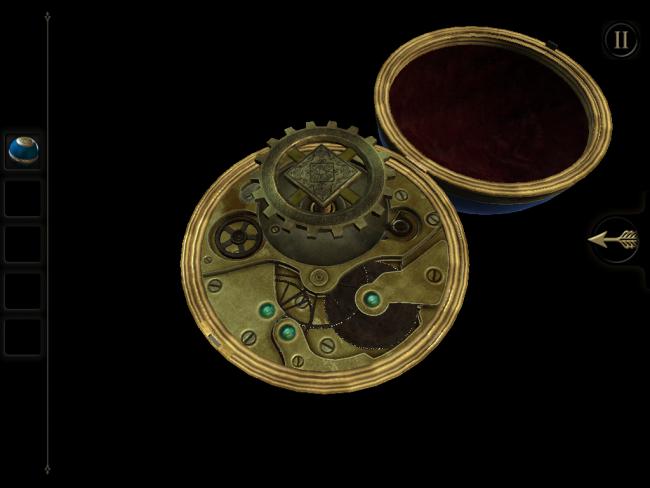
- Tap GEAR to collect
- Tap BACK ARROW
- Zoom out
- Rotate view to COMPARTMENT
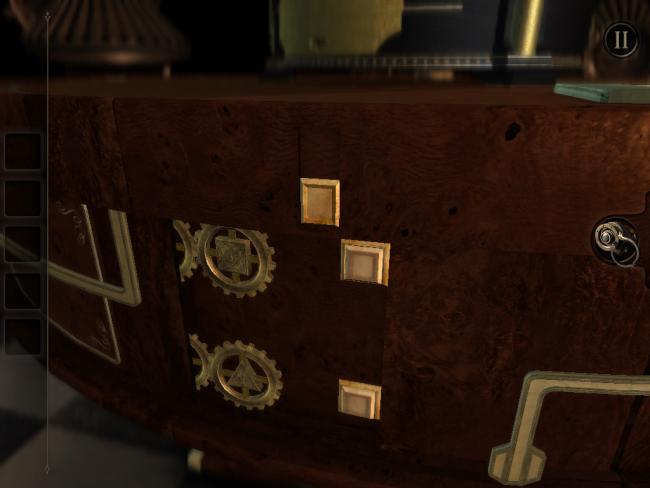
- Place GEAR in SQUARE PEG
- Tap SQUARE PEG BUTTON
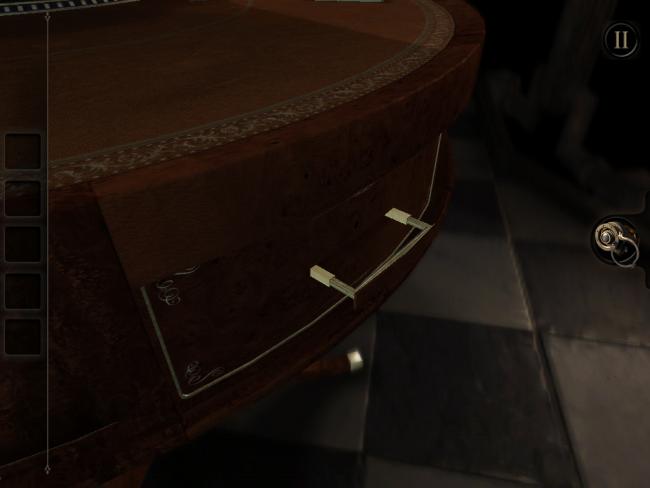
- Tap and drag on DRAWER HANDLE to pull out DRAWER
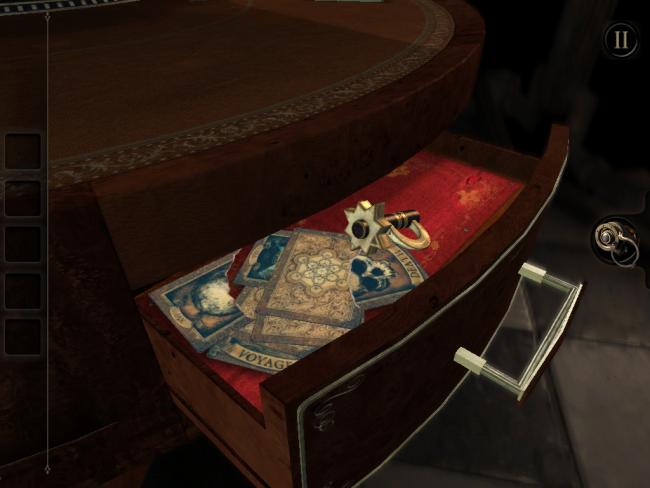
- Tap on STRANGE KEY to collect
- Zoom out
- Rotate view to SYMBOL PANEL
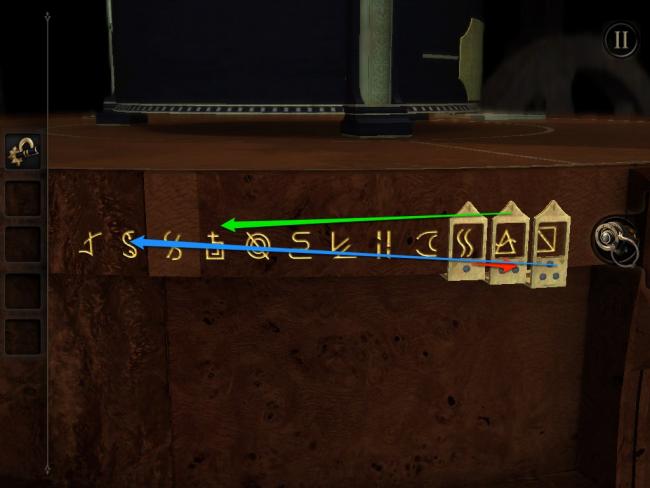
- Drag ONE DOT SLIDER one space to the right
- Drag TWO DOT SLIDER seven spaces to the left
- Drag THREE DOT SLIDER ten spaces to the left
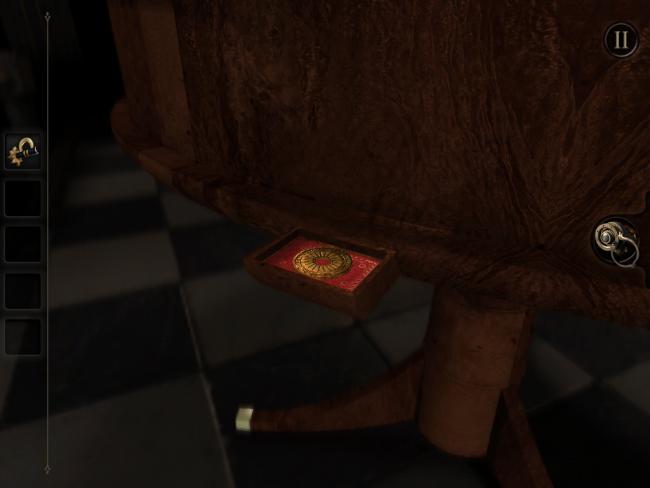
- Tap on COIN to collect
- Zoom out
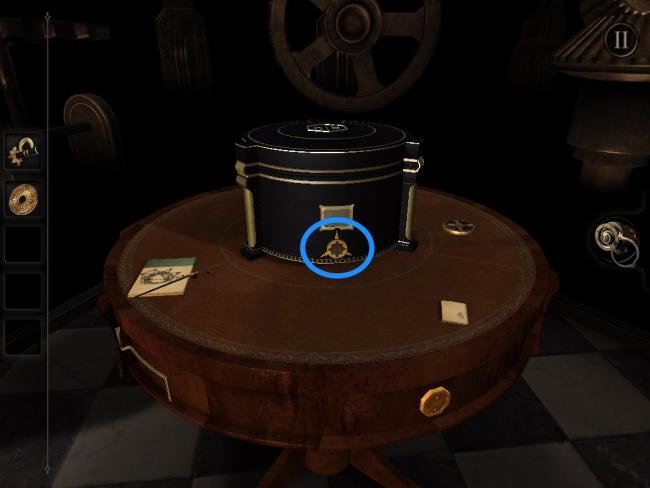
- Rotate view to KEYHOLE on BOX
- Zoom in on KEYHOLE
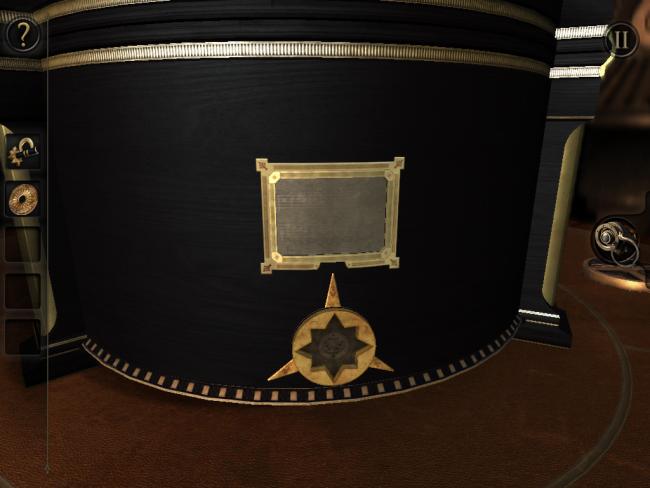
- Drag STRANGE KEY to KEYHOLE
- Rotate STRANGE KEY right to reveal SWITCH
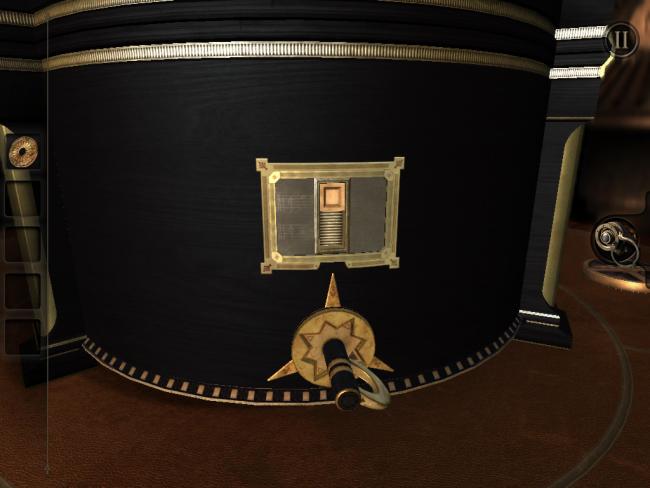
- Drag SWITCH down
- Zoom out
- Rotate view to KEY
- Zoom in on KEY
- Rotate KEY left
- Zoom out
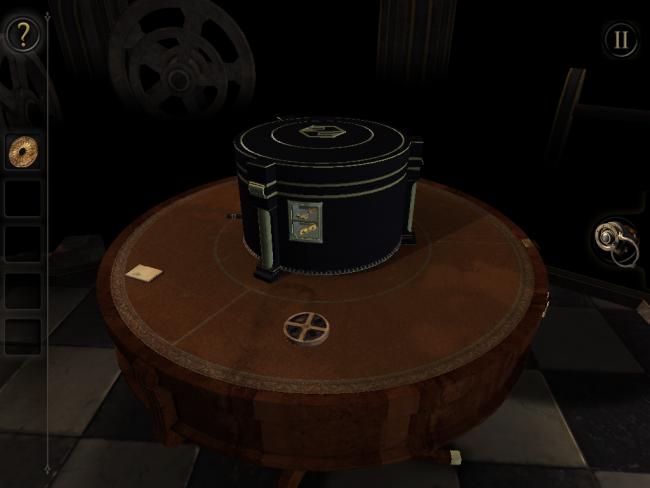
- Rotate view to WINDOW on BOX
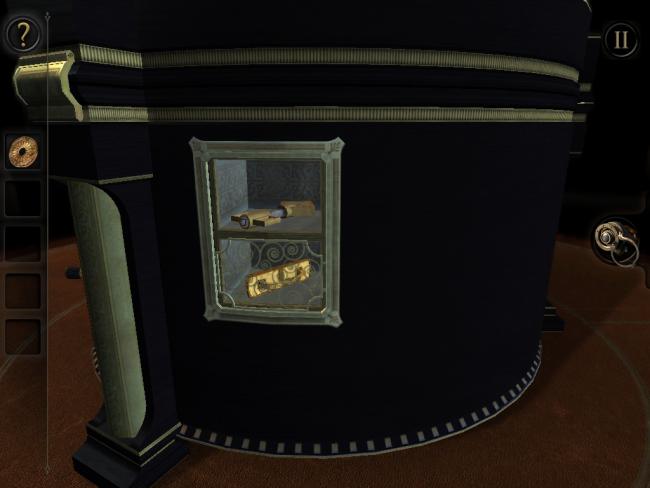
- Zoom in on WINDOW
- Tap on KEY on TOP SHELF to collect
- Zoom out
- Rotate view to KEY
- Zoom in on KEY
- Rotate KEY right
- Flip SWITCH up
- Zoom out
- Rotate view to KEY
- Zoom in on KEY
- Rotate KEY left
- Zoom out
- Rotate view to WINDOW on BOX
- Zoom in on WINDOW
- Tap on METAL PLATE on BOTTOM SHELF to collect
- Zoom out
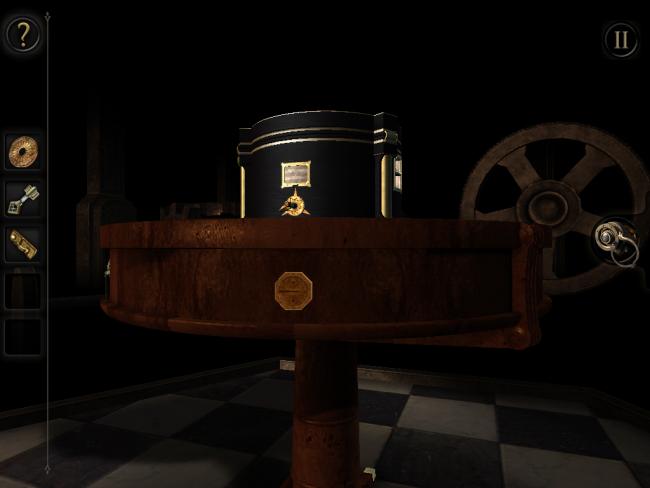
- Rotate view to CREST on TABLE
- Zoom in on CREST
- Place METAL PLATE on CREST
- Rotate METAL PLATE counter-clockwise
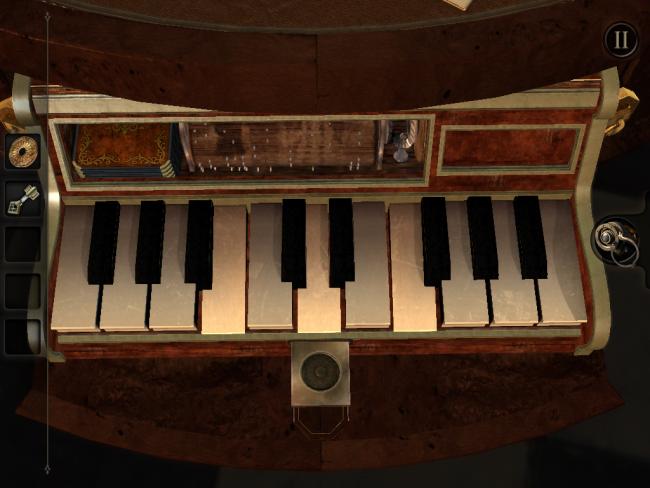
- Press PIANO KEYS as shown in the screenshot
- Place COIN in SLOT
- Repeat PIANO KEYS pressed in the pattern shown in the game
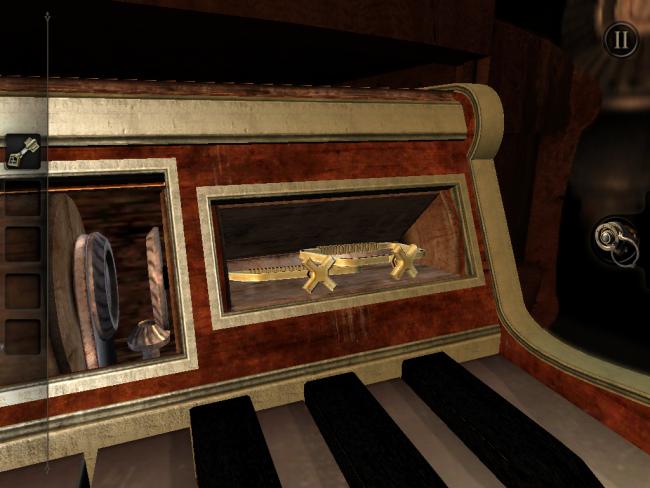
- Tap on METAL HANDLES to collect
- Zoom out
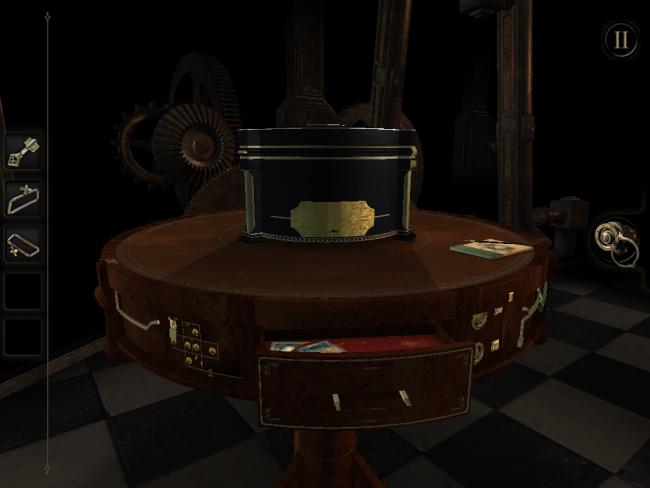
- Rotate view to GOLD PANEL on BOX
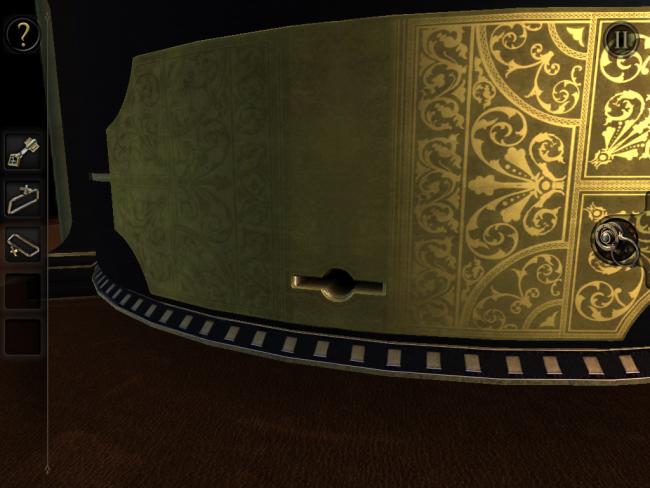
- Place SQUARE KEY in KEYHOLE
- Rotate right
- Zoom out
- Rotate view to STRANGE KEY
- Zoom in on KEY
- Move KEY right
- Zoom out
- Rotate view to SQUARE KEY
- Zoom in on SQUARE KEY
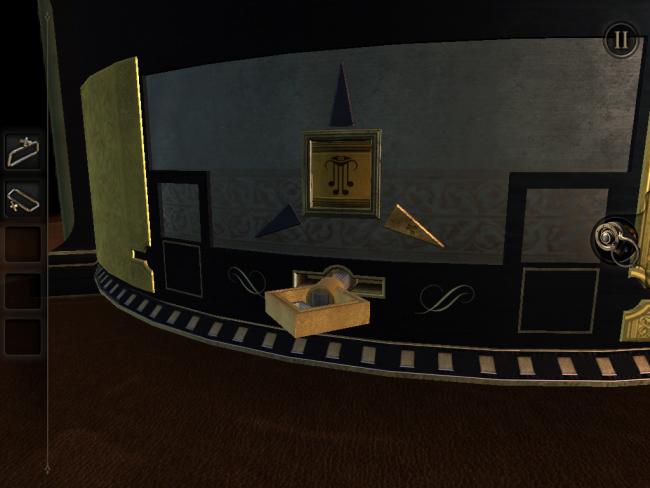
- Drag on SYMBOL to rote until you see SYMBOL in screenshot
- Zoom out
- Rotate view to GOLD PANEL on BOX
- Place SQUARE KEY in KEYHOLE
- Rotate right
- Zoom out
- Rotate view to STRANGE KEY
- Zoom in on KEY
- Move KEY left
- Zoom out
- Rotate view to SQUARE KEY
- Zoom in on SQUARE KEY
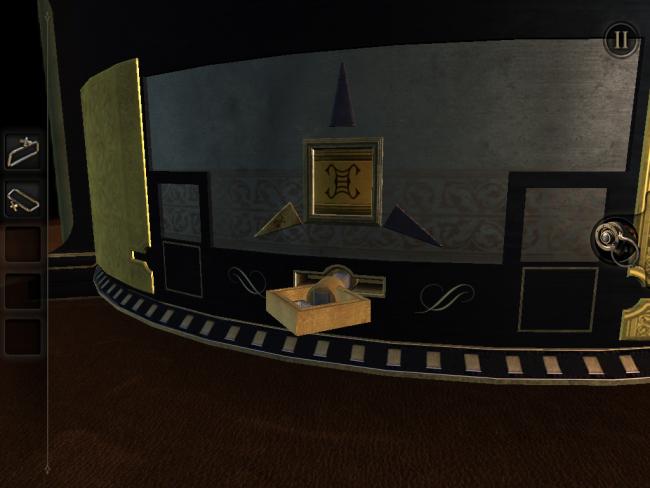
- Drag on SYMBOL to rote until you see SYMBOL in screenshot
- Zoom out
- Move view to STRANGE KEY
- Zoom in on STRANGE KEY
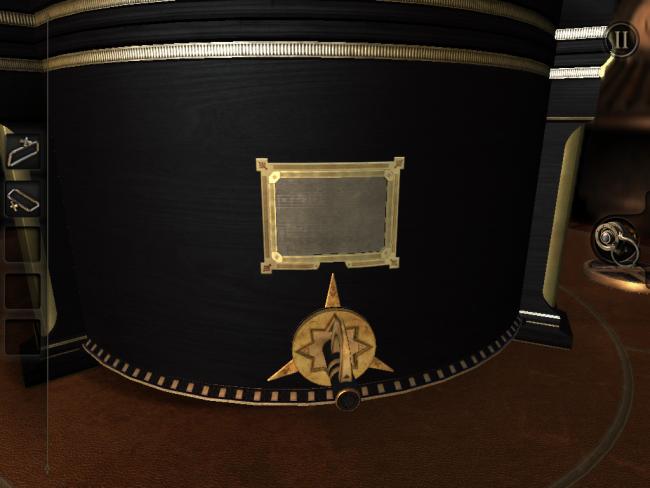
- Move KEY up
- Zoom out
- Rotate view to SQUARE KEY PANEL
- Zoom in on SQUARE KEY PANEL
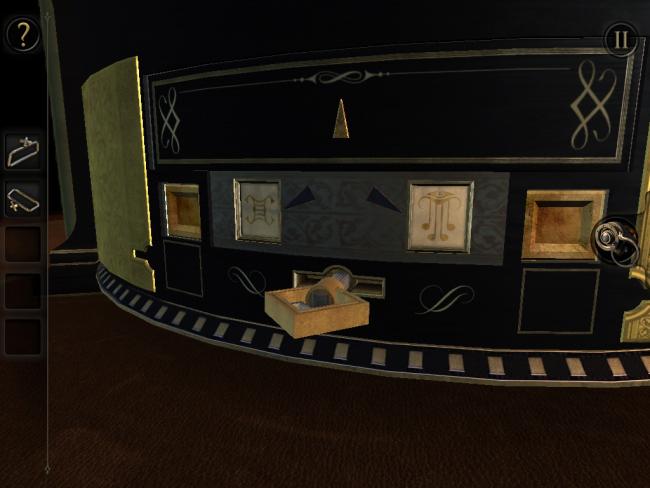
- Push GOLD SWITCHES
- Zoom out
- Zoom in on NUMBER PANEL
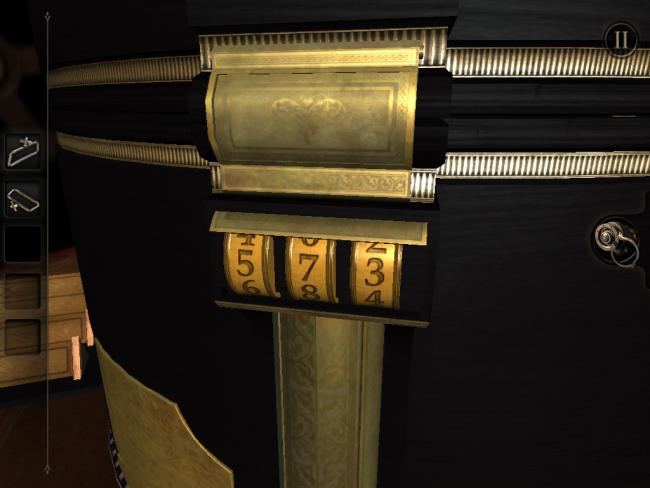
- Enter 573 on NUMBER PANEL by FLIPPING NUMBERS
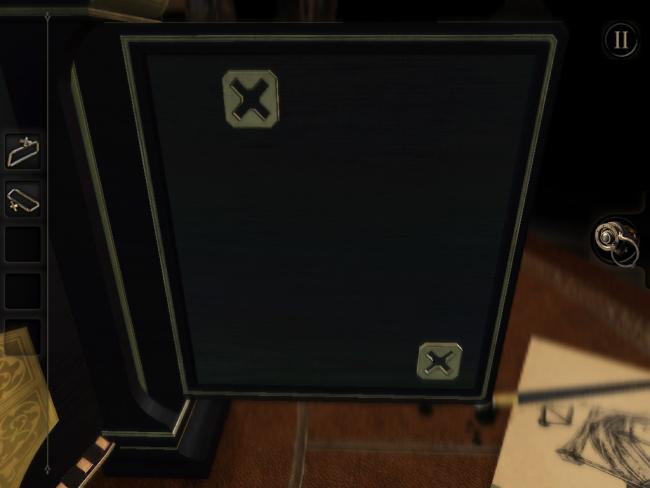
- Place METAL HANDLES in X HOLES
- Tap EYEPIECE ICON
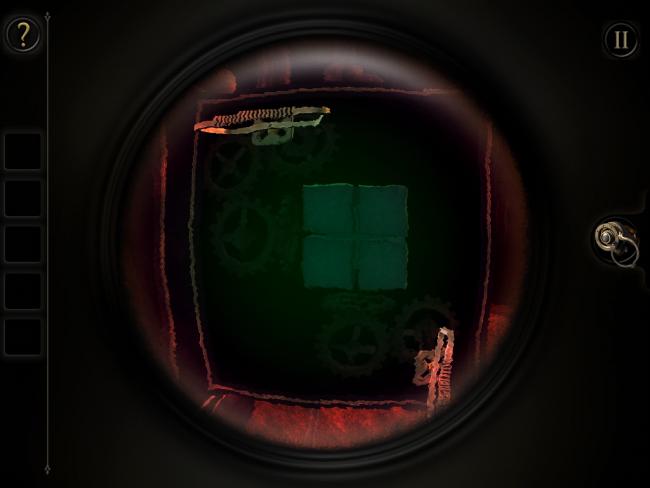
- Rotate METAL HANDLES to show OPEN SLOTS on SQUARE PANEL on OPPOSITE SIDE of PANEL
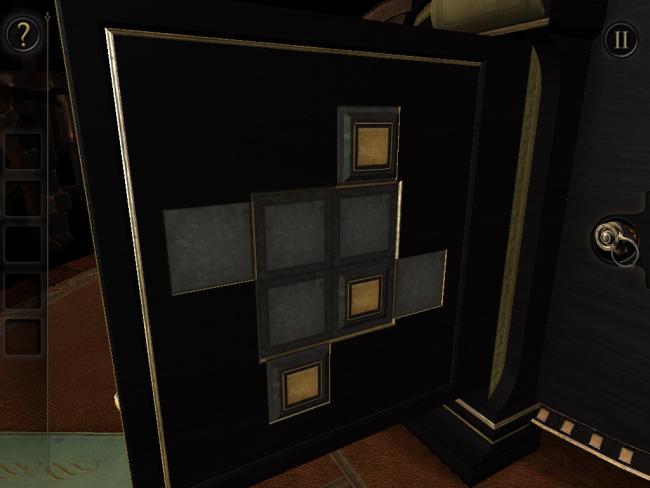
- Rotate view to PLACE PANEL PIECES into EMPTY SLOTS on PANEL
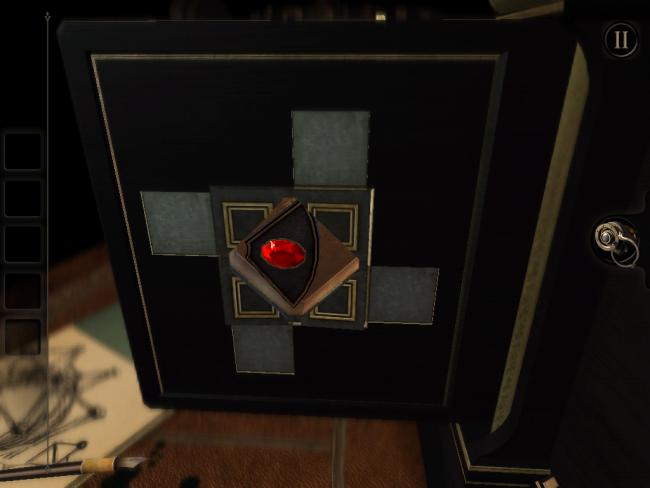
- Tap on RED GEM IN METAL PLATE to collect
- Zoom out
- Zoom in on PLATE CIRCULAR PANEL
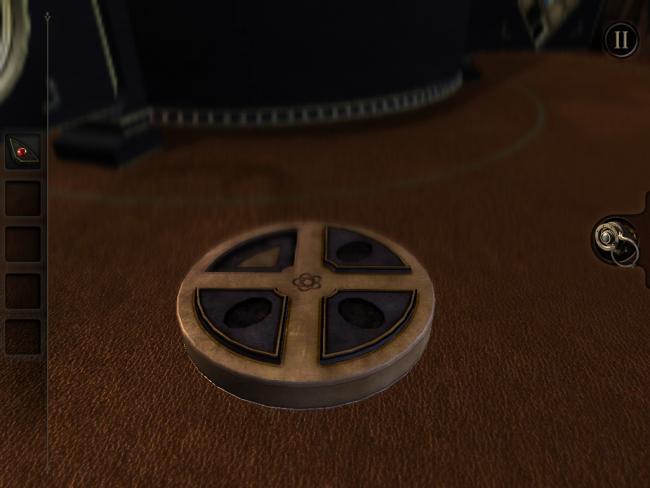
- Drag RED GEM IN METAL PLATE to PANEL to place
- Zoom out
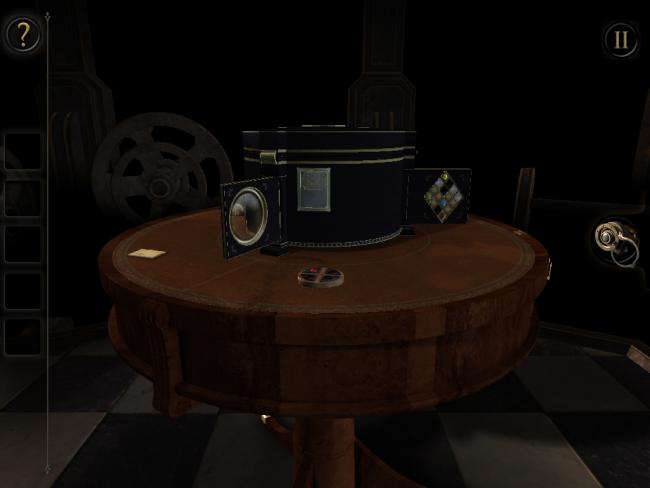
- Zoom in on COLORED GEM PANEL
- Drag COLORED GEM PLATES to OPEN SLOT
- Rotate view to OPPOSITE SIDE of PANEL
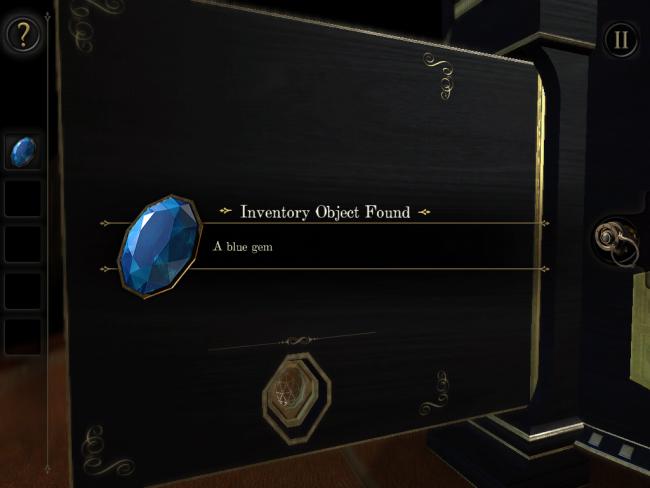
- Tap on GEM to collect
- Move EMPTY GEM PIECE out of slot
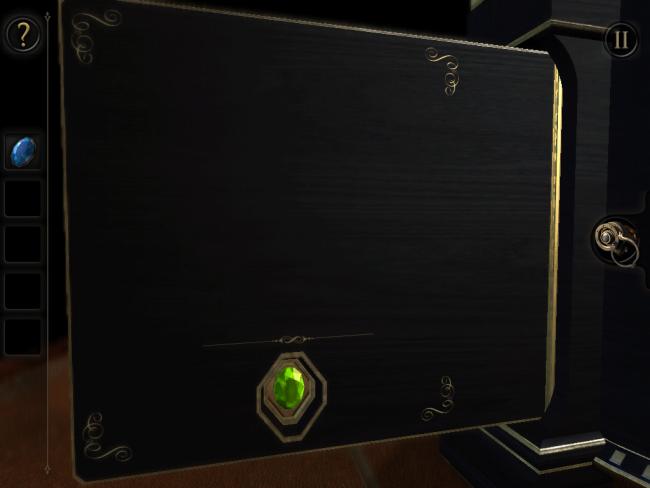
- Drag OTHER COLORED GEMS to slot to collect
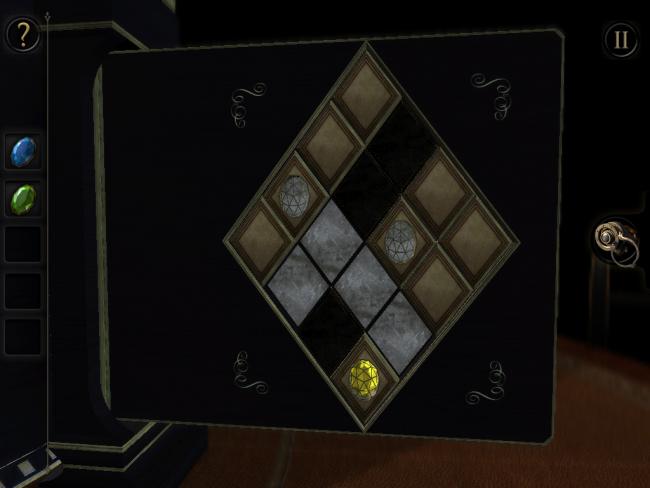
- When all COLORED GEMS are collected, zoom out
- Rotate view to PLATE CIRCULAR PANEL
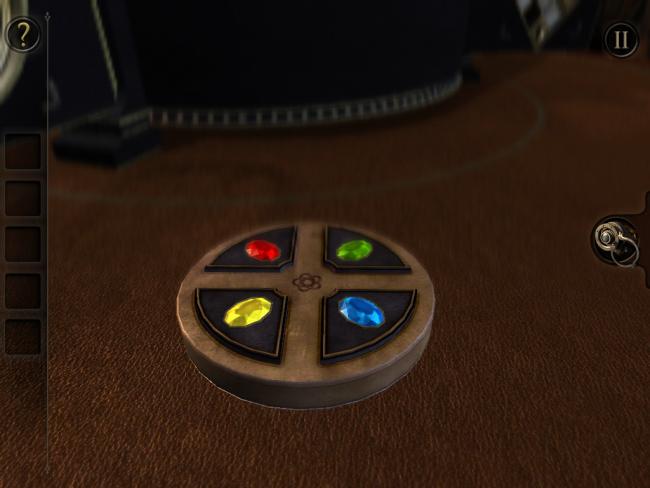
- Place BLUE GEM, YELLOW GEM, GREEN GEM on PLATES as shown in screenshot
- Zoom out
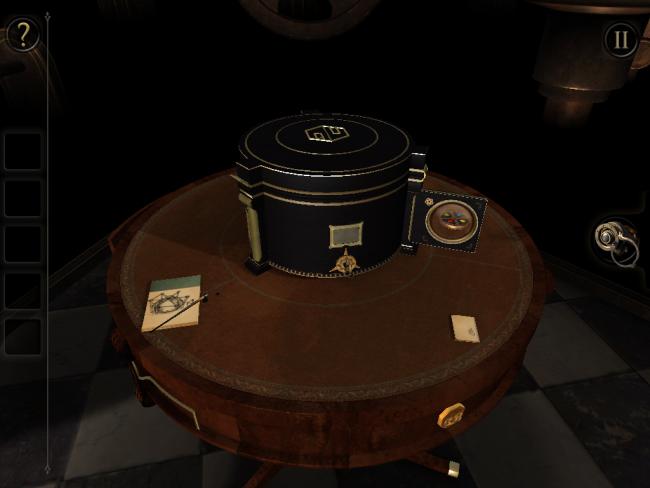
- Zoom in on CIRCULAR WINDOW
- Tap on EYEPIECE ICON
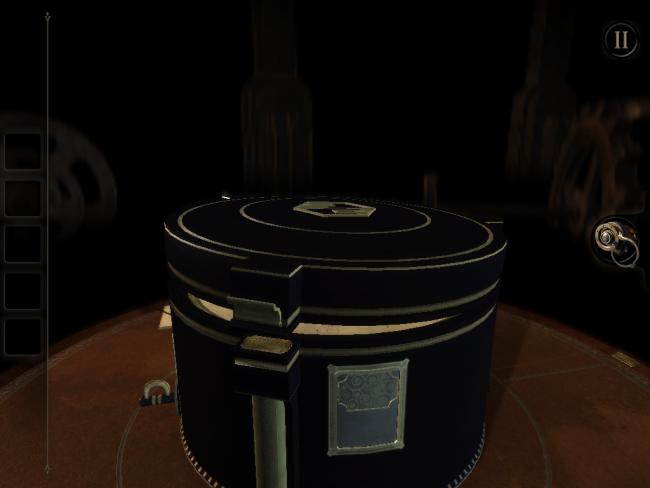
- Drag on BOX LID to open
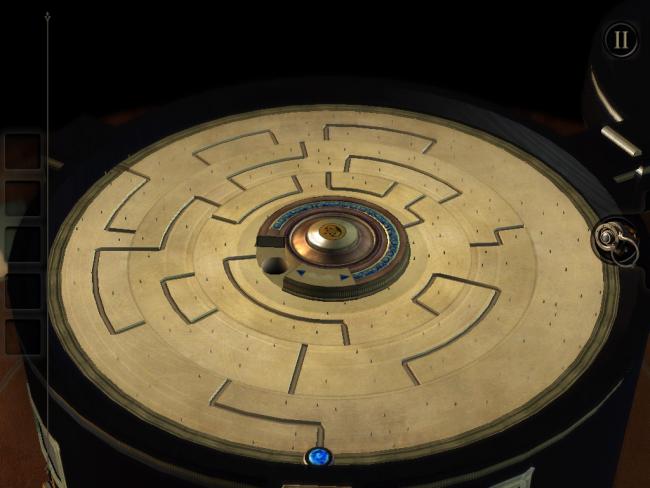
- Drag BLUE ITEM onto FIRST TRACK
- Push MIDDLE BUTTON twice
- Drag BLUE ITEM onto SECOND TRACK
- Push MIDDLE BUTTON once
- Drag BLUE ITEM onto THIRD TRACK
- Push MIDDLE BUTTON once
- Drag BLUE ITEM to SECOND TRACK
- Push MIDDLE BUTTON once
- Drag BLUE ITEM to FIRST TRACK
- Push MIDDLE BUTTON once
- Drag BLUE ITEM to SECOND TRACK
- Push MIDDLE BUTTON twice
- Drag BLUE ITEM to THIRD TRACK, then to SECOND TRACK
- Push MIDDLE BUTTON twice
- Drag BLUE ITEM to THIRD TRACK
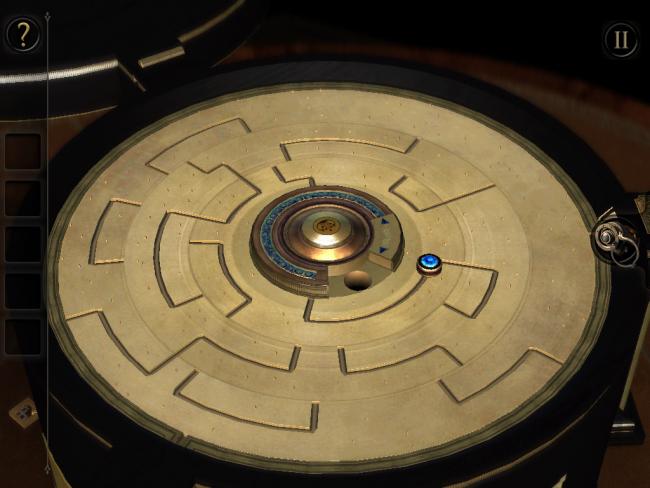
- Push MIDDLE BUTTON
- Drag BLUE ITEM to HOLE
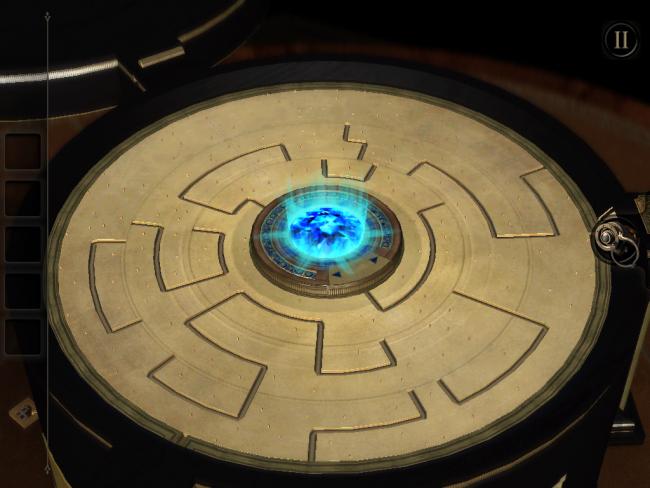
- Tap EYEPIECE ICON
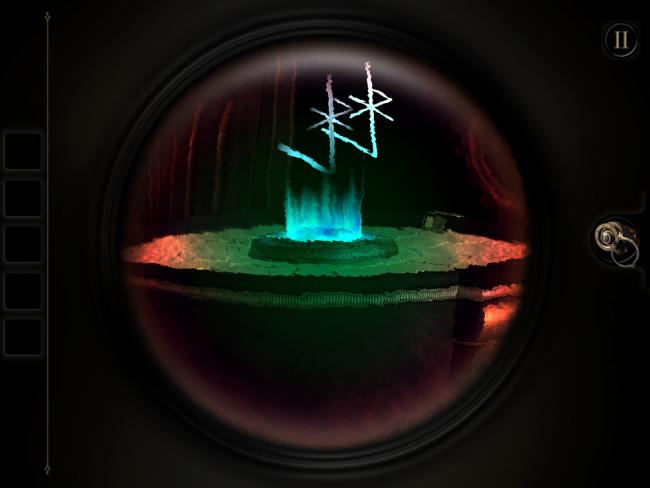
- Rotate view to MATCH SYMBOLS
- Push MIDDLE BUTTON once
- Drag BLUE ITEM to FIRST TRACK
- Push MIDDLE BUTTON once
- Drag BLUE ITEM to SECOND TRACK
- Push MIDDLE BUTTON once
- Drag BLUE ITEM to THIRD TRACK
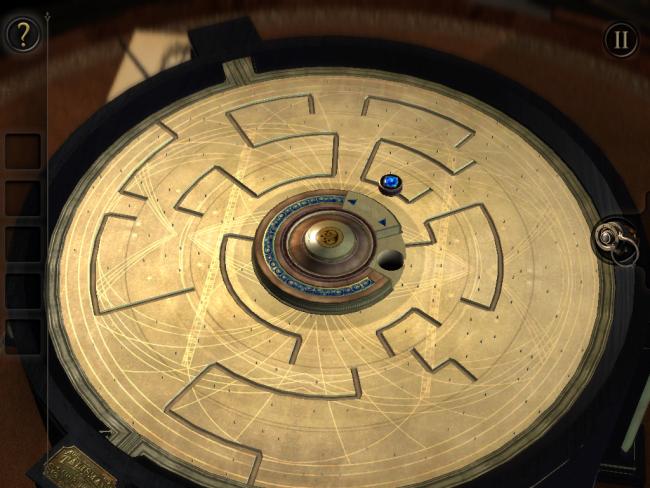
- Push MIDDLE BUTTON twice
- Drag BLUE ITEM to SECOND TRACK
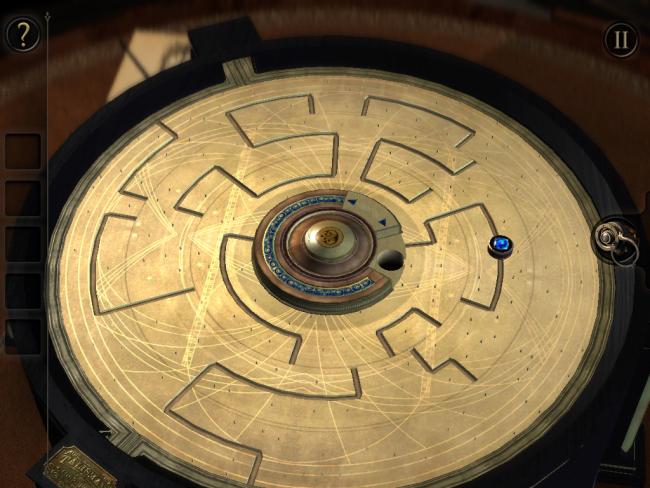
- Push MIDDLE BUTTON once
- Drag BLUE ITEM to THIRD TRACK
- Push MIDDLE BUTTON once
- Place BLUE ITEM in HOLE
- Tap EYEPIECE ICON
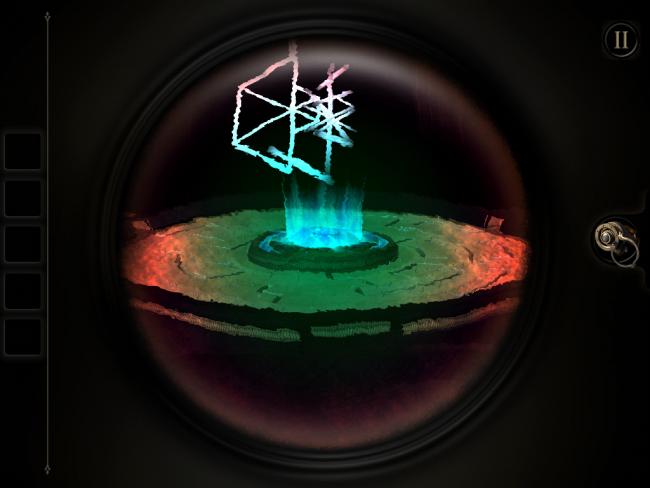
- Rotate view to MATCH SYMBOL
Congratulations!
- You have completed Gamezebo’s walkthrough for The Room. Be sure to check back often for game updates, staff and user reviews, user tips, forums comments and much more here at Gamezebo!


