The Curse of the Werewolves – Game Introduction
The Curse of the Werewolves is a hidden object/adventure game created by Nordcurrent. The game brings you back to your childhood home, which now has turned into an eerie old mansion, in search of your missing grandmother. Gamezebo’s walkthrough will provide you with detailed images, tips, information, and hints on how to play your best game.
General Tips
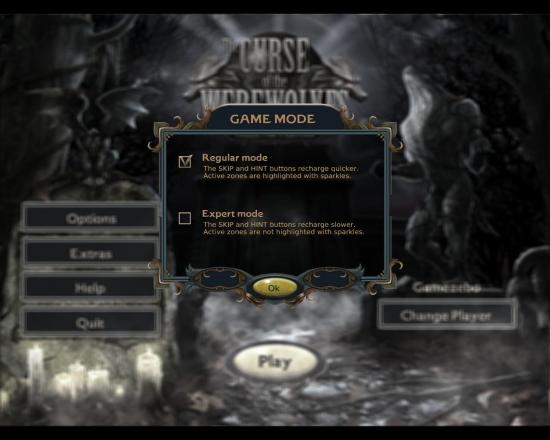
Game modes
- You can play the game in two different modes, regular or expert mode.
- In regular mode the Hint button recharges quicker after use, and you get to skip mini games quicker, if you wish. Any active areas in the game are indicated with sparkles to help you find your way around.
- In expert mode the Hint and Skip buttons take longer to charge, and there are no sparkles to help you along. You can not change mode during the game.
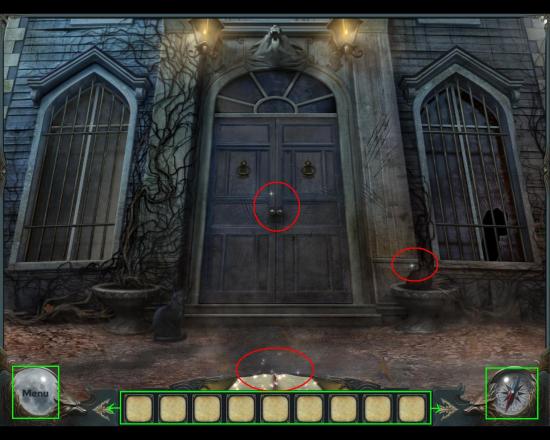
Screen elements
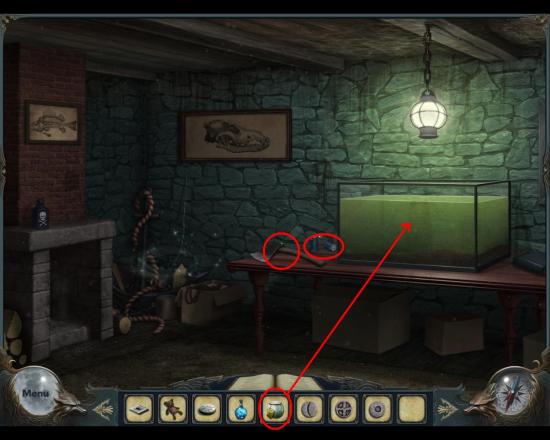
- In the screenshot the three red circles show the sparkles that in regular mode help you find the important areas in a particular scene. In expert mode, you get no such help.
- The controls are lined up along the bottom of the screen.
- At the bottom left corner you find the Menu button, where you for example can change some game settings (i.e. music and sound effect levels) and leave the game.
- Your inventory is in the middle, and when you have collected a lot of items you can scroll your inventory list left/right with the arrow buttons.
- In the bottom right corner is a compass, which you use to display the map. This compass changes into a red globe in HO scenes, and there you can use it to get hints.
- The map only shows the places you have already discovered, and indicates whether there is something you can do there – play a hidden object scene (HOS), a mini game or find something interesting. You can not move around by using the map.
- Above the inventory you find your journal, where interesting facts and information is noted automatically as you advance through the game.
Cursors
- The default cursor looks like a stylish arrow. It can change into the following icons:
- A magnifying glass indicates areas you can inspect more closely.
- A hand indicates items you can manipulate or pick up and put in your inventory.
- A smaller arrow with a compass indicates places where you can move to the next scene.
- The default cursor and the cursor for changing scenes are quite similar, so it is easy to overlook a possibility to move sideways in this game.
Hidden Object Scenes
- Hidden Object scenes (HOS) are straightforward: you get a list of items you need to find. These items are the same each time you play the game, so they are all shown in the images in this walkthrough.
- Some items are hidden extra well, which is not indicated in the list of items to find. Those items require an extra action to be found; in this game it amounts to opening something or remove another item hiding the one you need.
Chapter 1 – The Arrival

- The game starts with a short introduction of the plot; the lead character’s grandmother is in trouble, and off she goes to rescue grandma.
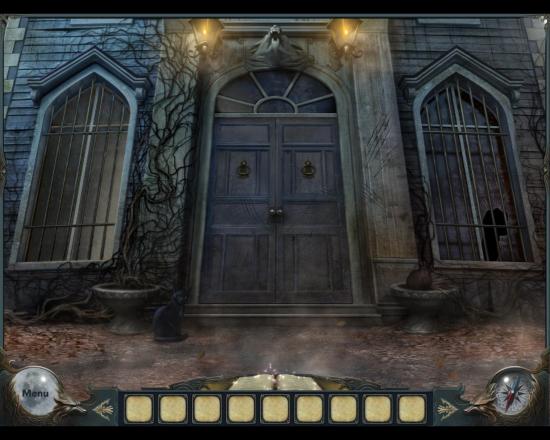
- The first scene puts you in front of grandma’s house. The front door is – of course – locked.
- Move the game cursor to the right, it then changes into a right arrow, to indicate that you can go there.
- You end up behind the house, at some kind of shed.
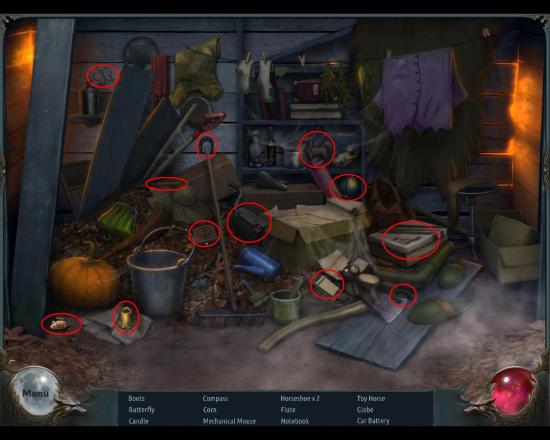
- Do the hidden object scene in the shed to get a TOY MOUSE.
- There is nothing in the object list that indicates some items are hidden extra well, but if you hover the cursor over the shoe box you see that it can be opened, and there you’ll find the boots. The little box with the anchor hides the compass.
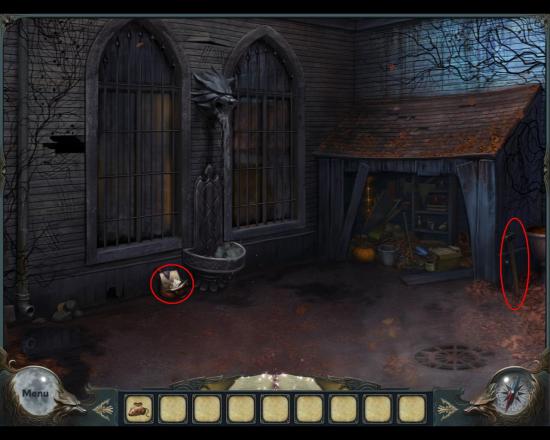
- Then pick up the sledge hammer leaning against the outbuilding and check through the purse to the left of the wolf fountain.
- From the purse you get MATCHES, a RED JEWEL and a NOTE from the diary.
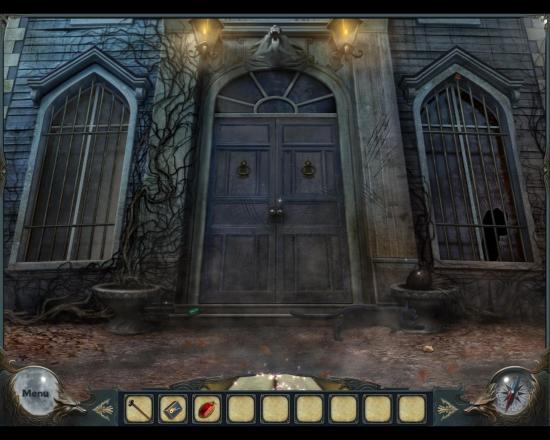
- When you have read the note, go back to the front door (to the left).
- Give the toy mouse to the cat, which then runs off like a bat out of h*ll, leaving a green jewel behind.
- Pick up the JEWEL and head south.
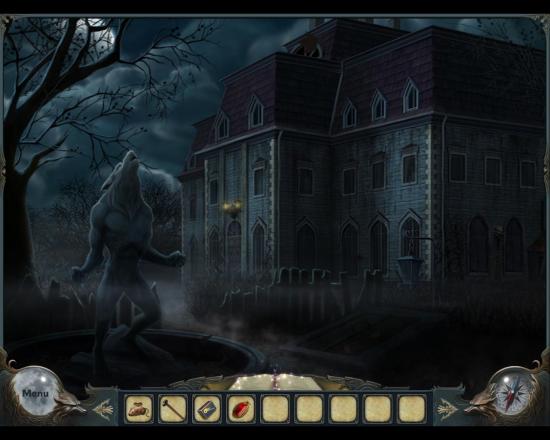
- Here you find a wolf statue, and something that looks like an entrance to a cellar.
- Zoom in around the wolf statue’s midriff, where you find a mini game:
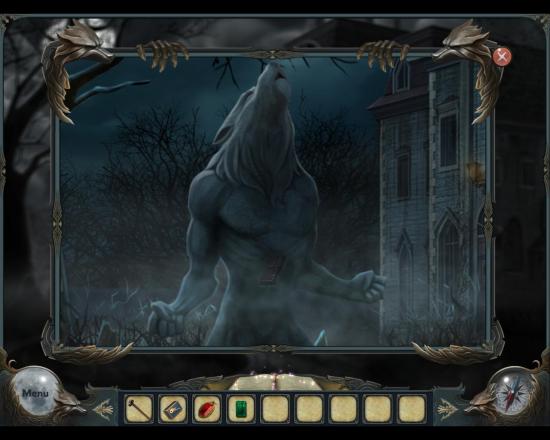
- First put the green jewel and the red jewel in the empty slots, and sort out the “pearl chain” mess, which ends up looking like something like this:
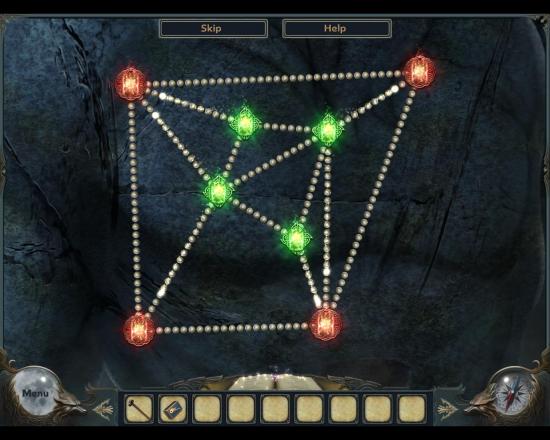
- A secret compartment opens, and you get a BOX KEY.
- Next, zoom in on the lantern above the cellar doors, and open it.
- Use the matches to light the candle:
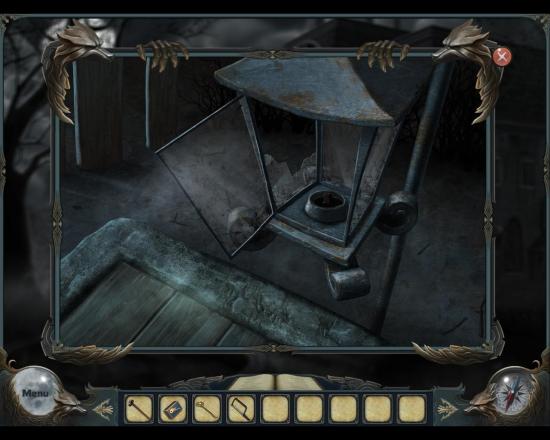
- Open the cellar door, and go down.
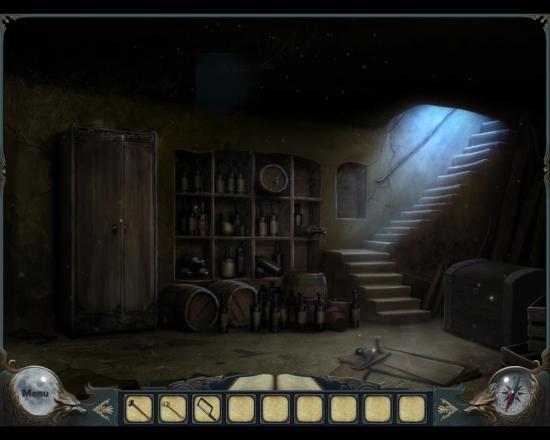
- Click on the left cupboard door to open it, and zoom in on the little box.
- Use the BOX KEY you found to open the box.
- You find a MINUTE HAND for a clock.
- Then open the large chest to the right (still in the cellar) to start an HO search:
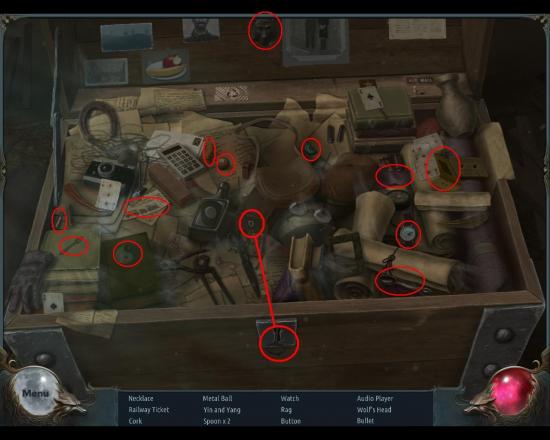
- The extra hidden item here is the necklace, which is in the jewellery box.
- You need to take the key from the lock of the chest, and use it on the box to open it.
- From this search you get A RAG.
- When finished, pick up a BOTTLE OF BRANDY from the shelves and a WOOD PLANE from the floor:
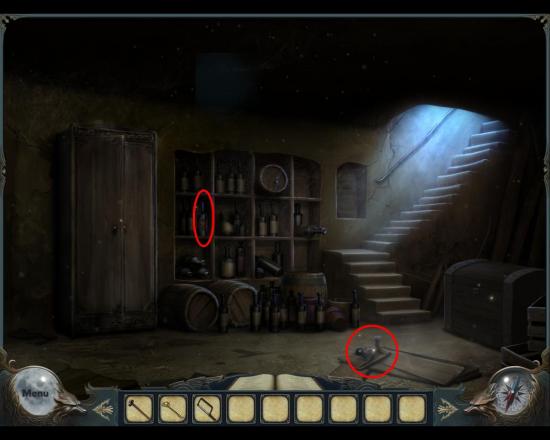
- Then you go to the left in the cellar – not very obvious that it’s possible, but move the cursor to the left side of the screen, and it’ll turn into a left arrow. You find your grandma’s neighbour, dead as a doornail:
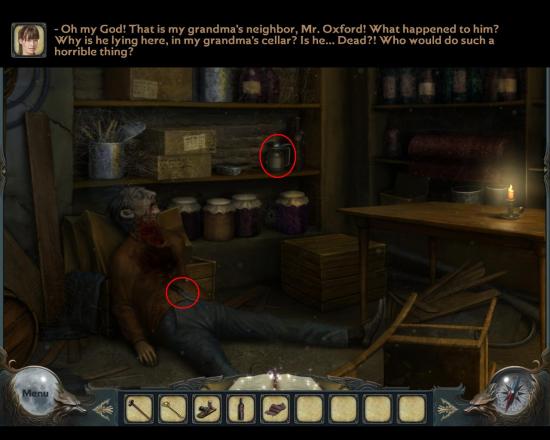
- Pick up the KNIFE and the OIL CAN.
- Head back to the shed behind the main building for another HO scene:
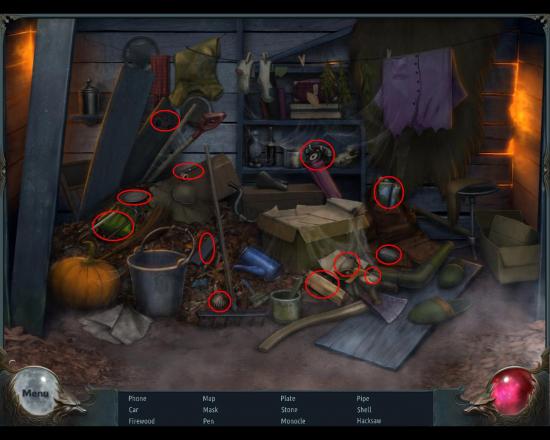
- The “extra” hidden object is the pen, which you find in the pen case (duh!).
- Here you get a HACKSAW.
- Get back to the front of the house, and use the KNIFE you found in the basement on the little sack to the right of the door.
- Pick up the ENTRANCE KEY that falls to the ground.
- Use the ENTRANCE KEY on the front door to start another mini game where you have to arrange the gears correctly to activate the lock.
Chapter 2 – In the House
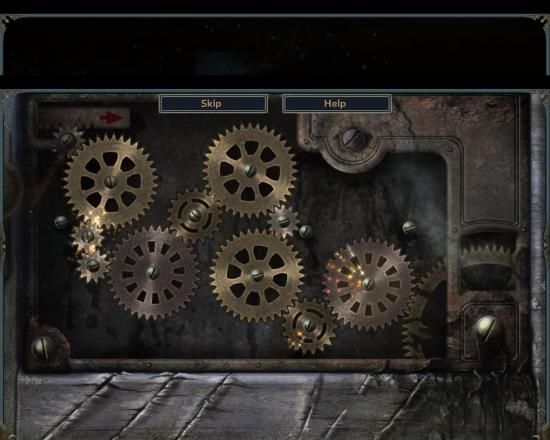
- Enter the house, and you find yourself in the foyer:
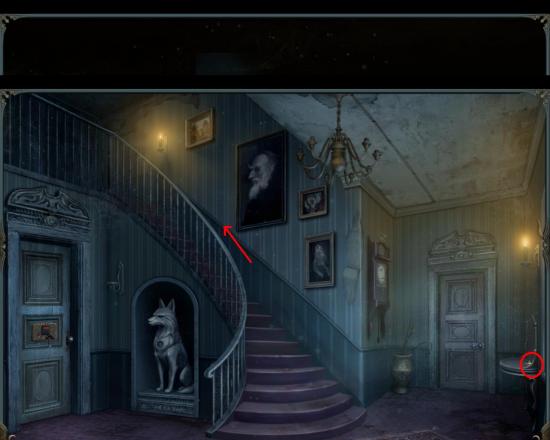
- Pick up the star from the small table to the right, and then head upstairs.
- You can of course inspect the two doors, the clock and the wolf statue first, but there’s not much to do with them – yet. It is possible to put the minute hand back on the clock, but nothing more.
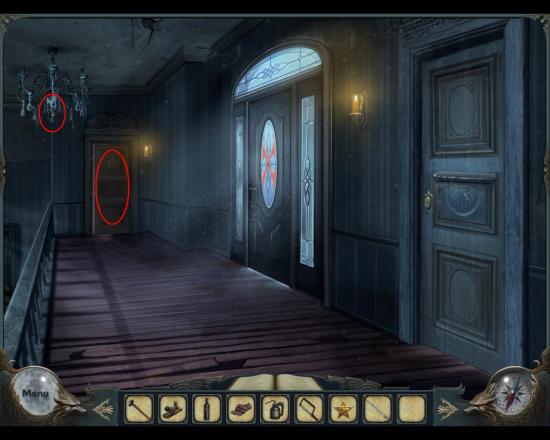
- First of all zoom in on the chandelier and grab a RED CRYSTAL.
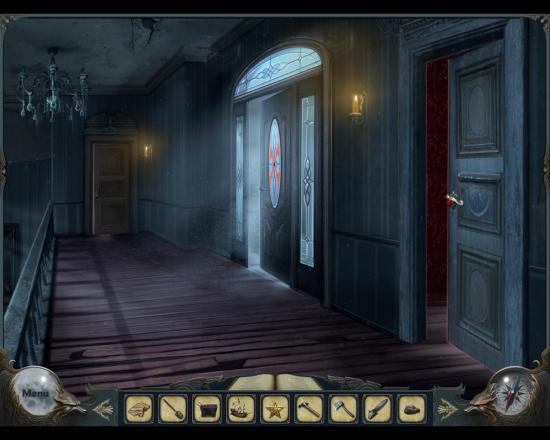
- Here, in the upper hallway, you find three doors, two of which you cannot open yet. The third is however open (see above), so enter the room.
- This looks like a typical male teenage werewolf room, albeit there being no such thing in the game, but logic isn’t mandatory in these games, it appears. There are a few things to do here.
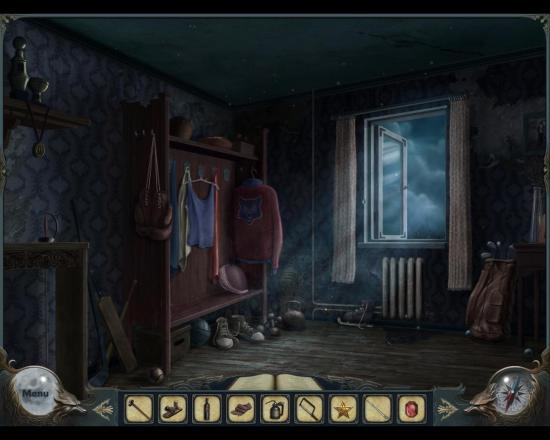
- First zoom in on the area below the open window (the left highlight in the illustration above), where there’s a ring sitting on the radiator pipe.
- Use the hacksaw to saw off the pipe and take THE RING:
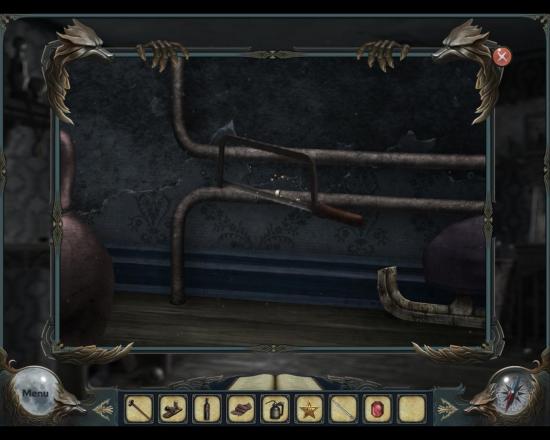
- The zoom window closes.
- Now use the RAG to wipe up the puddle in the same area.
- Take the WIRE that appears.
- Go back downstairs, to the foyer, and zoom in on the leftmost door with the electronic lock. Use the WIRE you found on the lock.
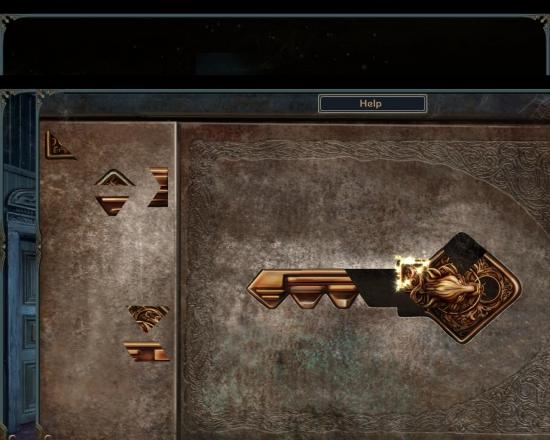
- You have to solve minigame, where you have to piece together a key, to actually open the door:
- In the parlour there are four areas of interest, plus an HO scene.
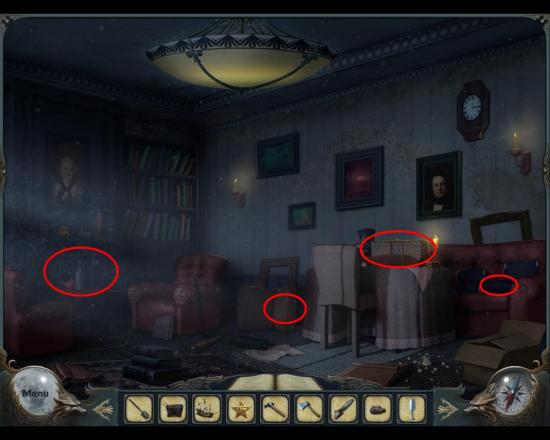
- From left to right you have the fireplace, a toppled over chair, a table with a box on and some items in the sofa.
- Start with the HO scene:
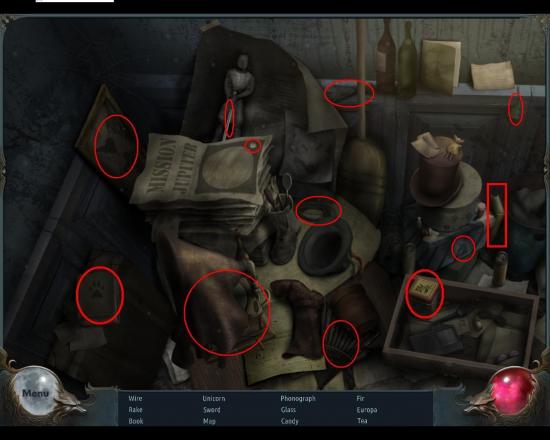
- The extra hidden things here are the candy (a lollipop), which confusingly enough is in the book to the left, whilst the book proper to find, is to the right (marked with a square box), and the tea, which more logically is hidden in the tea box.
- This HO gives you a RAKE.
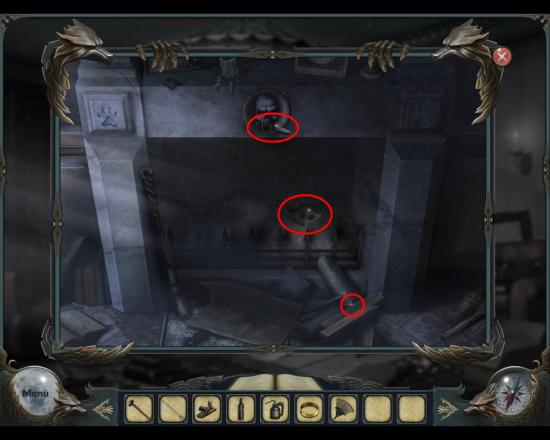
- Then zoom in on the fireplace, where you pick up a SMALL KNIFE, a NOTE and yet another little STAR.
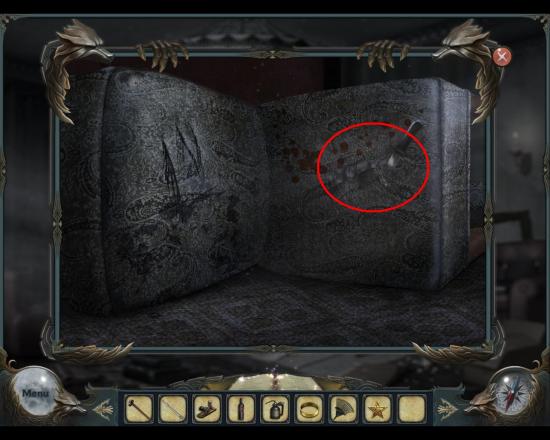
- Now zoom in on the chair that is lying on the floor, toppled over. Use the little KNIFE you just found to cut open the seat of the chair. You get another RING, and now you have two of them.
- The only thing left to do here at the moment is to pick up the BRANDY GLASS from the sofa – farthest to the right.
- Now scoot back to the outhouse area, where there’s another HO scene to play.
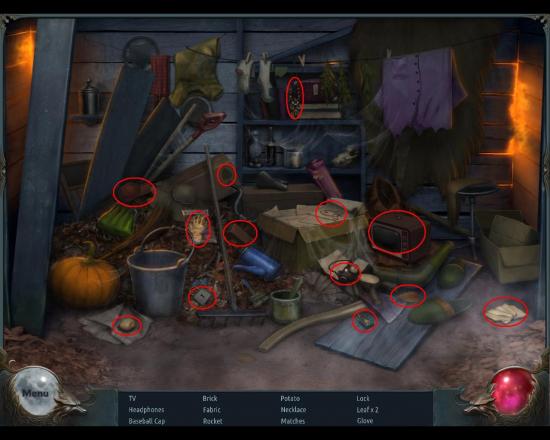
- The extra hidden object here is the glove, which isn’t very hidden at all – in a plastic bag. Compared to that, the 2nd (or 1st, however you prefer to think of it) leaf is more difficult to find since it’s looking more like a spade.
- The rag, down to the right, is not a rag either – it’s “A FABRIC“, which is what you get with you from this scene.
- Now back to the cellar, for another HO by the chest.
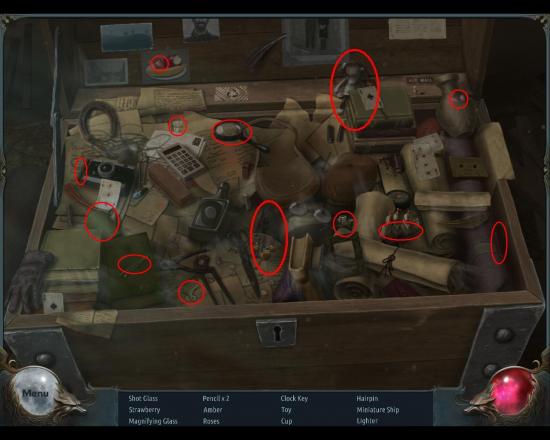
- Nothing extra hidden this time, and when finished, you get a CLOCK KEY.
- Worth noting is maybe that the toy is the doll, upper right, and by amber you should read amber necklace, which is center low.
- Now back to the main house and the foyer again.
- Zoom in on the clock and use the MINUTE HAND and CLOCK KEY on it.
- Note that you have to turn the key three times, before the cuckoo hatch opens, and gives you a third RING.
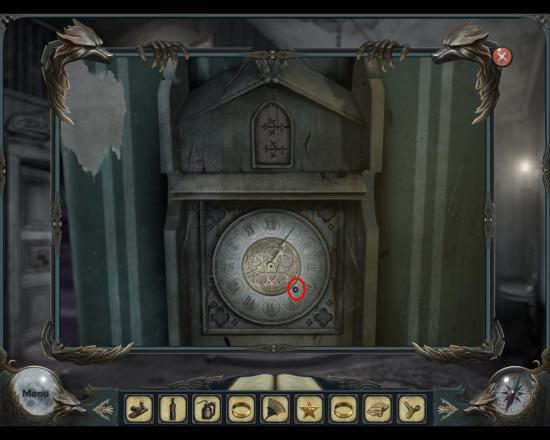
- Now that you have the three rings, you can go back to the parlour (leftmost door in the foyer).
- Zoom in on the table with the package.
- Put the RINGS on the seals to get rid of the string, and play the coloring mini game. It’s not very difficult, and you do not have to run around to try and find the stained glass window the speaker refers to, you can color the sections in any way you like, the only requisite is that two adjacent sectors may not have the same color.
Suggested solution:
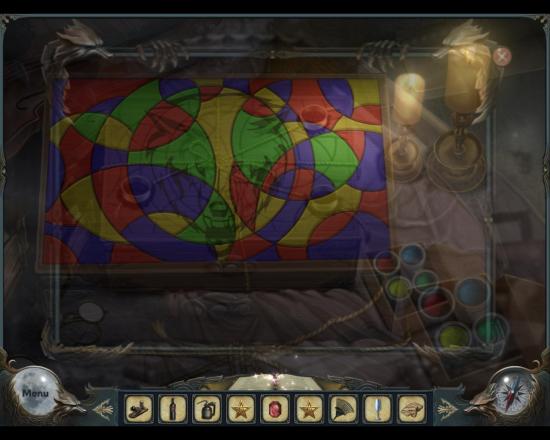
- Sorry about the quality here – the image disappeared a little quicker than expected!
- Inside the box you find a gear and the CAR KEYS to grandpa’s car.
- You now have to go back to the cellar once again, for another HO scene.
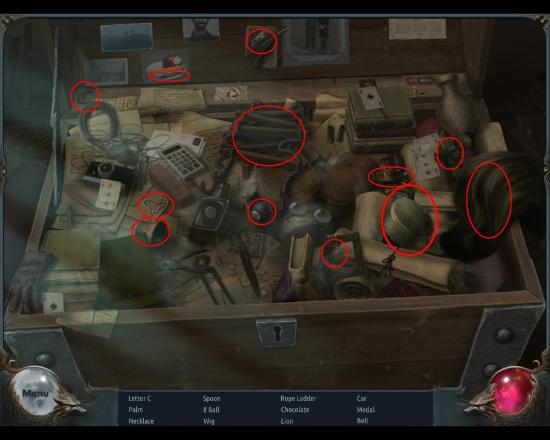
- The extra hidden object is the chocolate, which you find in the round box marked above. From this scene you get a ROPE LADDER.
- Go back to the teenage werewolf room on the upper floor of the main building, and use the ROPE LADDER with the open window.
Chapter 3 – The Backyard
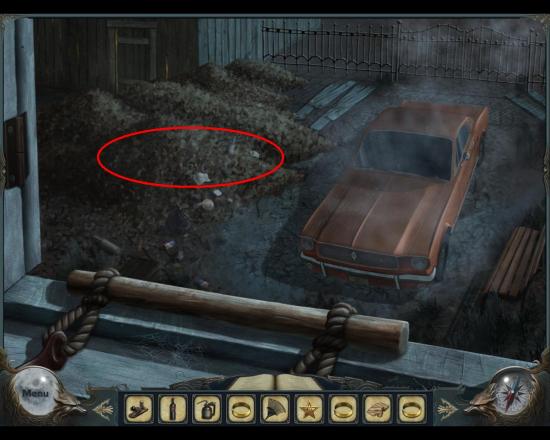
- Use the RAKE you found on the humongous pile of dry leaves on the back yard, and then enter the outhouse to the left.
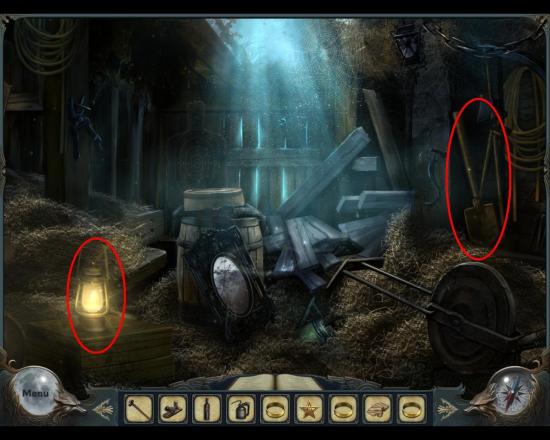
- Grab the SHOVEL and the LAMP, and do the HO scene.
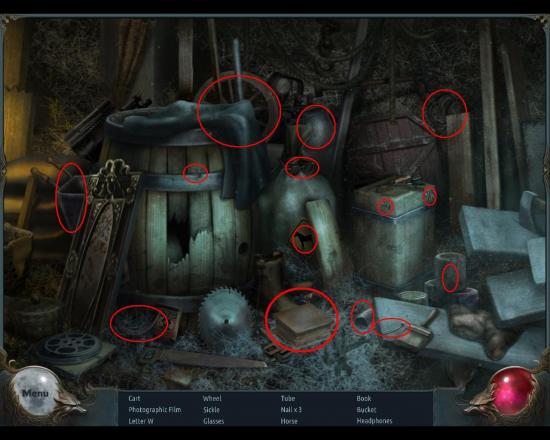
- The extra hidden object here is the book, which is inside the box.
- From this scene you get THE CART.
- Now use the CAR KEYS that you got from the box in the parlour on the car, to activate another HO:
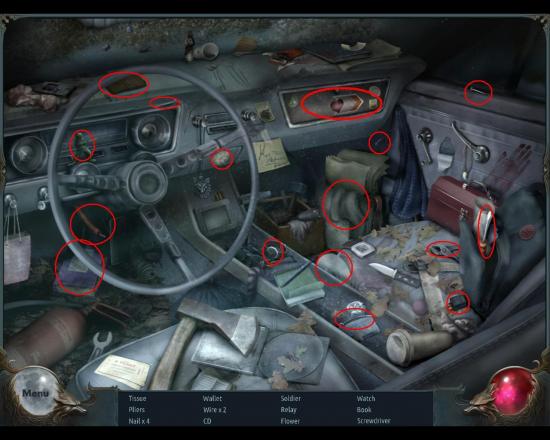
- The extra hidden object is in the glove compartment, the wire.
- From this HO you get a TISSUE.
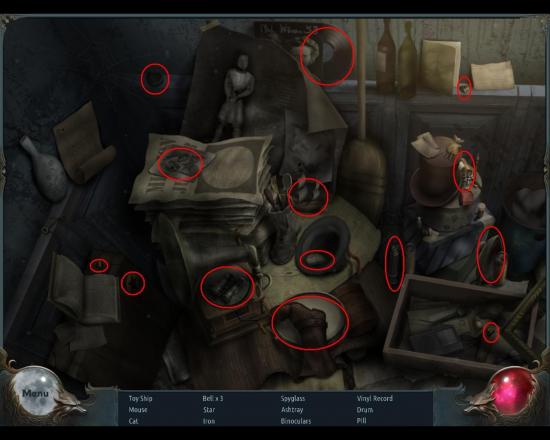
- Back to the parlour for another HO.
- Here you get the TOY SHIP.
- Worth noting about this HO is perhaps that “the pill” is actually an open pill bottle plus pills.
- With the tissue you got from the car HO, you can now open the right door in the foyer. Zoom in on the door, and use the TISSUE on the dusty area above the lock to the right:
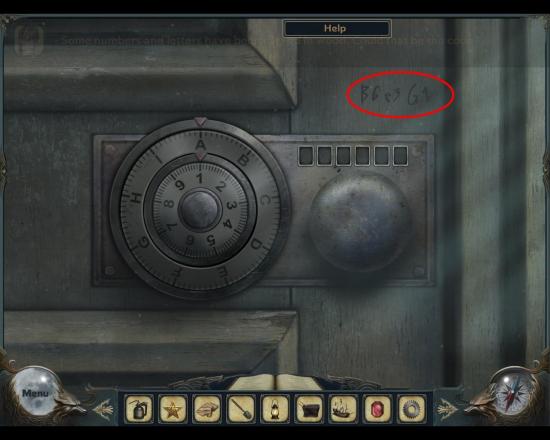
- Turn the lock rings on the door – it can be a bit finicky, and you have to start over if you mess up, but the code is pretty short and it’s not too difficult – it says B6E3G1.
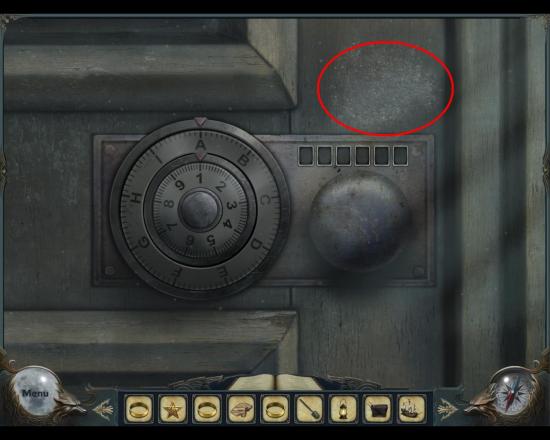
- Enter through the now open door into the game room. It’s pretty dark, as you can see:
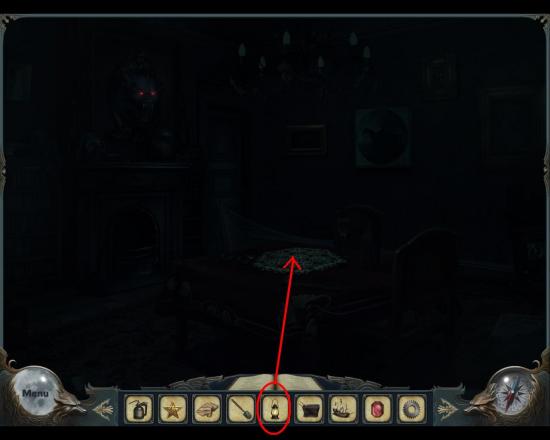
- Just grab the LAMP you found earlier on, and put it on the table, to make things look a great deal brighter:
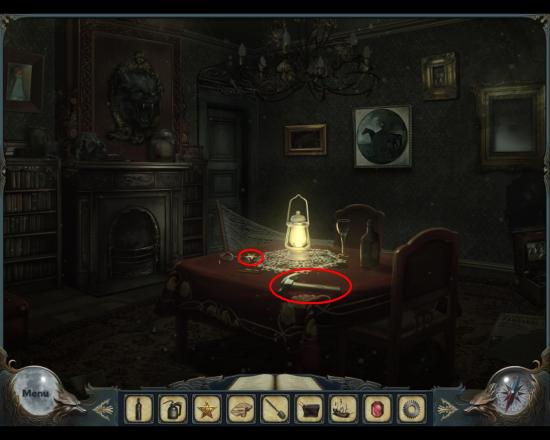
- Take the little STAR and the HAMMER from the table.
- Zoom in on the wolf head over the fireplace.
- You see some sort of mechanism, but it won’t work.
- Use the OIL CAN on the mechanism, insert the GEAR and the RED CRYSTAL over the wolf head:
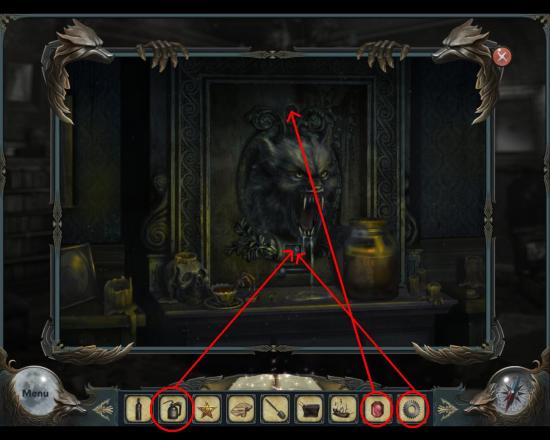
- Shazam – a picture on the wall slides away to show a safe.
- Zoom in again to access the mini game, a fairly simple ball puzzle:
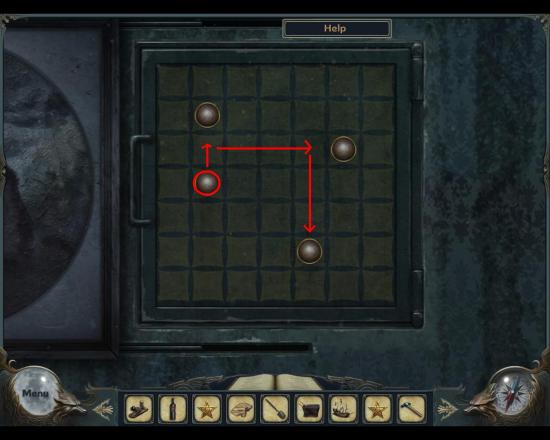
- Select the highlighted ball and move it up, right, and down to solve the puzzle.
- Inside you find a DIAMOND-ENCRUSTED HANDLE (whatever that could mean, really) which fits one of the locked doors on the upper floor.
- First, open the door in the game room and enter. You get into a bedroom, with an HO scene by the foot of the bed, and a NOTE that you can pick up from the chest of drawers:
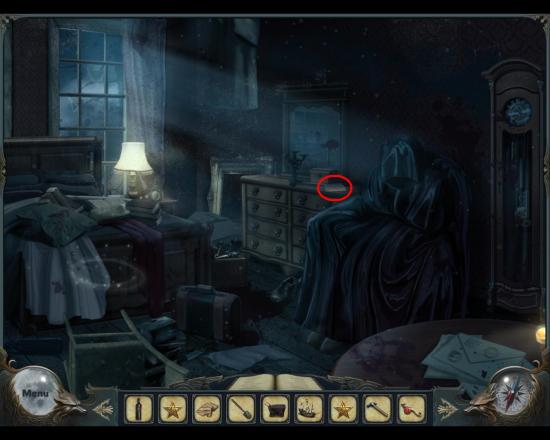
- When you pick up the note, the pile of sheets fall down, and reveals an injured man – yet another neighbor of grandma’s:
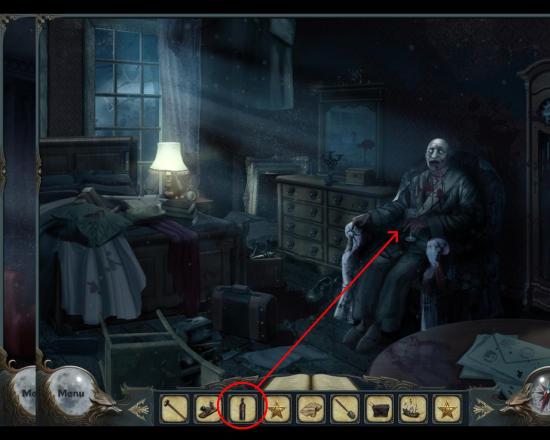
- First give the poor man the BRANDY GLASS, and proceed to fill it from the BOTTLE OF BRANDY.
- To be entirely truthful, it seems as though it didn’t do him much good – more like something AKA dead, but you get a nice MEDALLION.
- Now continue with the HO scene.
- The extra hidden object here is in the matryoshka doll, the diamond (which really looks like a sapphire, but never mind):
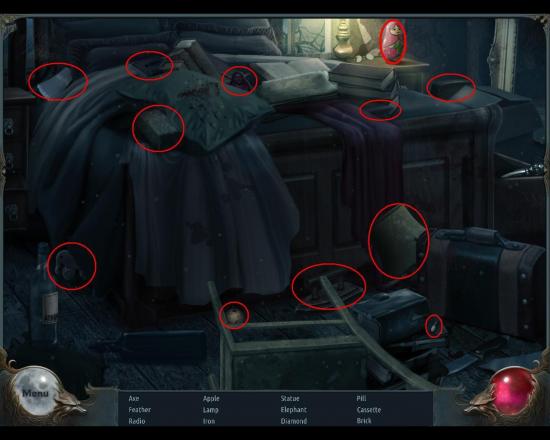
- This HO gives you an AXE.
- Now you can go back to the upper hallway, where you can use the medallion you found on the glass door:
- Enter the music room:
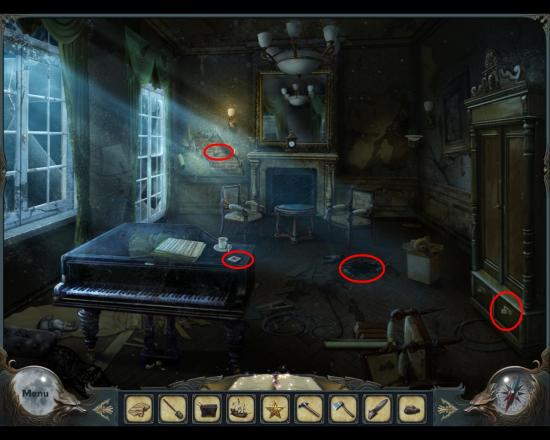
- From left to right you can inspect a loose brick in the wall, which of course won’t budge; pick up a LIGHT SWITCH from the grand piano, look down a dark hole in the floor and see nothing, and finally open a drawer in the large cupboard and pick up a ROPE.
- Go to the teenage werewolf room and look out the window and activate another HO scene in grandpa’s car:
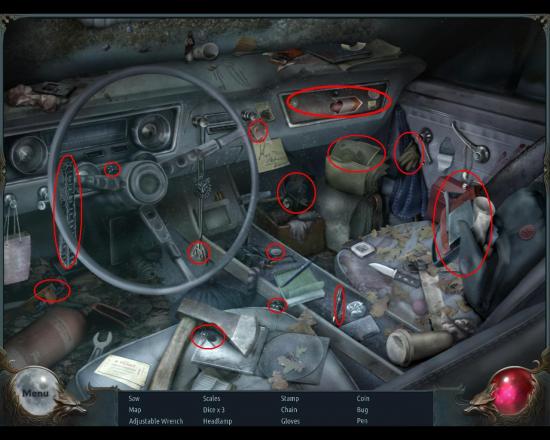
- Extra hidden this time is a die, once again in the glove compartment.
- The adjustable wrench is really a pipe wrench, and the saw a chain saw.
- The SAW is also what you get from this HO.
- Backtrack to the hallway, and zoom in on the first door on the upper floor, the one without a handle.
- Use the DIAMOND-ENCRUSTED HANDLE here, and enter the mucho yucky bathroom:
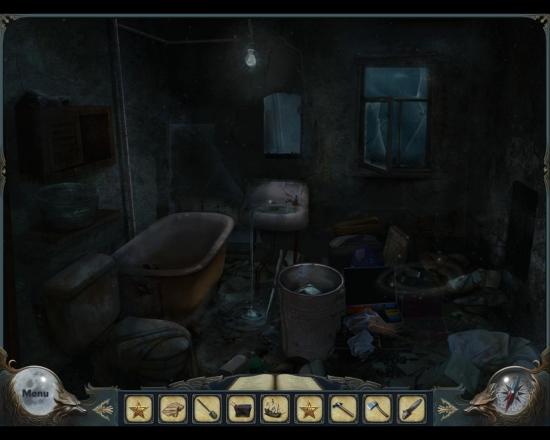
- You can look at the sink, but at the moment you’ll only learn that there no handle on the tap, so you can’t turn off the water.
- There is, however, another HO to do:
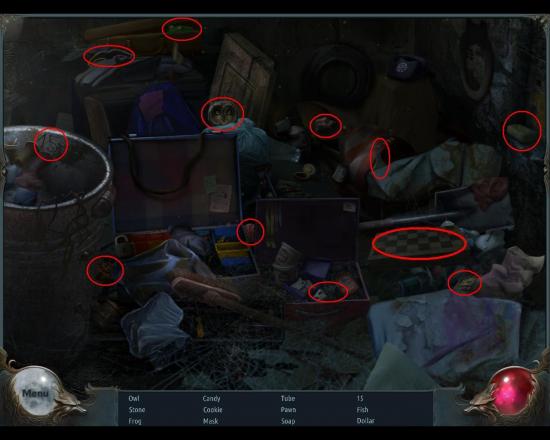
- The extra hidden object is the pawn, which is in the chess set.
- The tube is not really a tube, though, rather a lab flask.
- From this HO you get a STONE.
- You are now prepared to take the high road to the lighthouse.
- Go back to the teenager room and look out the windows.
- Click on the gate behind the car to open it, and walk out.
- You now find a major obstacle, a tree has fallen down over the road, and since it’s at least 6 inches high you have to mutilate it badly to be able to proceed. Additionally, there’s an interesting crate suspended in a rope, which you of course are interested in knowing what it contains.
Chapter 4 – The Fallen Tree
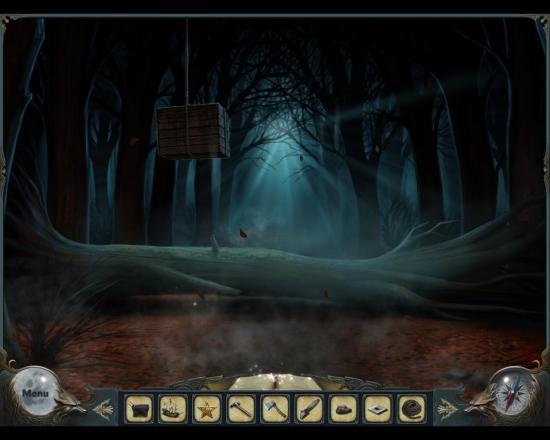
- First, take the STONE you recently found and use it on the crate.
- I kid you not – throw the stone. Don’t use the shovel, axe or sledgehammer or anything else remotely reasonable. Just the stone.
- The crate falls down, and then the next problem appears – even though you do possess an axe, a sledgehammer and various other tools you have to be a sissy and actually break the box with the HAMMER.
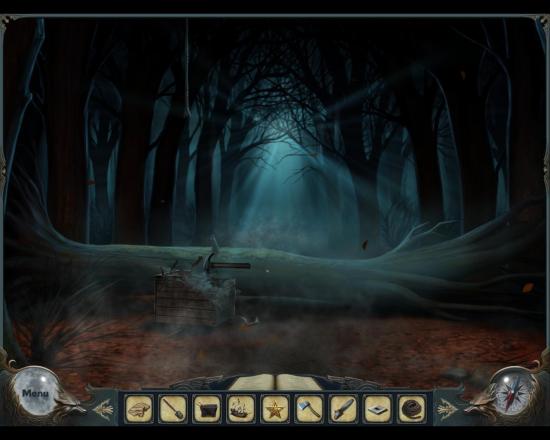
- Use HAMMER on crate.
- Pick up the TEDDY BEAR that falls out.
- Next, the tree. First, attack it with the SAW.
- Then continue with the AXE on the sawed off piece of the trunk.
- Finally use the CART to move the wood to the side, so you can pass.
- Do not forget to pick up a couple of boards for yourself – you’ll need them. So take the WOOD.
- Then move forward, to the creek:
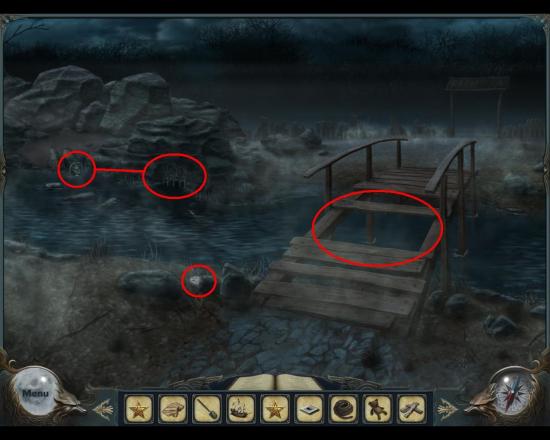
- From left to right, there’s an odd contraption on the other side of the creek, which you can zoom in. Then there’s a plastic handle in the grass that you can pick up, and finally there’s a big hole in the bridge.
- First, zoom in on the contraption, and put the TOY BOAT in the water:
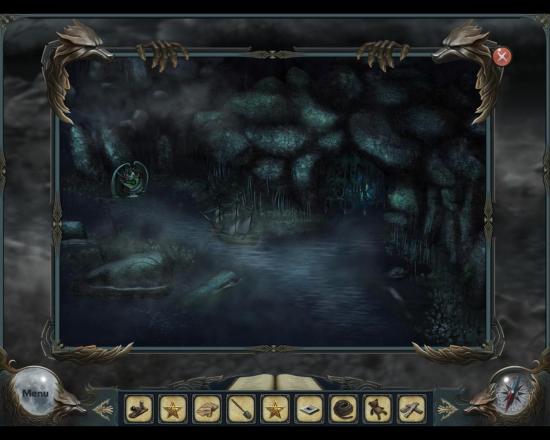
- It hits the button for the gate mechanism further to the right, and you get a blue ELECTRIC SPHERE.
- Then pick up the PLASTIC HANDLE.
- Finally the hole in the bridge: put the WOOD you got from taking out your aggressions on the tree earlier on by the hole.
- Then use the WOOD PLANE (!) on the boards to finally be able to cross the bridge.
- Next you come to some kind of temple:
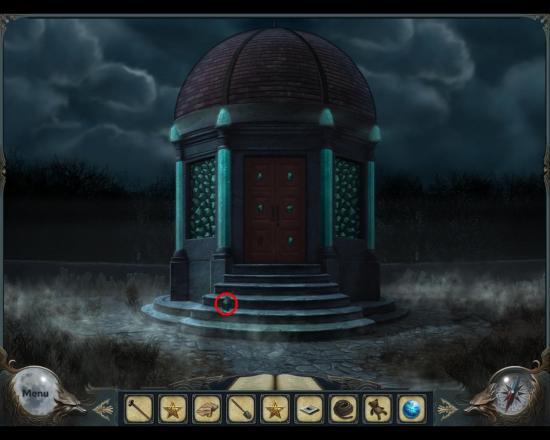
- Pick up the CRYSTAL on the step, and then zoom in on the door:
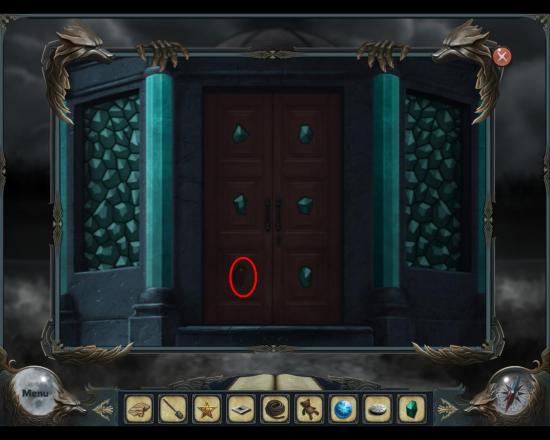
- Put the CRYSTAL in the empty slot.
- Unfortunately the door is also locked, so you have to head back to the house.
- Backtrack three times, until you are once again in the window with the rope ladder, looking out at grandpa’s car. Click on the outhouse door for another HO:
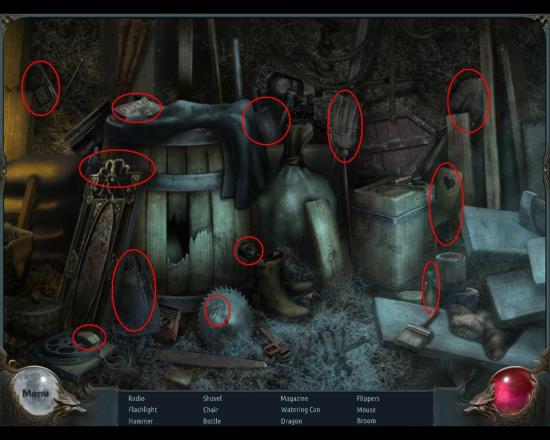
- Nothing extra hidden this time, but you get a FLASHLIGHT.
- Backtrack to the music room – with the glass door in the upstairs hallway.
- Zoom in on the hole in the floor, and then use the FLASHLIGHT on it:
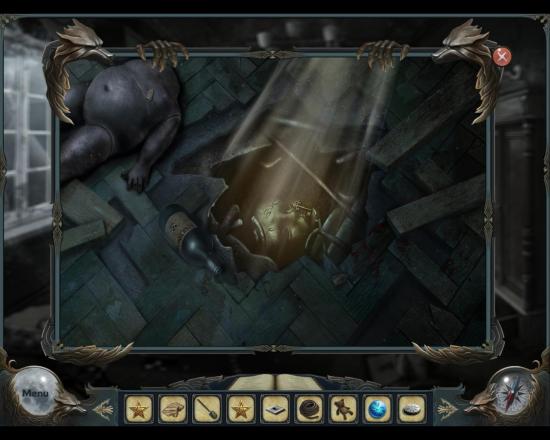
- Pick up the CRYSTAL KEY.
- Go back out in the hallway, and enter the bathroom (with the encrusted handle) for another HO:
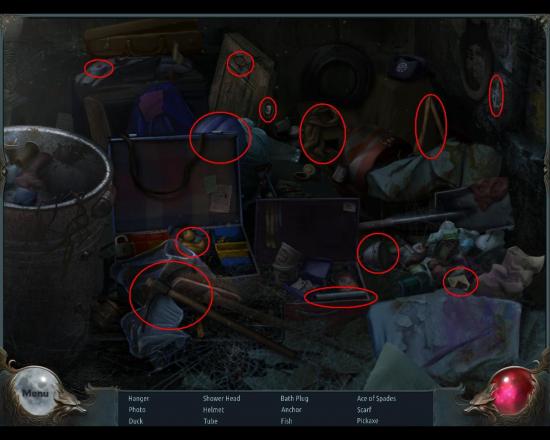
- Nothing extra hidden this time either – and you get a PICKAXE.
- Go downstairs, to grandma’s bedroom, and do yet another HO here:
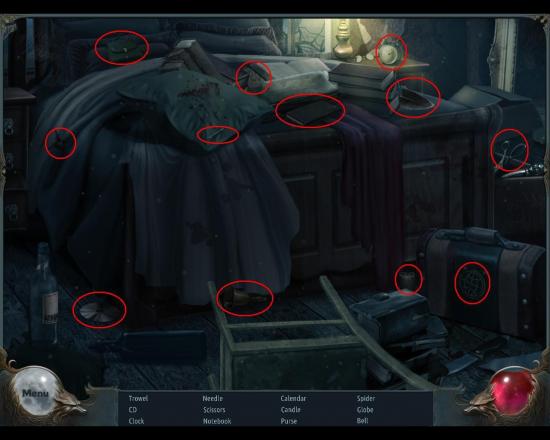
- No extra hiding places, and you get a TROWEL.
- Use this trowel immediately by going to the music room, and remove the stubborn brick in the wall with it:
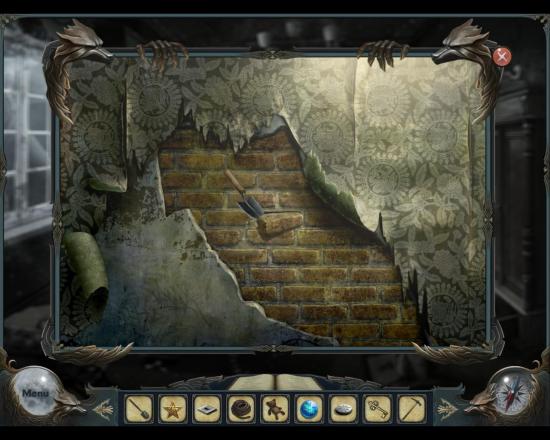
- Behind the brick a WOLF’S PAW is hidden.
- Now go back to the teen room again, look out the window and do another HO in the outhouse:
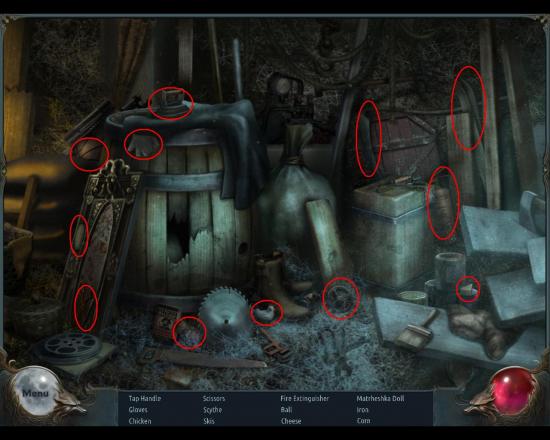
- No extra hiding place, and you get the TAP HANDLE here (which looks like a little wheel – more like a valve handle).
- Go to the bathroom and use the TAP HANDLE on the bathroom sink:
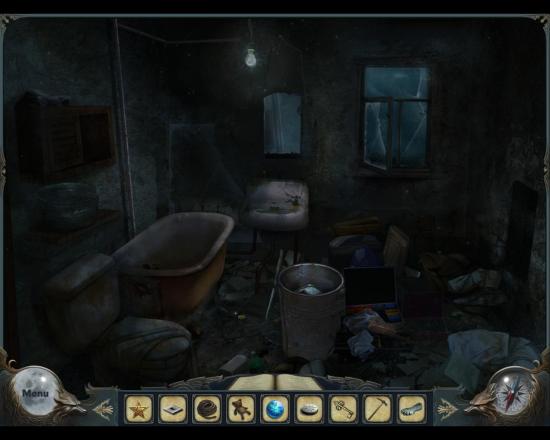
- A coin falls down on the floor (missed Newton 101, anybody?).
- Pick up the COIN.
- Now it’s time to go back to the temple, and use the CRYSTAL KEY in the door.
- Enter the temple:
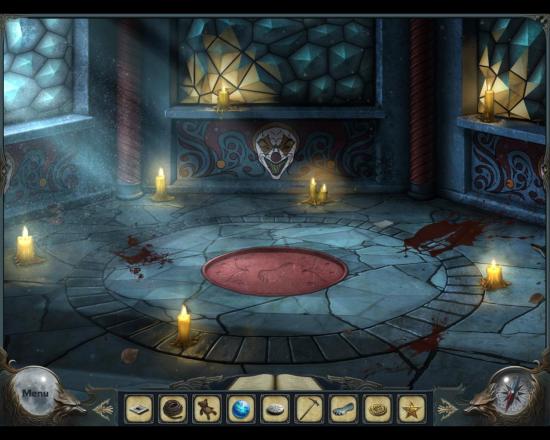
- Take the WOLF’S PAW and put it in the indentation on the red hatch, which now opens:
Chapter 5 – Into the Tunnel
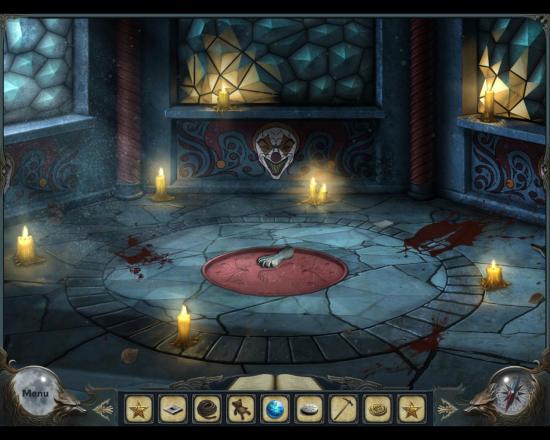
- Use the rope on the opening, and climb down.
- You are now in a tunnel, blocked by a large gate with a huge padlock:
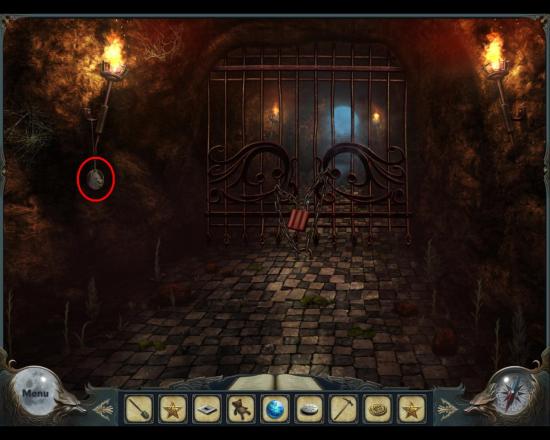
- Pick up the AMULET hanging from the torch on the left side.
- Inspect the lock – and ponder the statement “The gate is chained. No way I can force it open.” When finished pondering, bring out the PICKAXE and whack the lock.
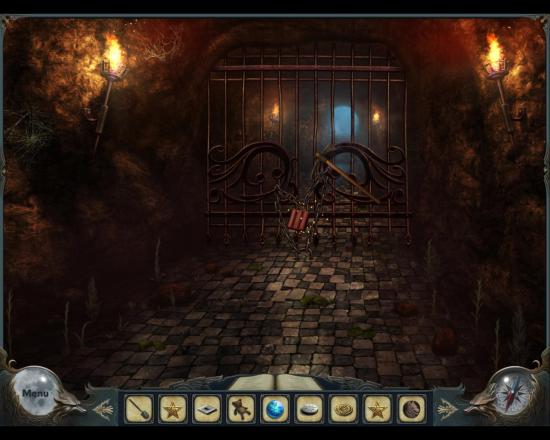
- Continue forward through the tunnel, and you will get out on a cliff, where you find another dead man:
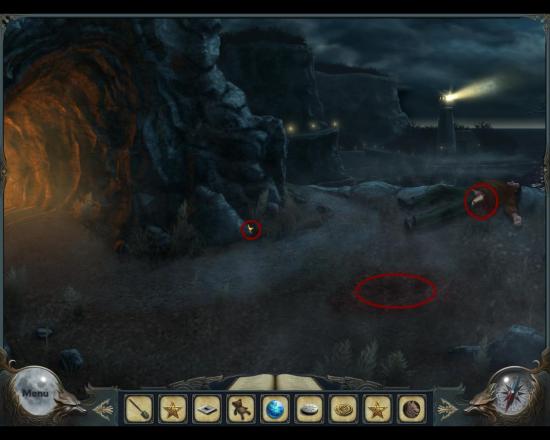
- From left to right there’s a little star to pick up, a hole to dig and a document to pick up.
- Pick up the STAR and the SCROLL from the dead man, then use the SHOVEL on the ground:
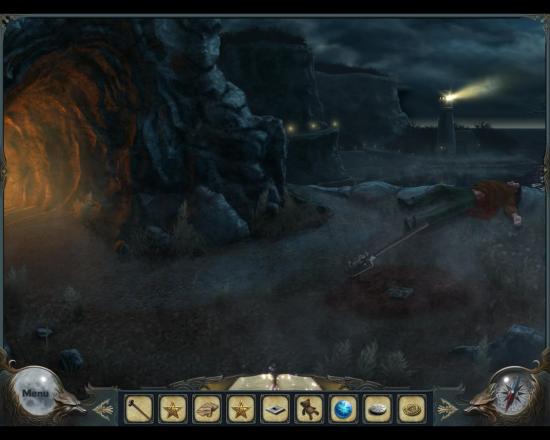
- When the digging is done, zoom in on the hole.
- You see a box, where you can place your so far four (4) STARS:
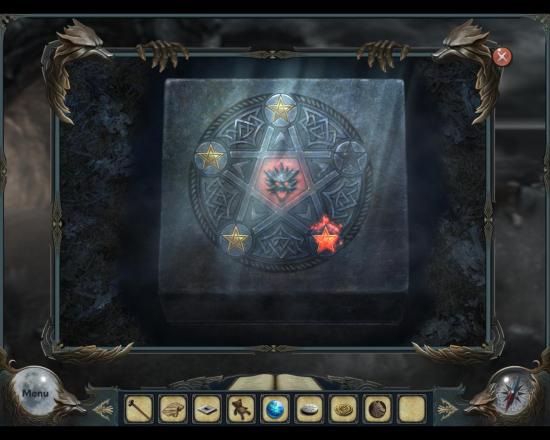
- Then move on towards the lighthouse:
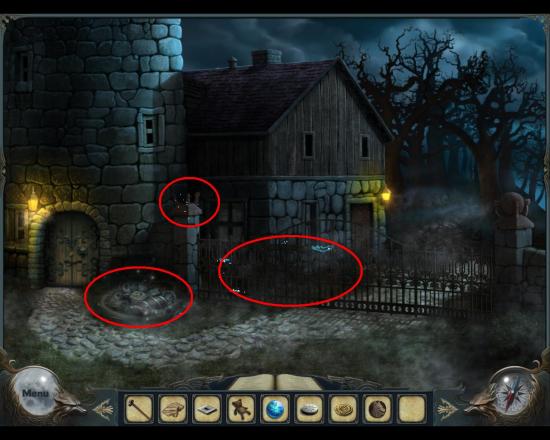
- From the left you have an HO scene, a pillar with something missing on top and an electrified fence.
- Start by putting your blue ELECTRICAL SPHERE on the pillar, which turns off the electricity in the gate.
- Then do the HO.
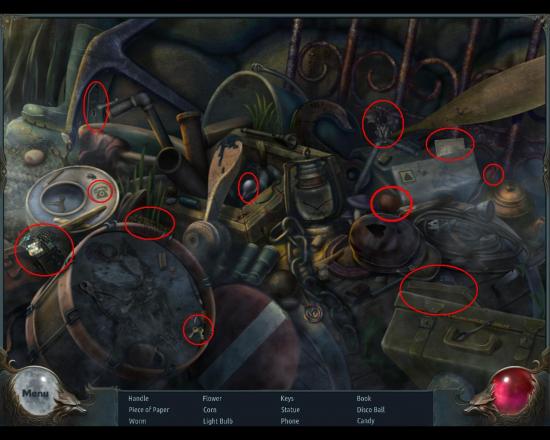
- The extra hidden item here is the worm, which is chomping away inside the apple – difficult spot since the pointer does not change into a hand when hovering over the apple, at least not on my computer.
- The item you get from this HO is a PIECE OF PAPER.
- The door to the lighthouse proper is protected by three locks, and is – for now – impossible to open. Look instead at the gate in the fence, and zoom in on the lock:
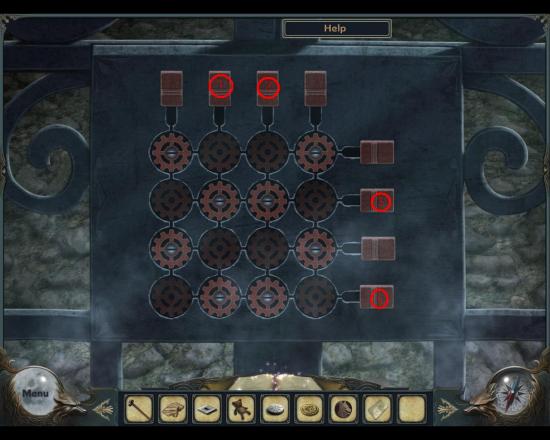
- Four clicks here, and you are done.
- It’s not really obvious that you can move to the right from the gate area, but you can.
- Move the cursor to the right and click your way to the dock:
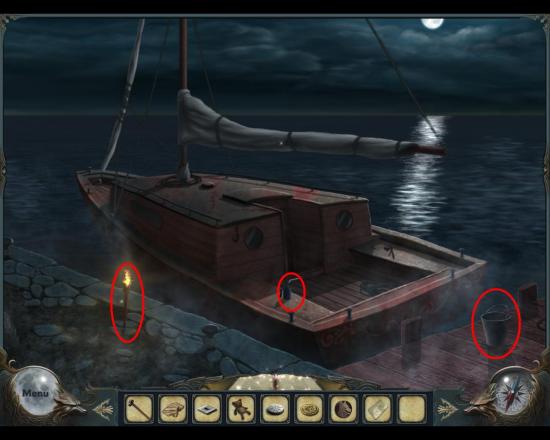
- From left to right, pick up the TORCH, the OIL CAN and the BUCKET.
- When you take the bucket you first have to dip it into the lake, and fill it with water.
- After that you can pick it up to your inventory.
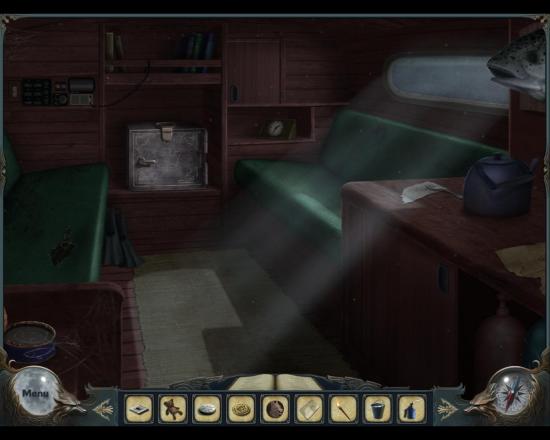
- You can get into the boat now, but there’s nothing to do there yet.
- There is a safe in there:
- Unfortunately it’s now time to scoot back to the main house once again, to the bathroom, where there’s an HO waiting:
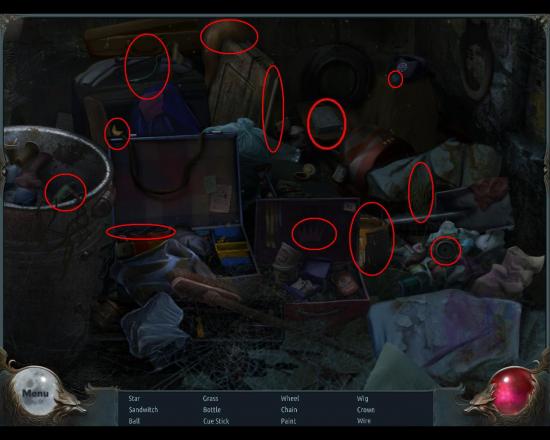
- Extra hidden object here is the sandwitch, hidden in the box highlighted above. A sandy witch which looked more mouldy than witchy to me.
- What you get from this HO, though, is the fifth, and final, STAR.
- While back in the house, go down to the foyer and insert the WOLF AMULET into the slot on the wolf statue:
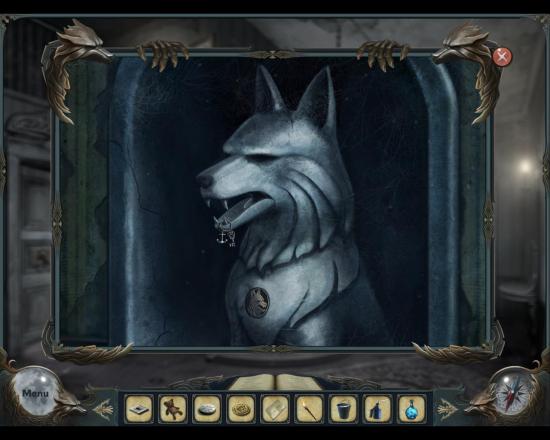
- Pick up KEY WITH ANCHOR.
- Scoot back to the cliff, zoom in on the box in the ground, and put the last star into the box lid. Then the box opens, and reveals a POTION BOTTLE. Pick it up.

- Continue on to the lighthouse, and zoom in on the door lock.
- Use the KEY WITH ANCHOR on the ornate golden lock with the chain, and insert the COIN in the door knocker figure.
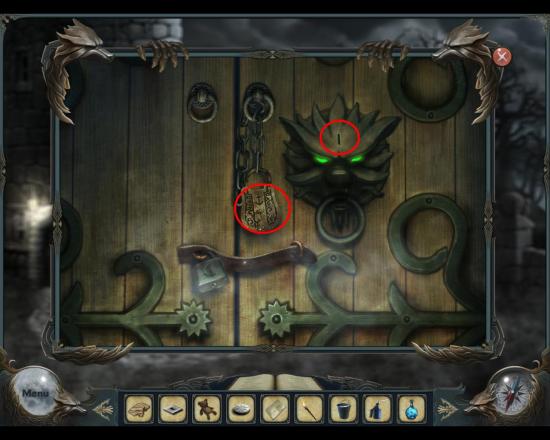
- Continue to the door to the lighthouse cottage. If you try the door, you get the message that it won’t budge – but it does budge quite gracefully if you give it a good whack with the SLEDGEHAMMER:
Chapter 6 – Lighthouse Cottage
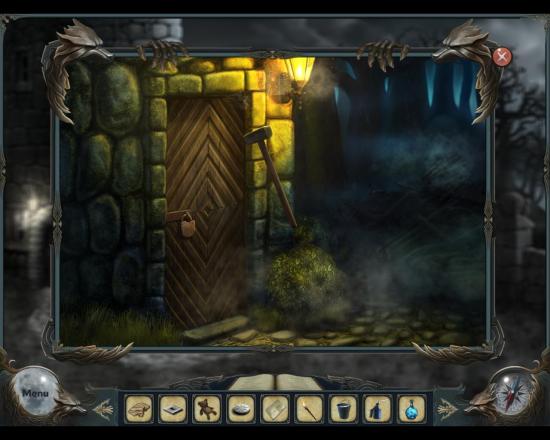
- Enter the lighthouse cottage:
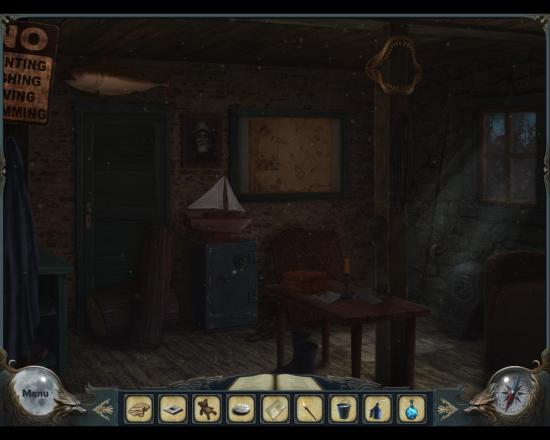
- Zoom in on the table, and use the TORCH to light the candle:
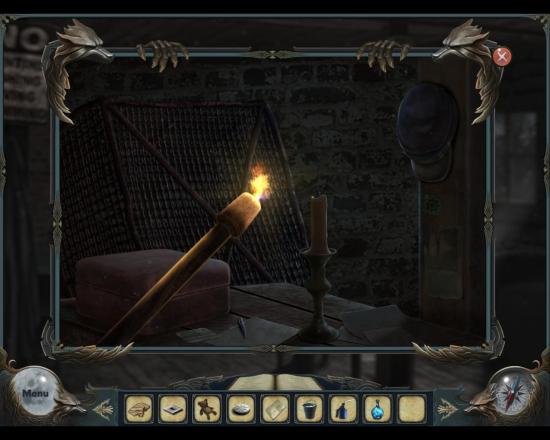
- Use the PIECE OF PAPER on the candle:
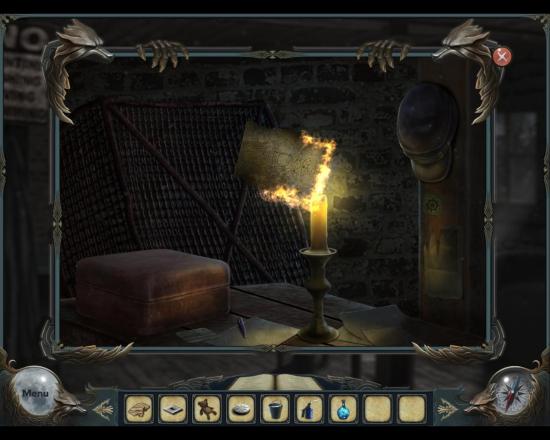
- The heat from the candle reveals a code, and the piece of paper falls down on the table.
- Pick up the CODE and use it on the safe in this room:
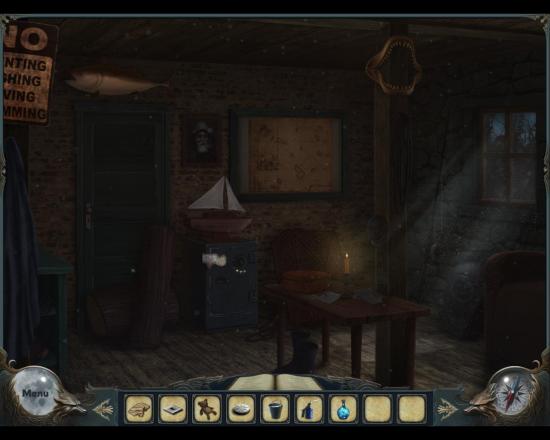
- The safe opens (you don’t have to enter the code yourself), and you get a KEY WITH SHIP.
- Exit the cottage and move back to the lighthouse door, where you now can open the remaining lock – but first do the HO outside:
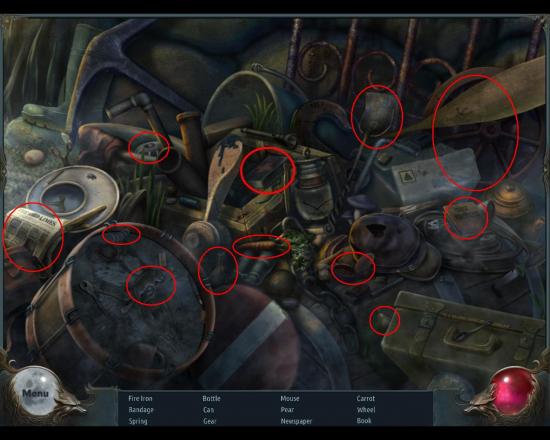
- The extra hidden object is the bandage, which is in the little box with the red cross.
- Note the title of the book: “Curse of Werewolves” – neat little detail.
- From this HO you get a FIRE IRON.
- Open the final lock to the lighthouse using KEY WITH SHIP.
- Click the door to open it and then enter the lighthouse:
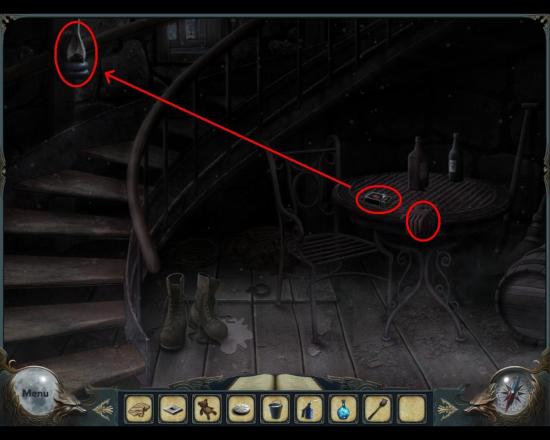
- Pick up the GLOVES and the MATCHES from the table.
- Then zoom in on the lamp:
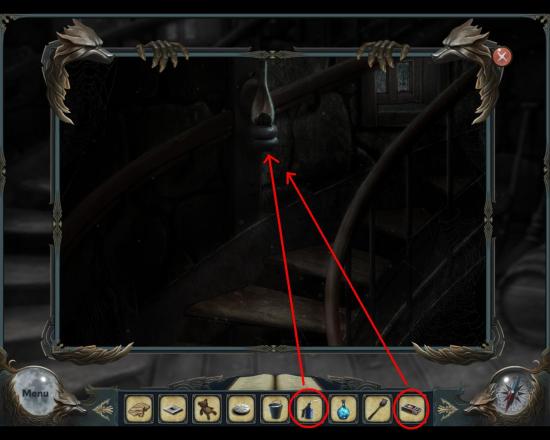
- First use the OIL CAN to fill the lamp with oil, and then use the MATCHES to light it.
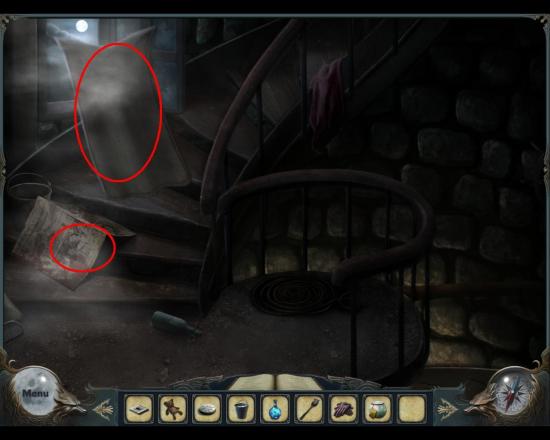
- Walk up the stairs, to reach a landing where the wind blows hard and stops you from walking further. Closing the window would be the logical step, but not here.
- Use the FABRIC to cover the window, then click on the newspaper to reveal the AQUARIUM POT and pick it up:
Chapter 7 – Getting the Crown
- Now you can walk upstairs to the lighthouse proper:
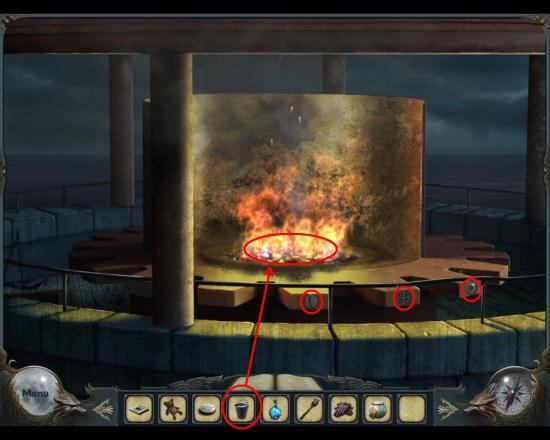
- Take the three SYMBOLS along the edge of the large base for the fireplace.
- Then use the BUCKET OF WATER on the scorching fire.
- Use the FIRE IRON to sift through the embers, which uncovers a crown:
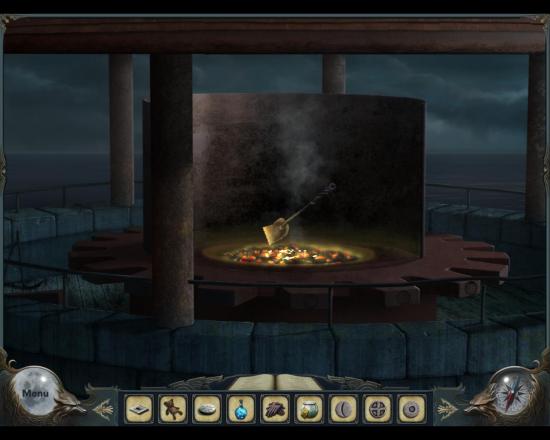
- However, it’s still too hot to handle, so use the GLOVES you found on the bottom floor to pick it up and put it aside for cooling:
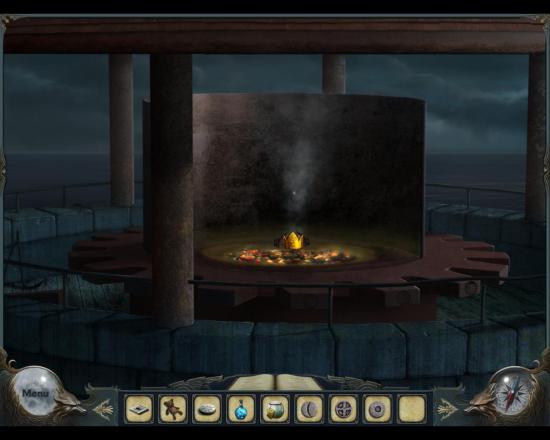
- The crown is now possible to pick up.
- Go down, all the way to the yard outside the lighthouse, and do another HO scene:
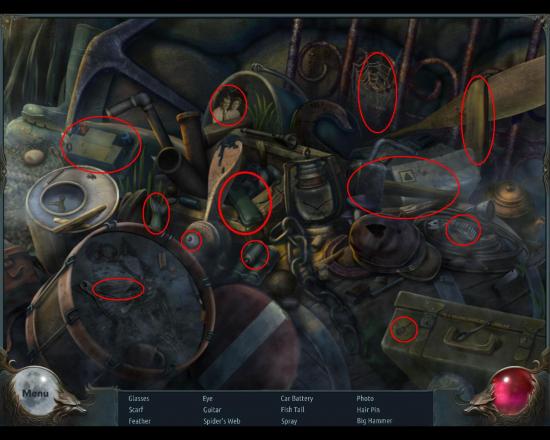
- The extra hidden object here are the glasses, which you find in their case.
- From this HO you get a BIG HAMMER.
- Scoot along to the docks again, and enter the boat with the safe.
- Zoom in on the safe, and put the crown from the lighthouse on top of it to open it and get a KEY.
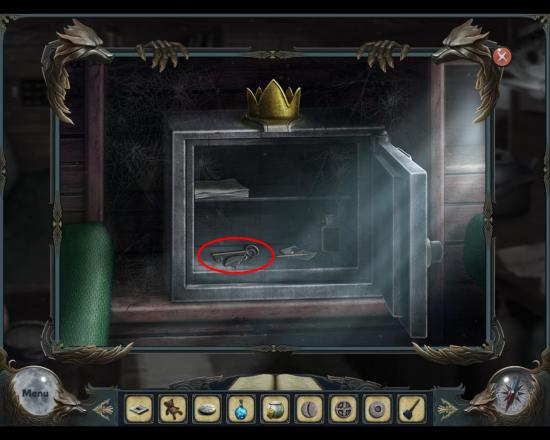
- Now return to the lighthouse cottage, and use the BIG HAMMER on the logs that are blocking the door:
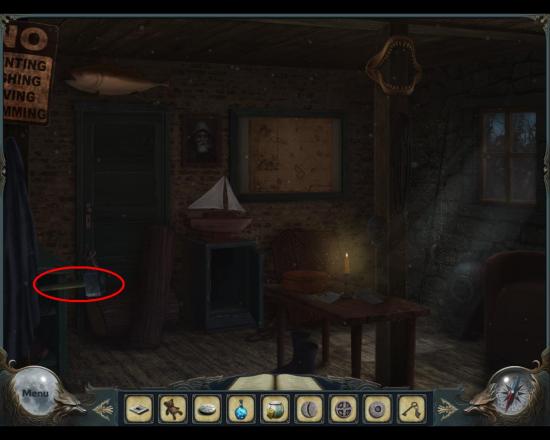
- Then use the KEY you found in the safe on the boat to unlock the door.
- In this inner room, pick up the AXE and the BATTERIES from the table:
- Then zoom in on the tank and use the AQUARIUM POT on it.
- The little aquarium will now be filled with gooey water and placed beside the larger tank:
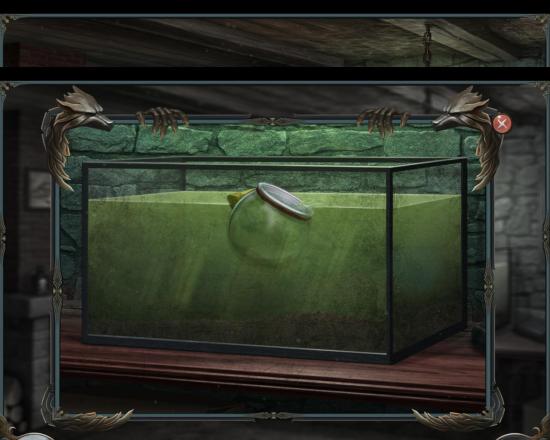
- What’s important are the keys that float up in the tank after you have removed some water. Pick up the BUNCH OF KEYS from the tank.
- Now do the HO scene in this room:
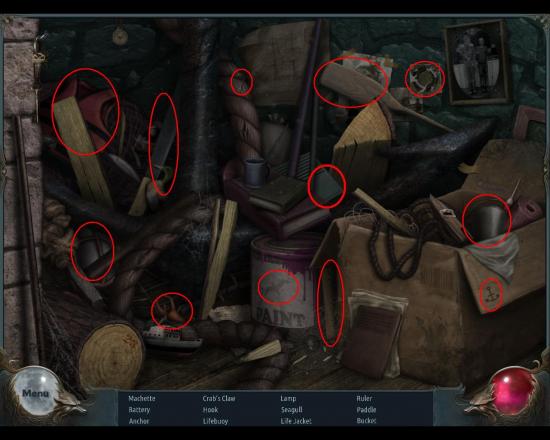
- The extra hidden object here is the battery, which is concealed behind the battery lid on some unidentifiable greenish gadget.
- From this search you get a MACHETE (or a machette).
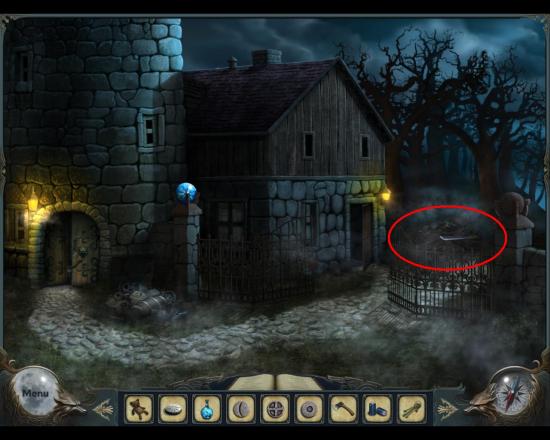
- Leave the cottage and use the machete on the pile of brushwood just outside:
Chapter 8 – Beyond the Brushwood
- You can now proceed into the woods.
- But immediately you run into trouble again, when you stumble upon a huge cobweb that blocks the road:
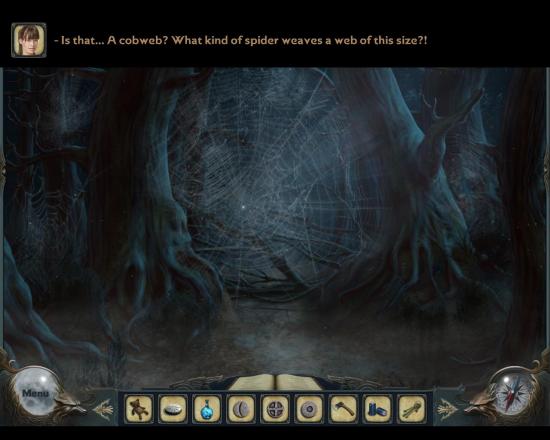
- You must go back to the inner room in the lighthouse cottage for another HO search to get what you now need:
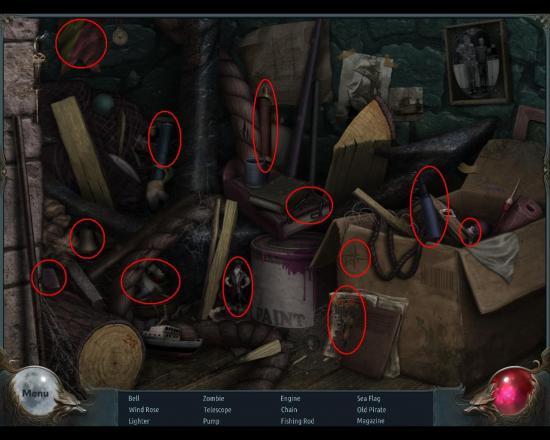
- No extra hidden object this time – but you do get a LIGHTER.
- Hurry back to the cobweb in the forest, and use the lighter on it:
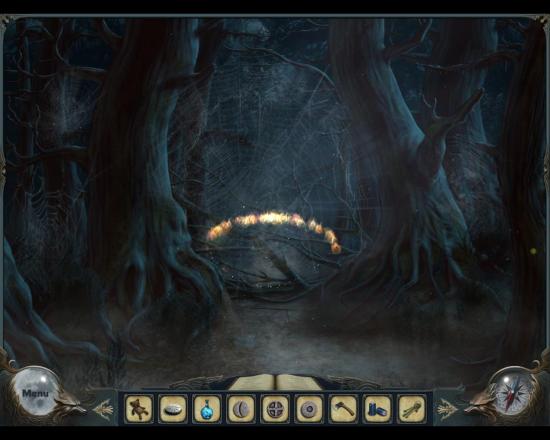
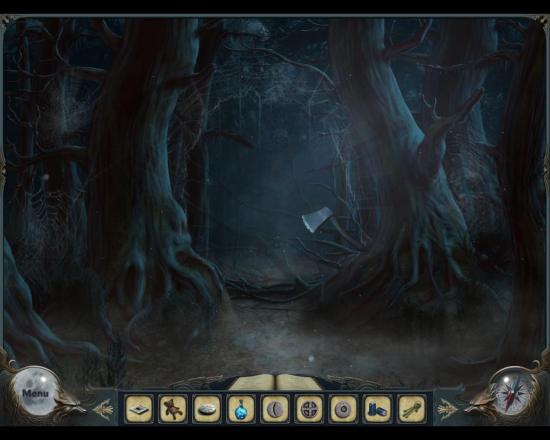
- Behind the net are branches, still blocking your way.
- Use the AXE on those:
- You could of course move forward immediately – but you do need to go back again, to the inner room in the lighthouse cottage for yet another HO scene:
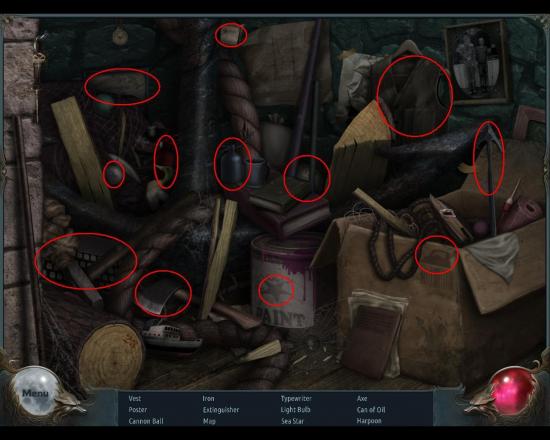
- Nothing extra hidden here, and you get a LIGHTBULB.
- Go back to the forest, and this time continue beyond the cobweb area to reach grandma’s cabin:
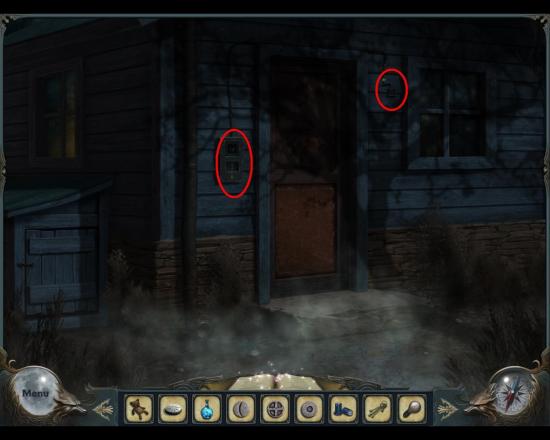
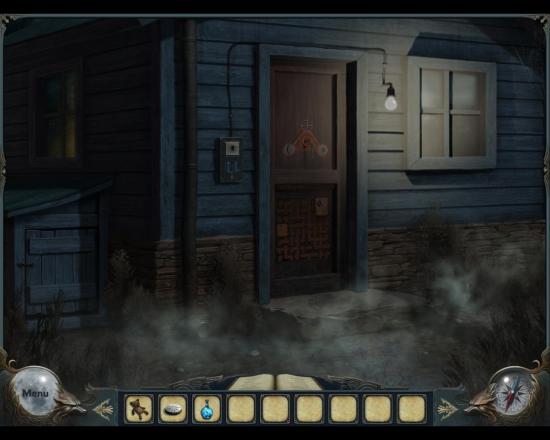
- Use the LIGHTBULB on the lamp to the right of the door.
- Put the BATTERIES in the control box to the left of the door.
- Finish it off with the LIGHTSWITCH that you’ve been lugging around for the longest time. And of course – click the lightswitch to turn on the light:
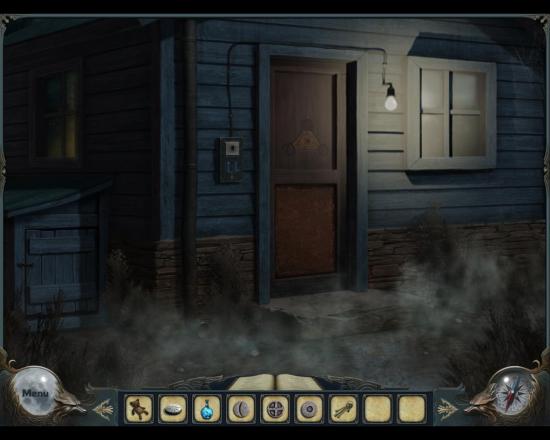
- Zoom in on the door, and insert the three SYMBOLS you found in the lighthouse:
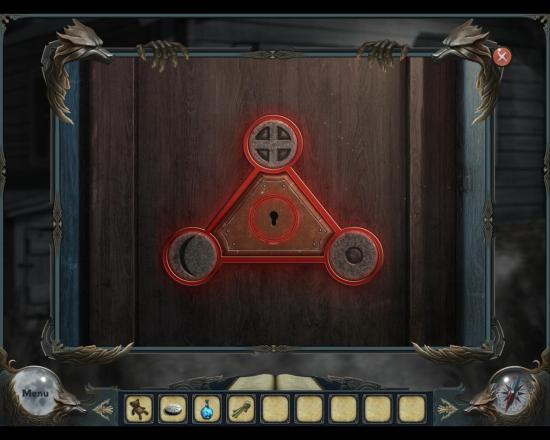
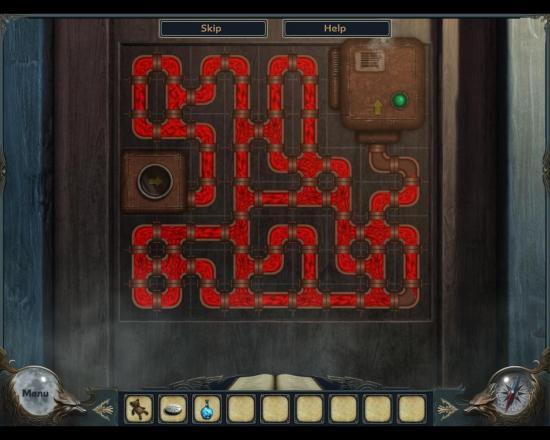
- Finish it by using the bunch of keys on the lock, which reveals yet another mini game on the lower part of the door – a traditional pipe puzzle:
- Zoom in on the puzzle and solve it – no “loose” pipe ends allowed:
Chapter 9 – Finale in Grandma’s Cabin
- The door opens, and you can enter grandma’s cabin:
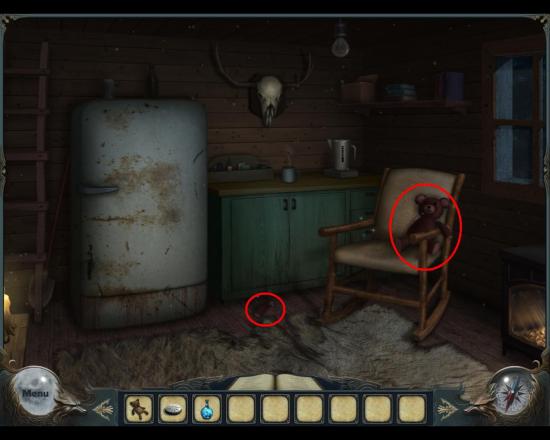
- The teddy in the rocking chair is one arm short.
- The TORN ARM is on the floor, so pick it up and put it back on the teddy bear in the chair.
- If you inspect the now mended bear you get the message that it “looks lonely”.
- Take the other TEDDY from your inventory, and put it beside the other bear:
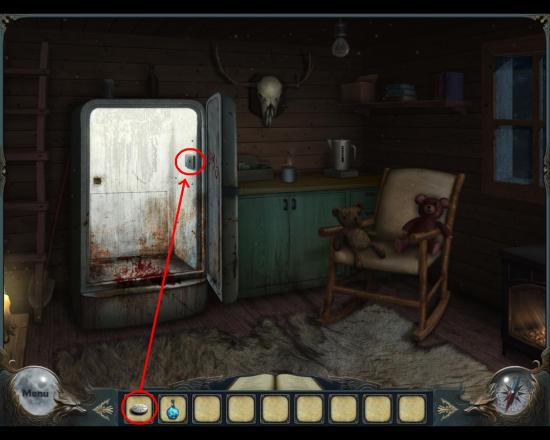
- When you do, the (gross) fridge opens.
- Now you finally get to use the plastic handle you’ve been carrying around for ages, since the fridge is missing such an item.
- Zoom in on the fridge and put the PLASTIC HANDLE where it belongs, and the hatch in the back of the fridge opens:
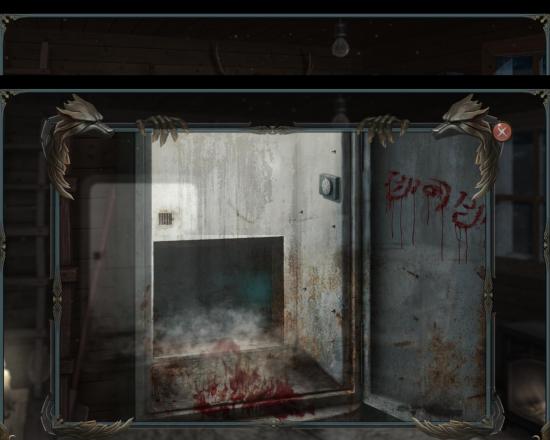
- Enter the hatch to find …
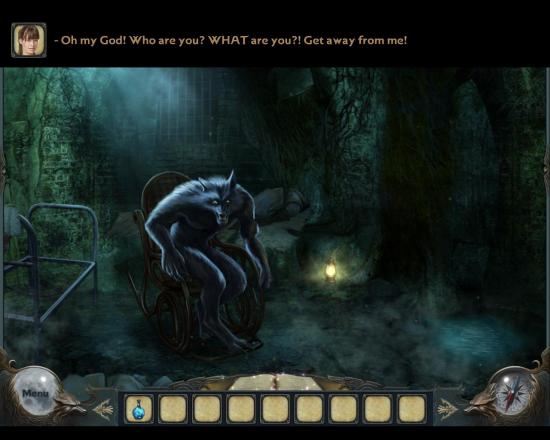
- … a werewolf!
- But wait – give the werewolf the POTION, and see that grandma really doesn’t have that big ears:
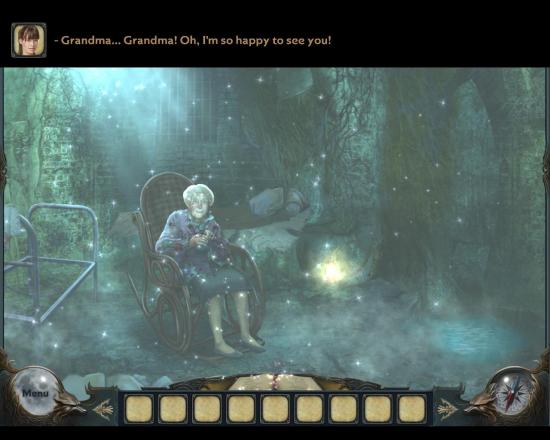
The story now winds up – grandma tells about the curse of the werewolf that has been haunting her for years.
The explanation however does not include why there’s a room for a teenage werewolf boy in her house, or who the dead man on the cliff edge near the lighthouse was – or why and how he died. Seems to have been forgotten, somehow!
Bonus Chapter
First a warning! There is a major problem in the bonus chapter – if you skip the mini game you play on an arcade machine you will not get an item that you need to continue playing. You will find an additional warning in the walkthrough so you know exactly where the problem occurs.
As soon as the main game ends, and you have watched the explanation to what has happened to you, the bonus chapter begins. You once again find yourself in front of grandma’s house, but this time an envelope is waiting for you by, propped up against the steps. What now?
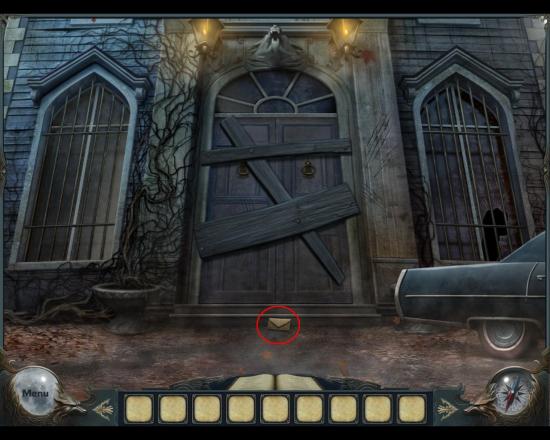
- Pick up the NOTE.
- Click on your notebook to read the short message: “Meet me at my place, Robert”.
- You now need to seek out grandma’s neighbor Robert, and find out why he’s been harrassing her of late.
- Move your cursor to the left side of the screen until it changes to a left arrow.
- Click to move along to Robert’s house.
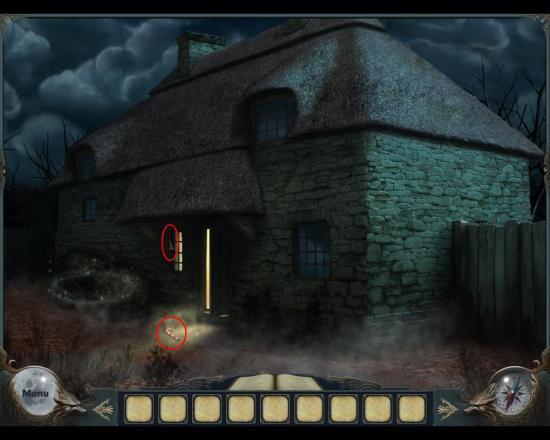
- You now stand in front of Robert’s house, the lights are on, the door is ajar. What’s happened here?
- Pick up the CANDY CANE from the ground.
- Take the BELL that’s hanging by the door.
- Do the HO scene to the left of the door:
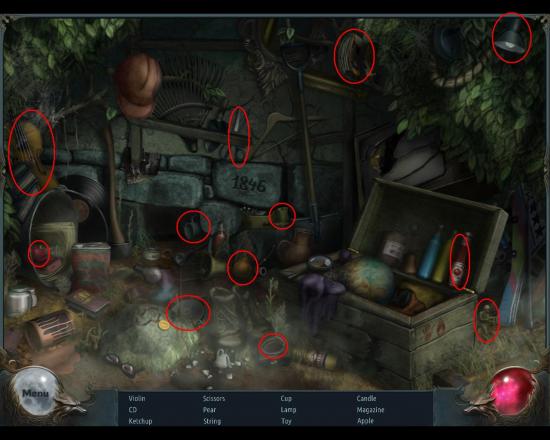
- The extra hidden object here is the CD, but only hidden in the sense that you have to open the cover.
- The toy refers to the little toy soldier on the right hand side.
- From this scene you get a VIOLIN.
- Click the house door to enter.
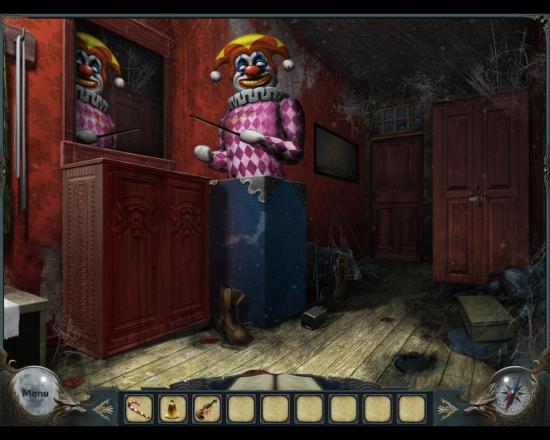
- You now stand in the hallway of Robert’s house, which is clearly deserted. Cobwebs everywhere.
- You can click on the cupboard door, to see that you probably will need a coin to open it.
- A huge jack-in-the-box figure greets you, holding a bow. A perfect match for your violin.
- Use the VIOLIN on the clown.
- Your host plays a short tune, and a secret doorway opens:
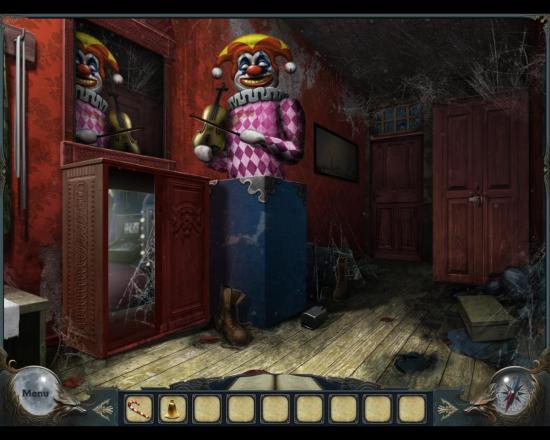
- You are now in the entertainment room, where you find the malfunctioning mini game:
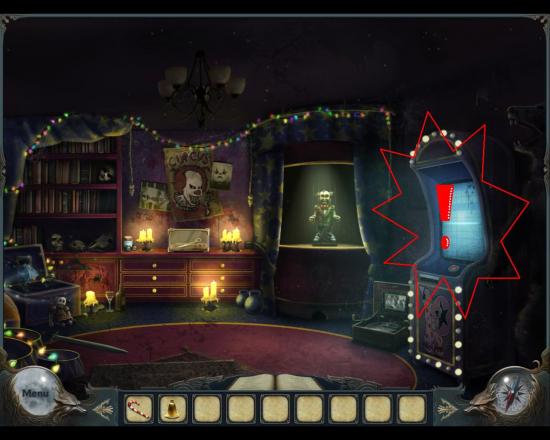
- If you choose to skip this mini game, you will not get the coin you need to open the cupbard in the hallway.
- To gather strength in your trigger finger it might be best to start with the HO scene:

- The only thing worth mentioning is that the gloves are really mittens.
- You will get a KEY from this scene.
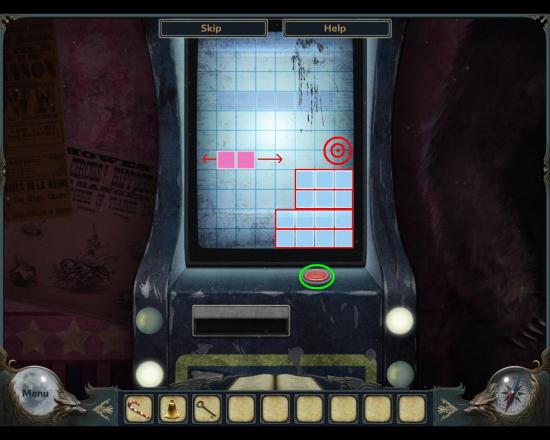
Now it’s time to try your luck with the mini game. IF you skip it, you cannot try the bonus chapter again unless you play the main adventure from scratch again. The game is slightly annoying, and it’s understandable that many opt out, but there are a few things you can do to make it easier.
The game is somewhat similar to Tetris, but in this case you need to stack the blocks on top of each other – only the very first block may be dropped on the bottom of the screen. If you don’t manage to drop the current block on top of the previous, you have to start over.
There are a few things you can do to simplify things:
- first of all stay calm, let the blocks move back and forth a couple of times so you get the feeling for their speed
- let the blocks bounce against the right wall just before you press the drop button (green)
- try to let them go around the bullseye drawn in the screenshot.
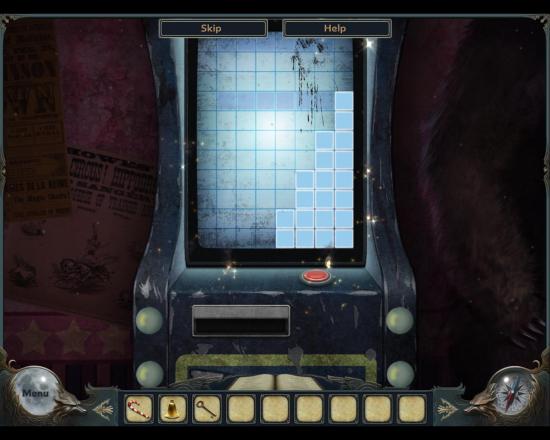
- This is the easiest way to place of a winning combination of blocks.
- When you have won the game – and you will! – you get a COIN.
- Go back to the hallway.
- Click on the lower part of the screen to back out to the front yard again.
- Another HO scene is now active to the left of the door:
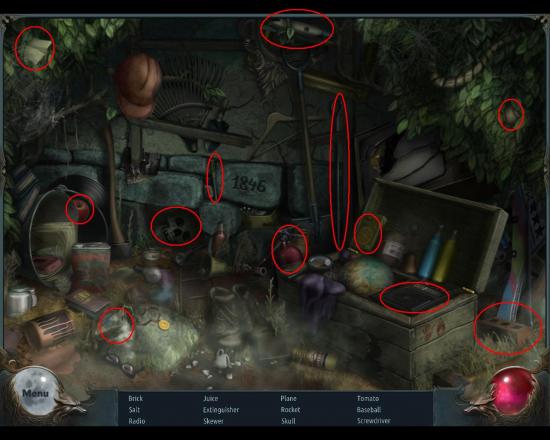
- From this scene you get the BRICK.
- There’s an excellent item to use a brick on inside, so go back to the entertainment room.
- Zoom in on the glass case with the scissors.
- Break the case with the brick.
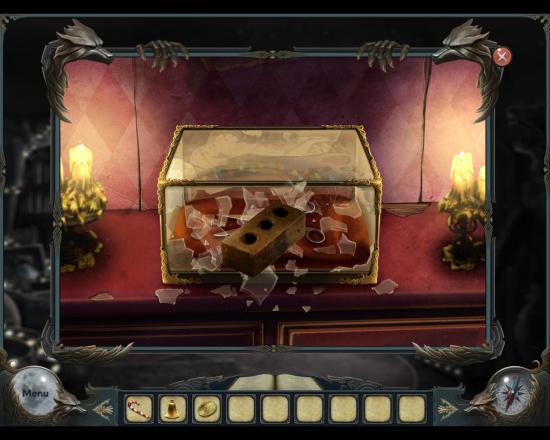
- Take the SCISSORS.
- Another HO scene is now available in the entertainment room:
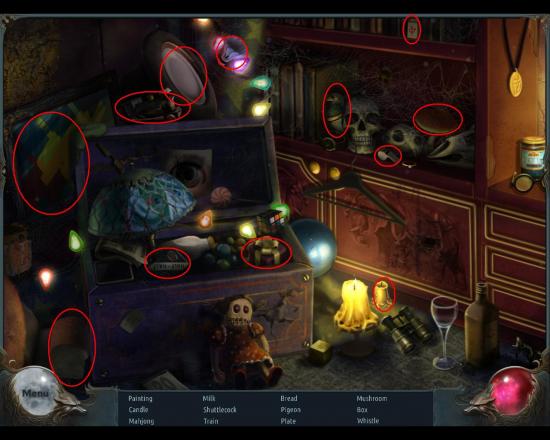
- Here you will get a CANDLE.
- Zoom in on the puppet theater.
- Put the CANDY CANE and BELL in the puppet’s hands:
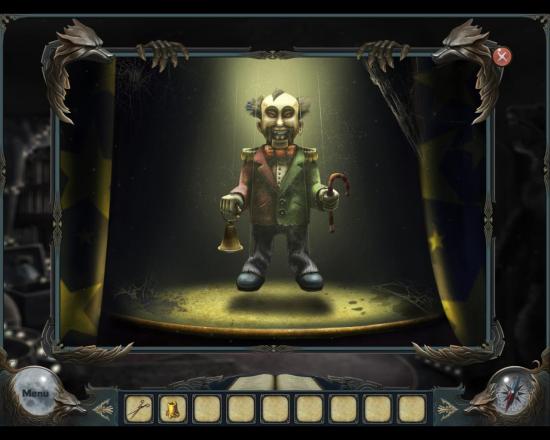
- When you do, the puppet’s mouth opens, so you can pick up a DIAMOND.
- Next, go back to the hallway.
- Zoom in on the cupboard on the right side of the hallway.
- Insert the COIN from the mini game in the slot, and put the DIAMOND above the lock:
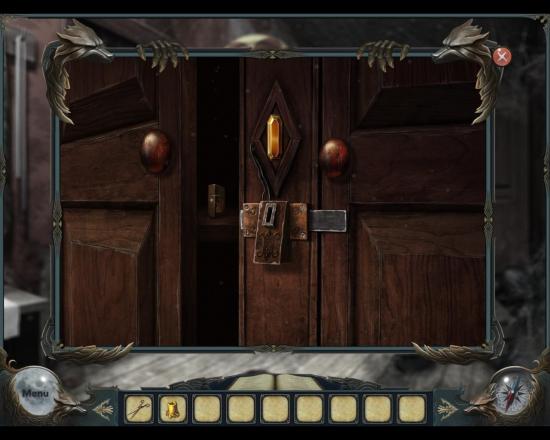
- Take the LIGHTER from the cupboard shelf.
- Use the KEY on the back door to open it.
- Click on the door to go outside:

- Now you come out on the patio (or at least it used to be):
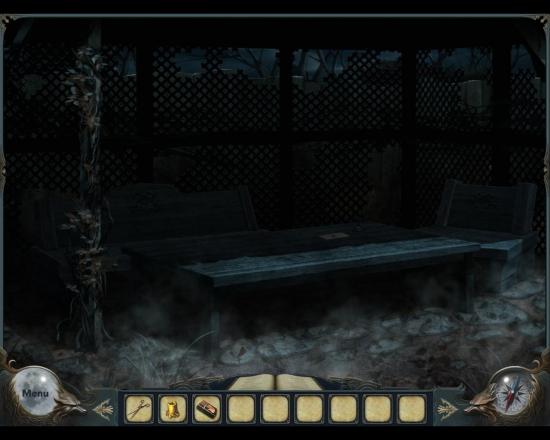
- Zoom in on the table
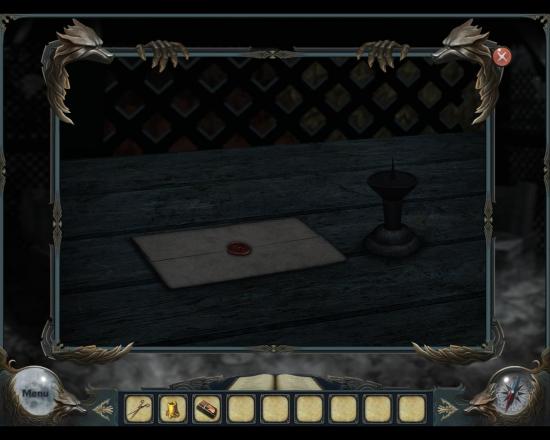
- Put the CANDLE on the peg.
- Use the LIGHTER to light the candle.
- Use the SCISSORS to open the letter.
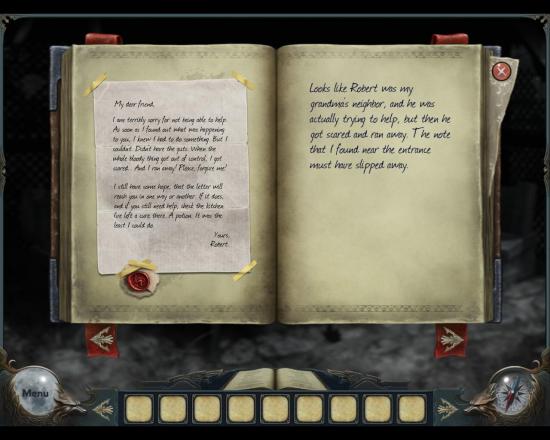
- Take the NOTE.
- Click on your notebook to read the letter:
Congratulations!
You have completed Gamezebo’s walkthrough for Curse of the Werewolves, Collector’s edition. Be sure to check back often for game updates, staff and user reviews, user tips, forums comments and much more here at Gamezebo!


