The best offence is a good defense, or so they say. These anonymous old adages often prove more fiction than fact, but when it comes to MLB Perfect Inning Live (available now for iOS and Android) strong pitching is definitely the key to success in both the live season and live battle modes, which is where the all the best action lives. You can bring the heat in every inning, but if your defense isn’t on point prepare to watch any lead you accumulate evaporate in no time.
Where MLB Tap Sports Baseball 2017 is more a batter’s game, as is MLB Perfect Inning Live in Turn-Based Mode, the live action and live battle modes are really a pitcher’s paradise from the mound to the boardroom. With control comes power and we all know what comes with great power – great responsibility!
If you’ve not played the Perfect Inning series before, or you’re new to baseball, all this responsibility can be a little intimidating but don’t worry – we’re here to help! This guide will have you pitch perfect in no time.
On the Mound in MLB Perfect Inning Live
A pitching roster full of souped-up Clayton Kershaws might stand you in good stead if you stick to simulation mode but that’s no fun. If you want to rack up the Ws in active play you need to avoid choking on the mound as much as possible.
Pitching in MLB Perfect Inning Live is a three step process. First, you choose your pitch type, then you focus your aim and finally you pick your power. In Live Season you can take your time going through the motions, but in Live Battle, you have five seconds from start to finish so you’re going to need to get steps two and three down to a reflex.
Step 1: Ready!
There are seven different pitches in MLB Perfect Inning Live and each pitcher will be able to throw up to six. Generally, starting pitchers have the greatest variety in pitch types with options getting more restrictive the deeper you move into the bullpen (where your relief pitchers and closers hang out).
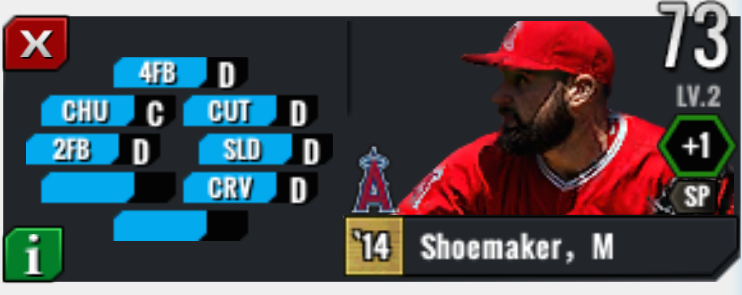
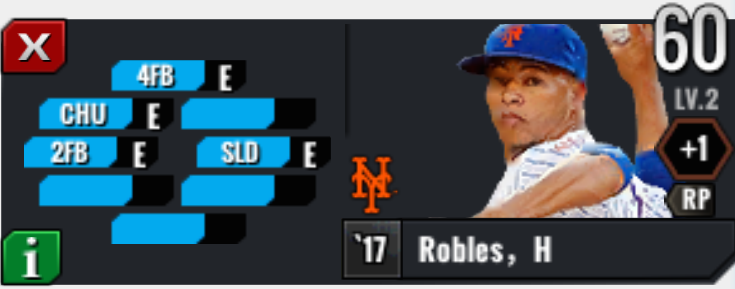
The seven pitch types are:
- 4FB (four-seam fastball) – Sometimes called the rising fastball, this pitch is usually the fastest/hardest pitch in any pitcher’s arsenal. It also takes a lot of your pitchers when thrown well so be careful about how frequently you rely upon it.
- 2FB (two-seam fastball) – Combines the general speed of a fastball (just a little slower) with the movement trajectory of a screwball. The goal with this one is to break the ball a little so it moves down and away from the batter mid-air leaving him swinging at nothing.
- CHU (change-up) – Thrown to look like a fastball but slower, hopefully confusing the batter and getting him to swing too early.
- CUT (cutter) – A variation on the fastball that is designed to move across the pitcher’s body as it goes from mound over the plate. There isn’t really a break on the ball, but the lateral movement is enough to ensure that if the batter makes contact it’s with the small of the bat where the hit’ll be less powerful.
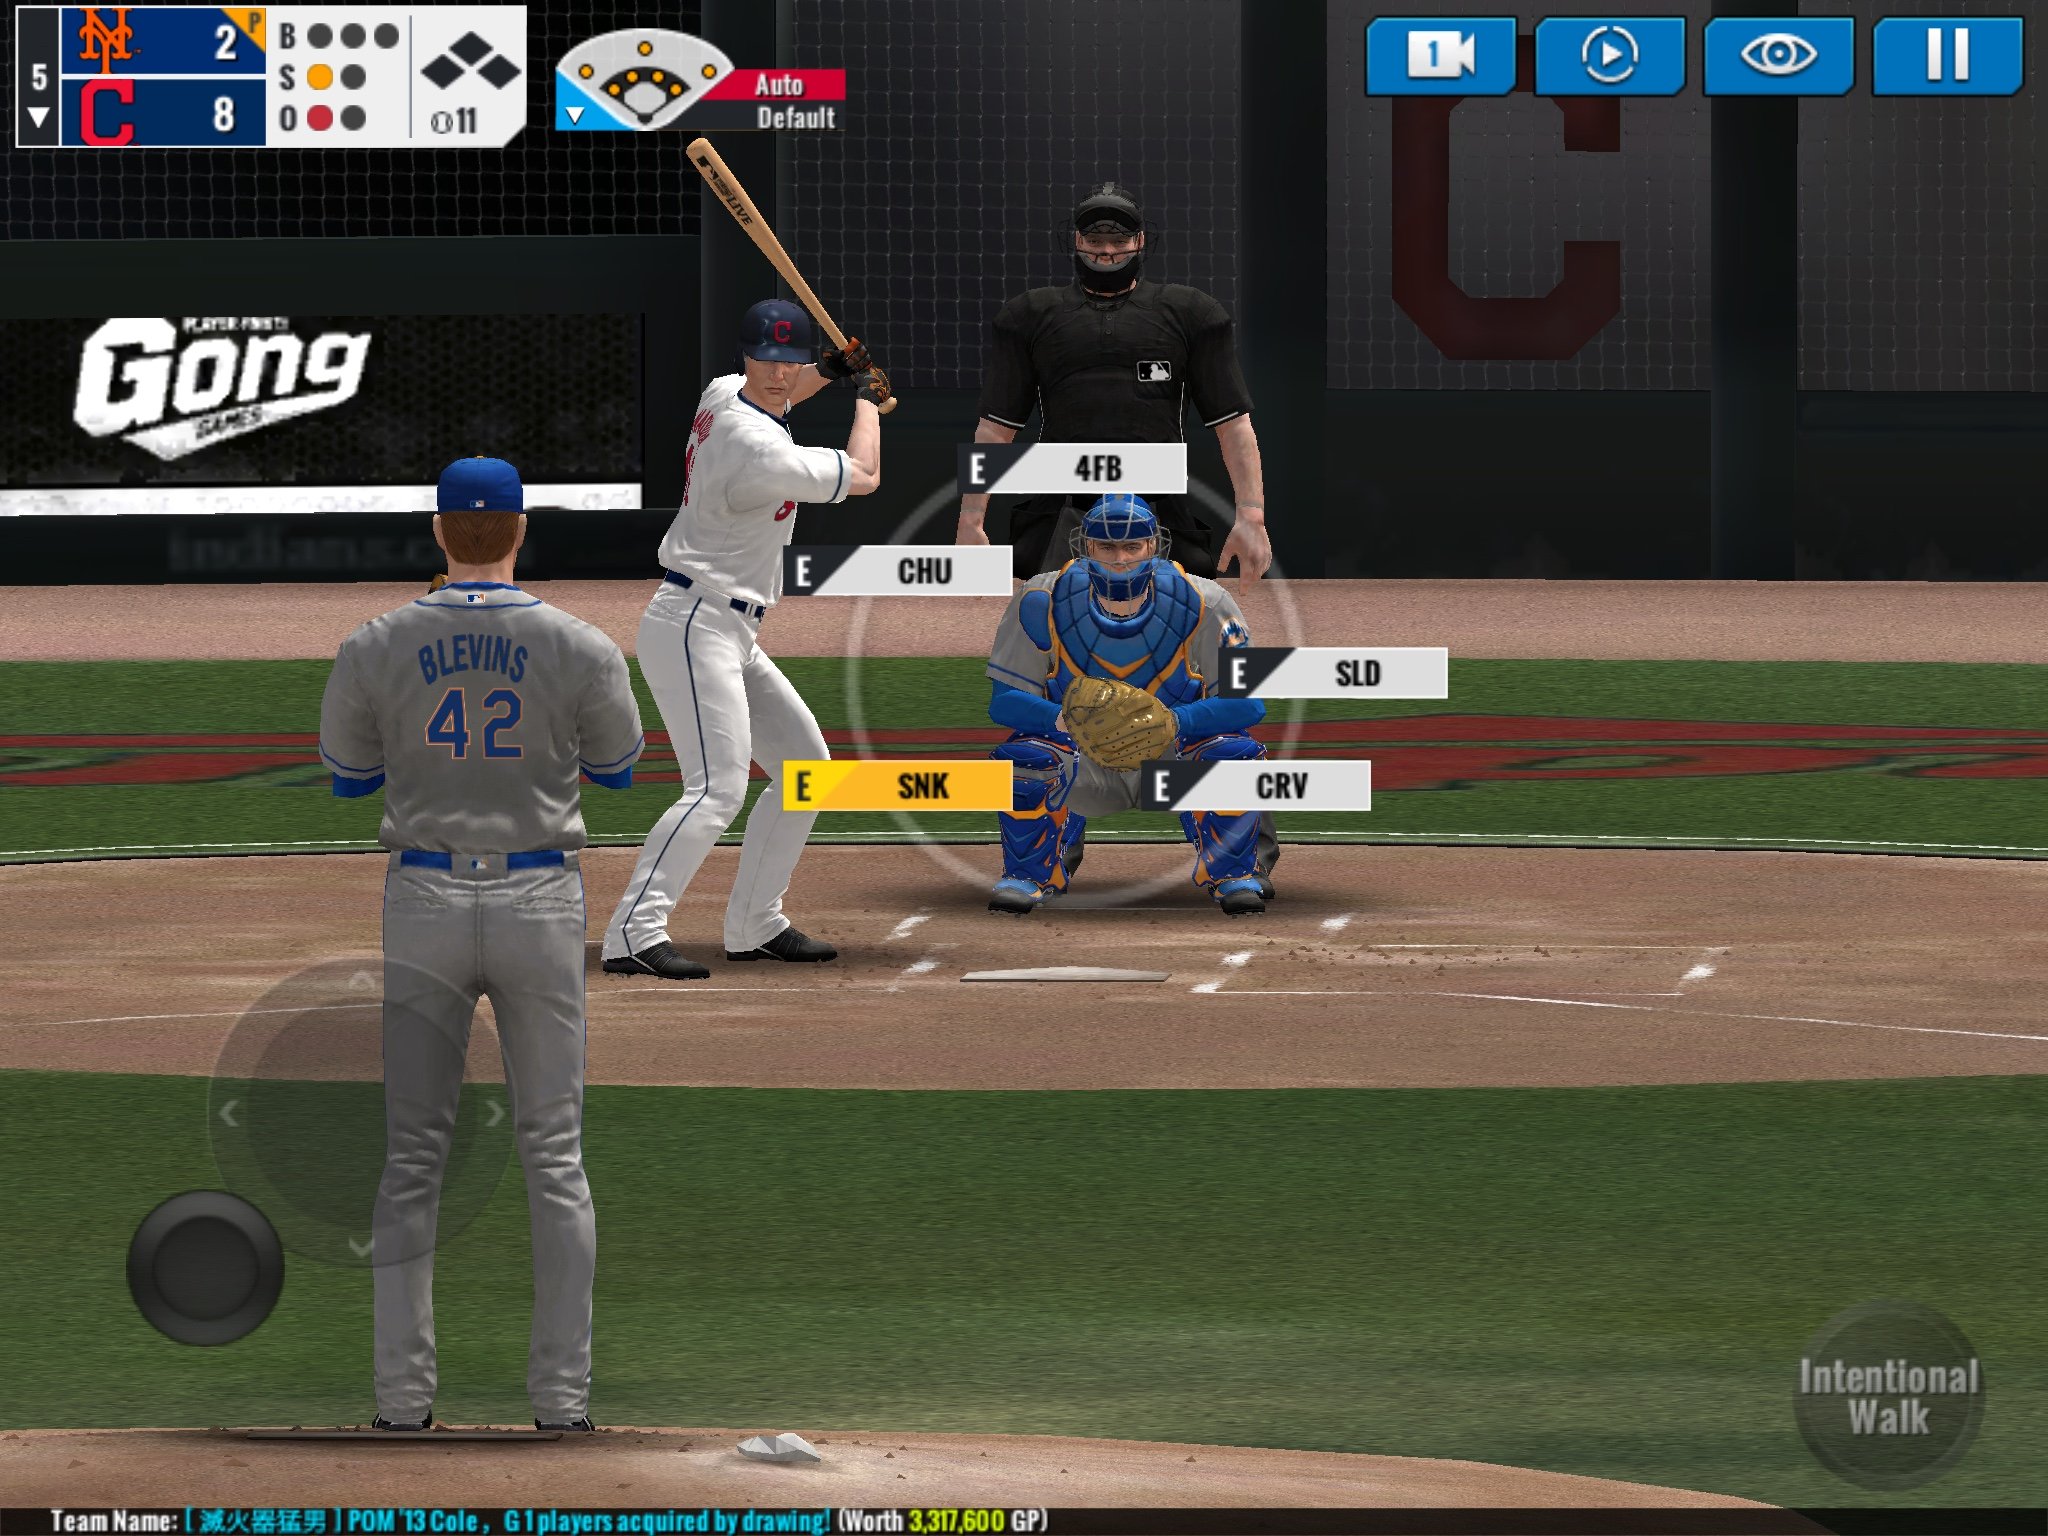
- SNK (sinker) – A variation on the fastball with a sharp downward movement designed so that if the batter makes contact it’s a ground ball at best and one the can be quickly scooped up in the infield for an easy out.
- CU (curveball) – Typically your pitcher’s slowest pitch, the curveball breaks the hardest making a hook-like shape mid-air. Used against batters who the pitcher thinks will be expecting a fastball to fool them into swinging up and over the ball.
- SL (slider) – A faster/harder variation of the curveball with less lateral movement while still being tricky to hit.
To pick your pitch move the joystick on the right side of the screen to match the placement of the pitch that you want in the selection wheel at the centre of the screen.
When it comes to selection strategy, as your options are likely to grow increasingly limited as you move through your bullpen, you’ll want to make the most of your variety in the first few innings. For breaking pitches, pay close attention to which side of your pitching arm the batter is on. You’re going to want to mostly choose pitches that’ll break down and away (under the tip of the bat) or at the small of the bat to decrease both the potential for a hit and the amount of power contact have.
Step 2: Aim!
Something the MLB Perfect Inning Live tutorial doesn’t do particularly well at is showing you how to aim. After you pick your pitch type and before you press down on the pitch button to determine the power of your release, you have the chance to choose where your pitch is going to land. Normally this will be within the strike zone, though it doesn’t have to be. You can choose to deliberately throw a ball to try to throw off the batter.
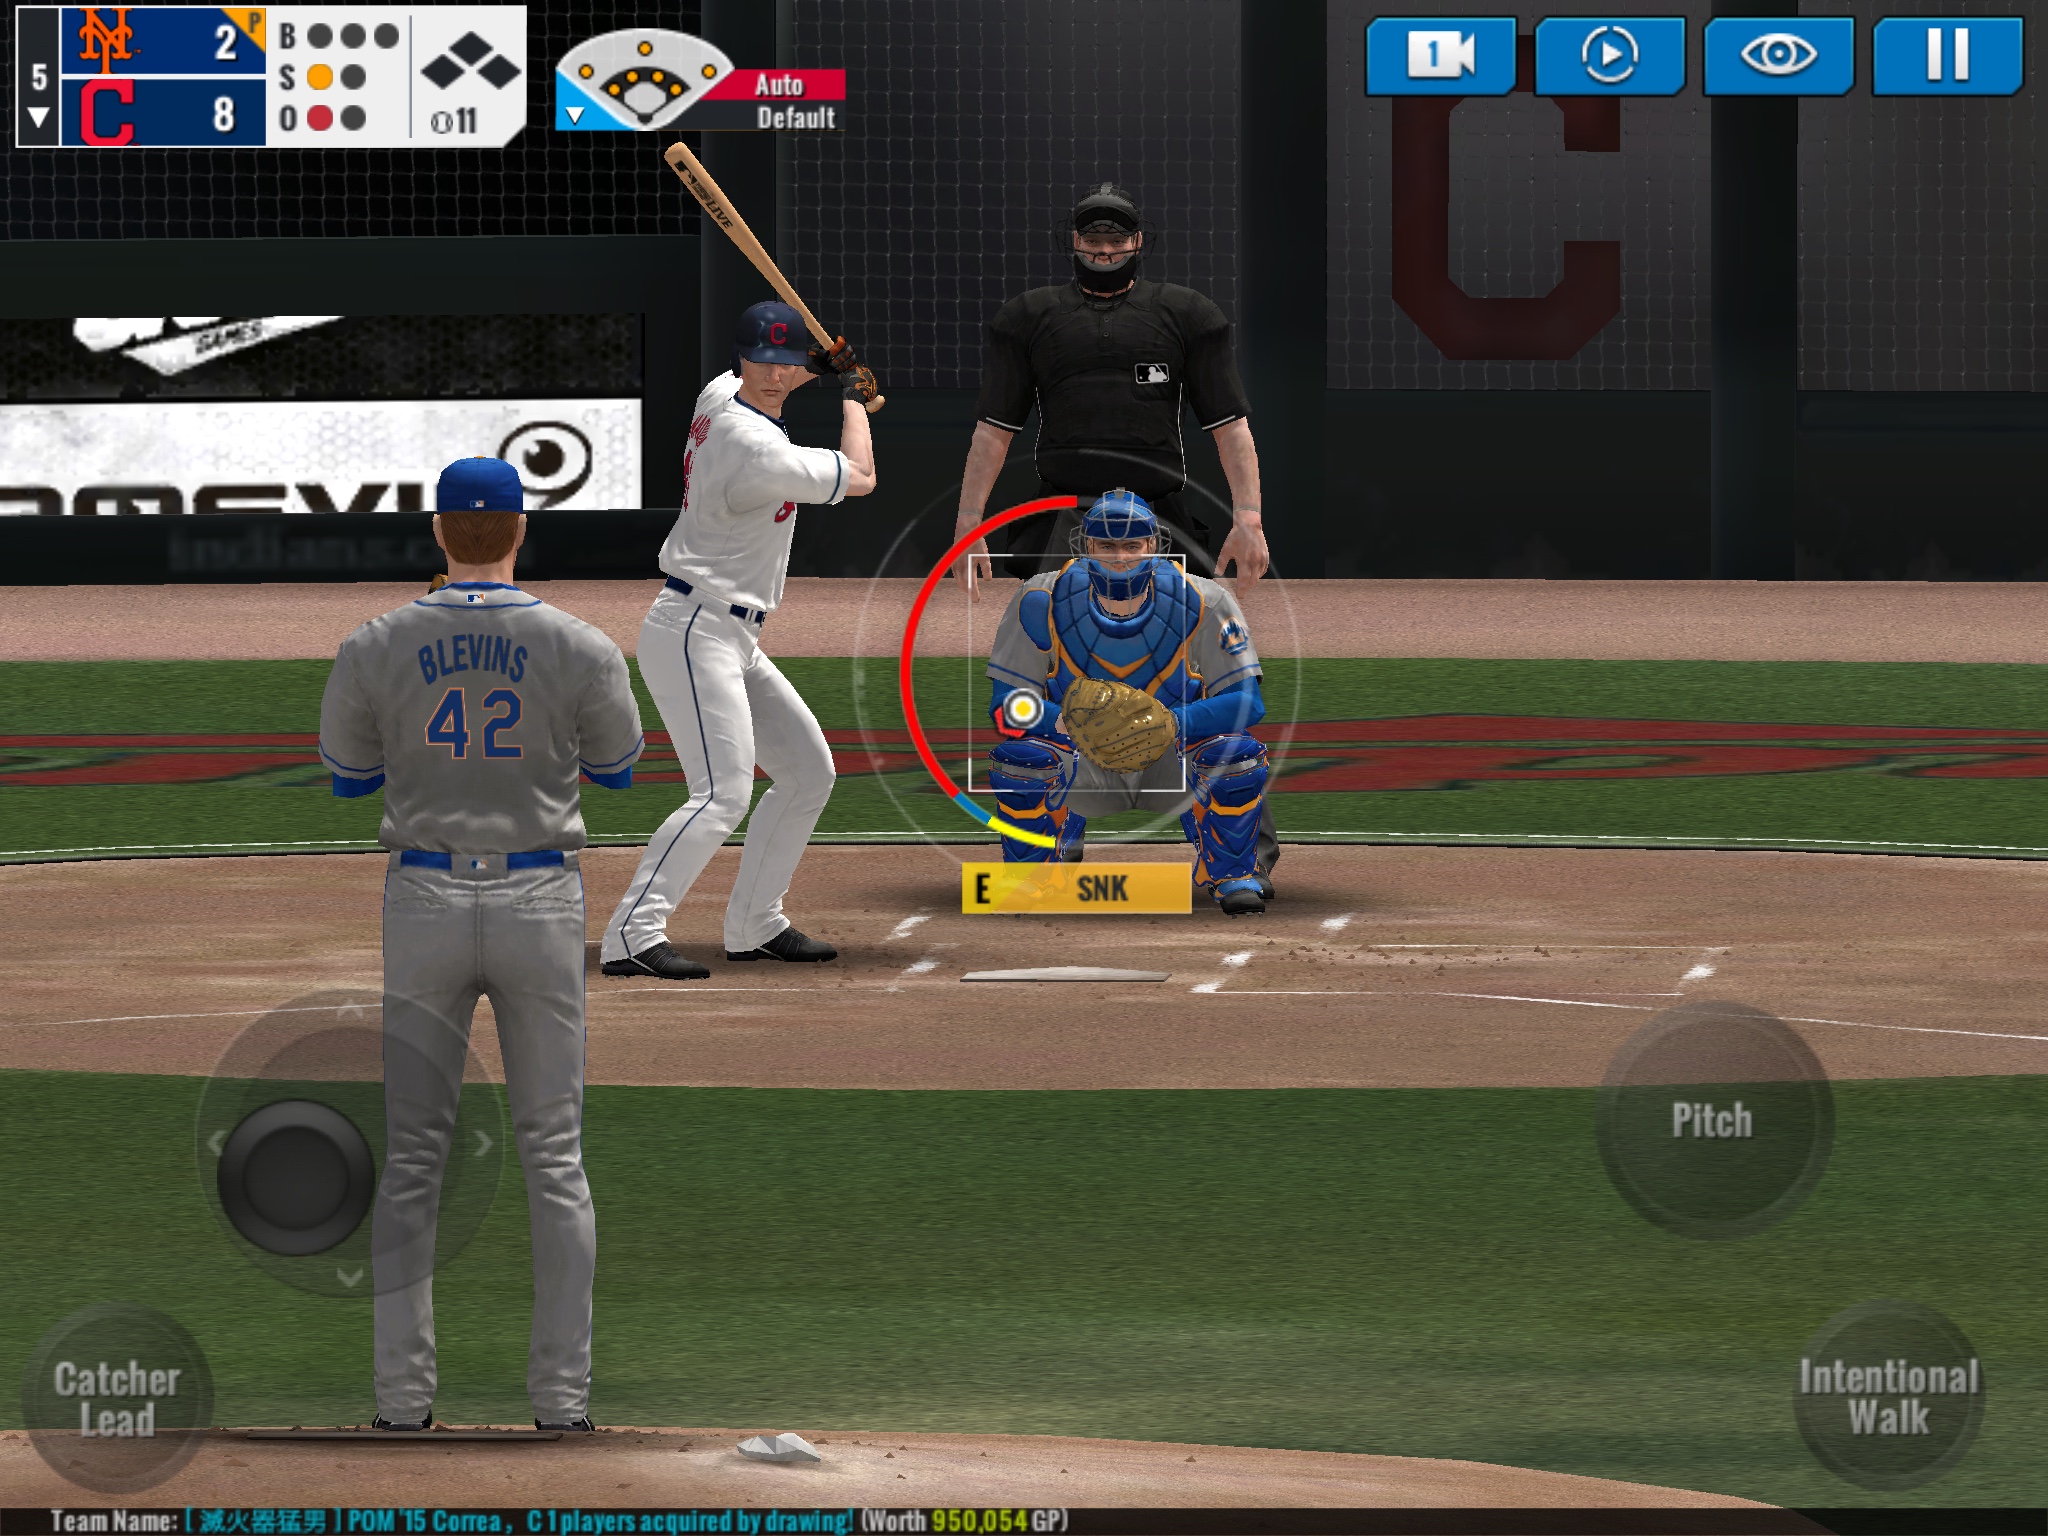
Aiming happens on the same screen as your release. To aim use the same joystick on the left side of the screen you used to pick your pitch type. As you move the joystick the white dot in the centre of the strike zone will move around the screen. Once you know where you want to go get ready to throw by pressing the pitch button.
Step 3: Fire!
The last step in the throw is determining your release strength. Hold (don’t tap!) the pitch button and watch the indicator move around the release circle. The yellow ‘best’ zone is optimal, but throwing that well can also drain your pitcher’s strength pretty quickly.
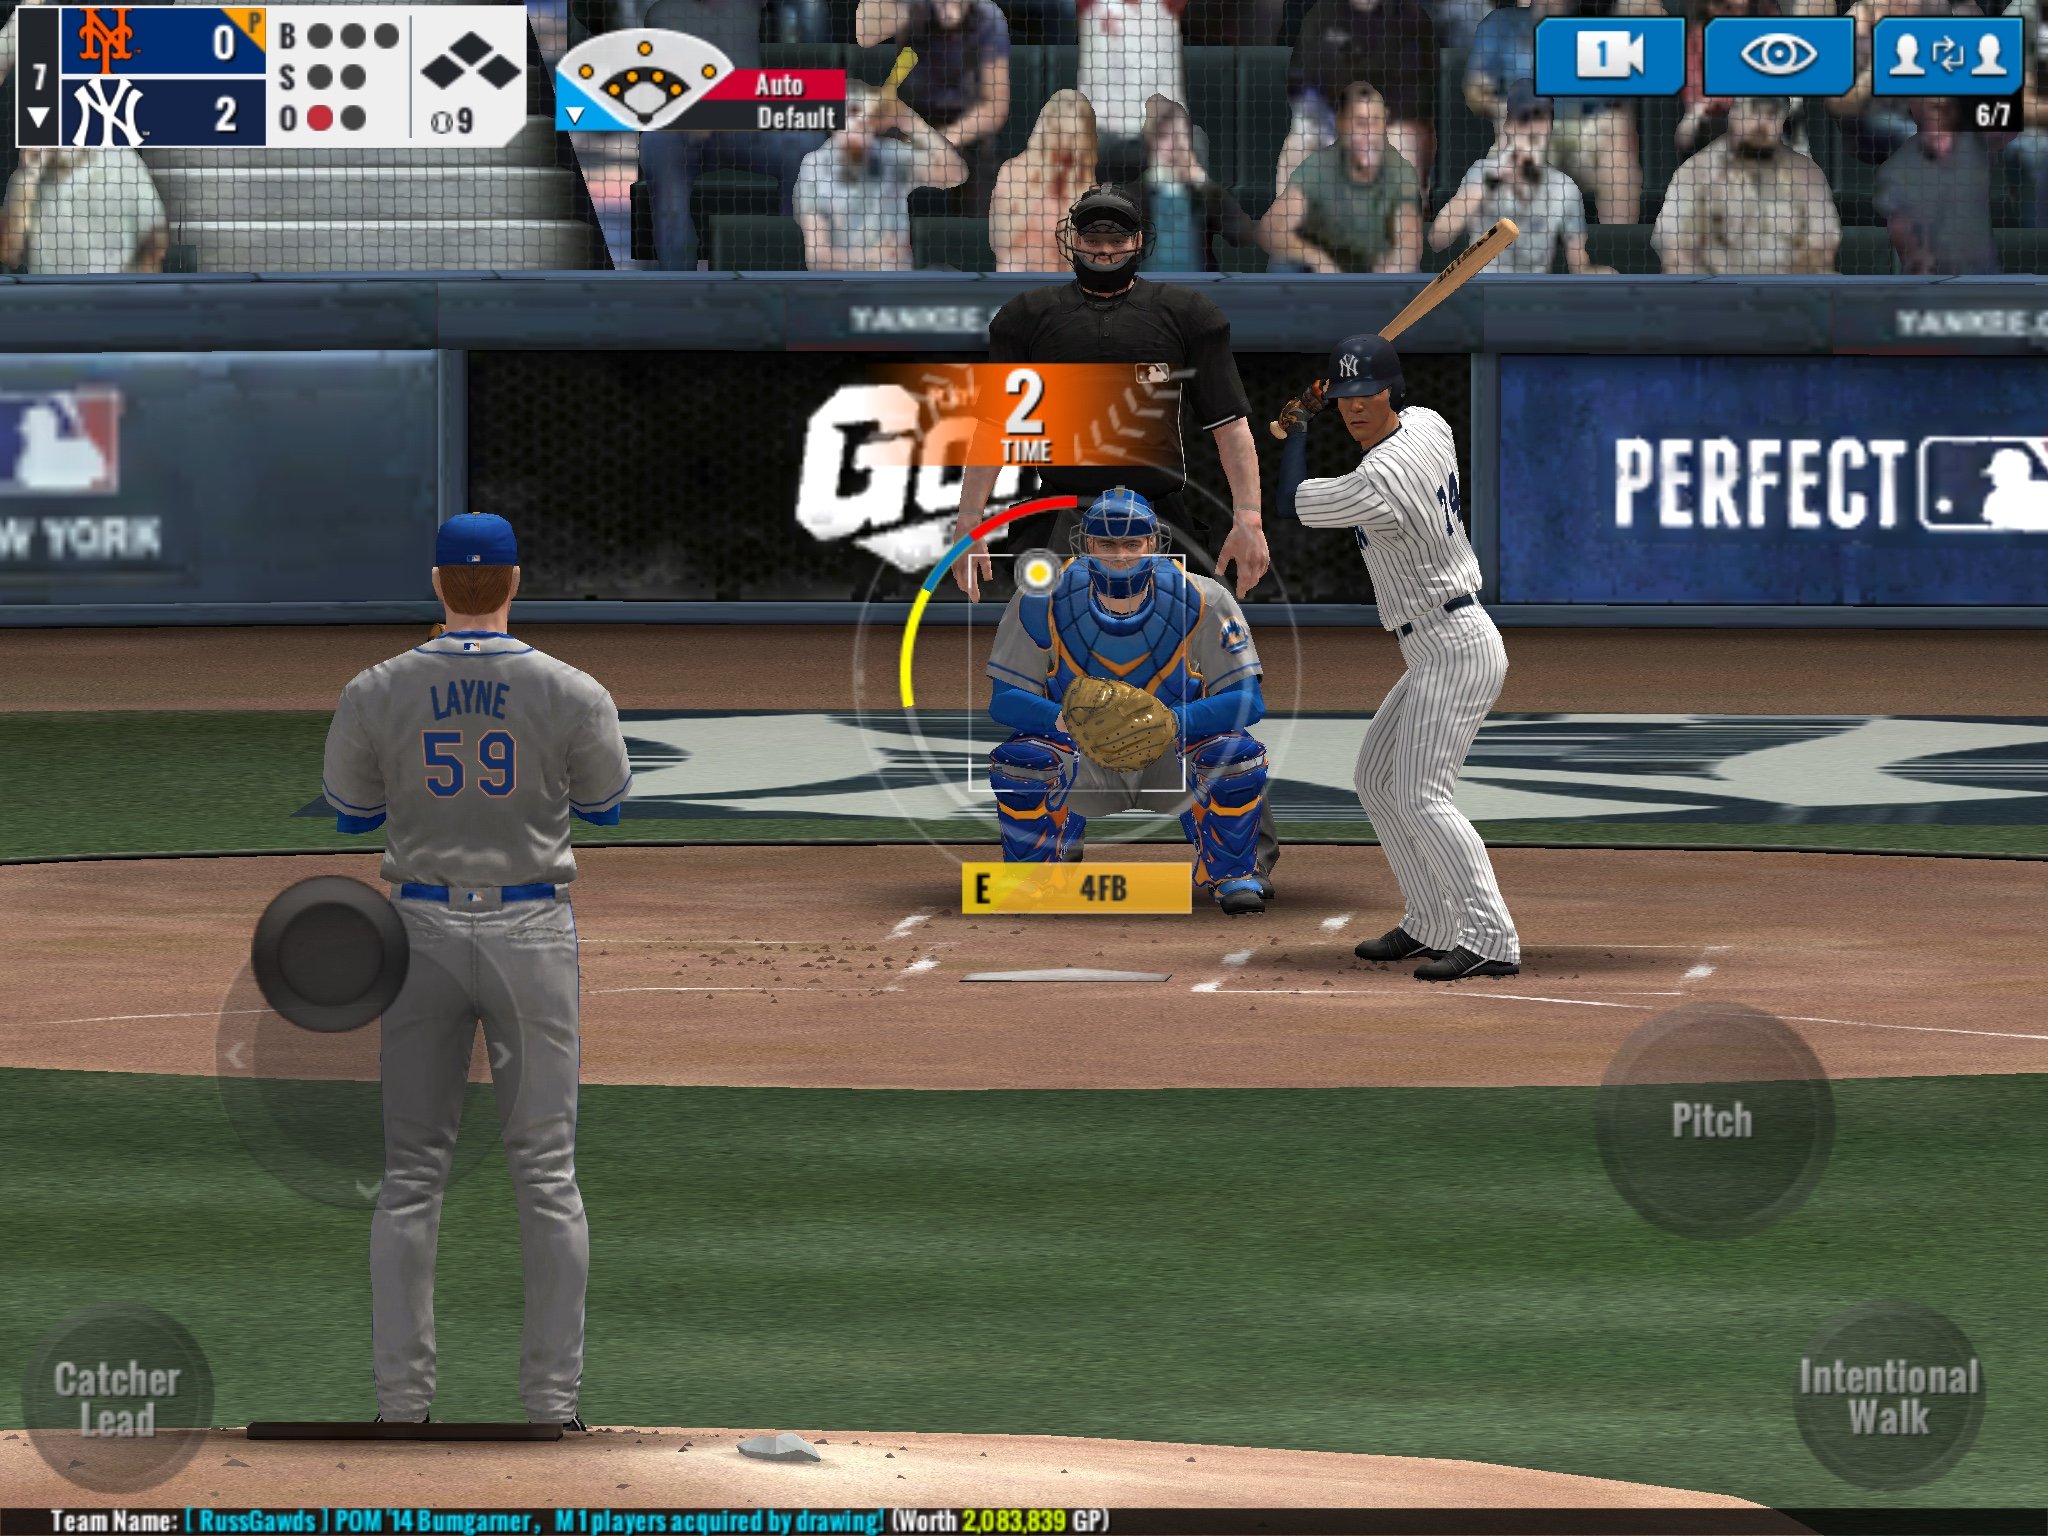
Below the yellow zone (the clear part of the circle) is ‘normal’. These pitches are weaker than your best pitches but use less energy. Throwing these can help you make sure your star pitcher lasts a little but longer than he might otherwise.
Above the yellow zone is the blue ‘overpitch’ zone. Here you use too much energy and lose some control on the throw in the process. Beyond this is the red ‘fail’ zone. These pitches can be wild so you’re just as likely to get a lucky strike as you are to basically hand the batter a home run on a silver platter.
It’s important to avoid releasing in the red zone at all costs. It’s better to release too early (in the upper end of the normal zone) than to throw flying failures. Staying out of the red becomes more difficult the more tired your pitcher gets because as stamina falls the red zone grows while the yellow and clear zones shrink. Move between best and normal pitches in the first inning or two to conserve starting pitcher energy and get a feel for the release rhythm.
Know When to Hold Them & When to Fold Them
In MLB Perfect Inning Live you’ll go through pitchers quite quickly. Even with the superstars on your roster stamina can be disappointing. Knowing when to substitute your pitcher is essential because it’s hard to avoid letting the homers fly when your man on the mound is exhausted.
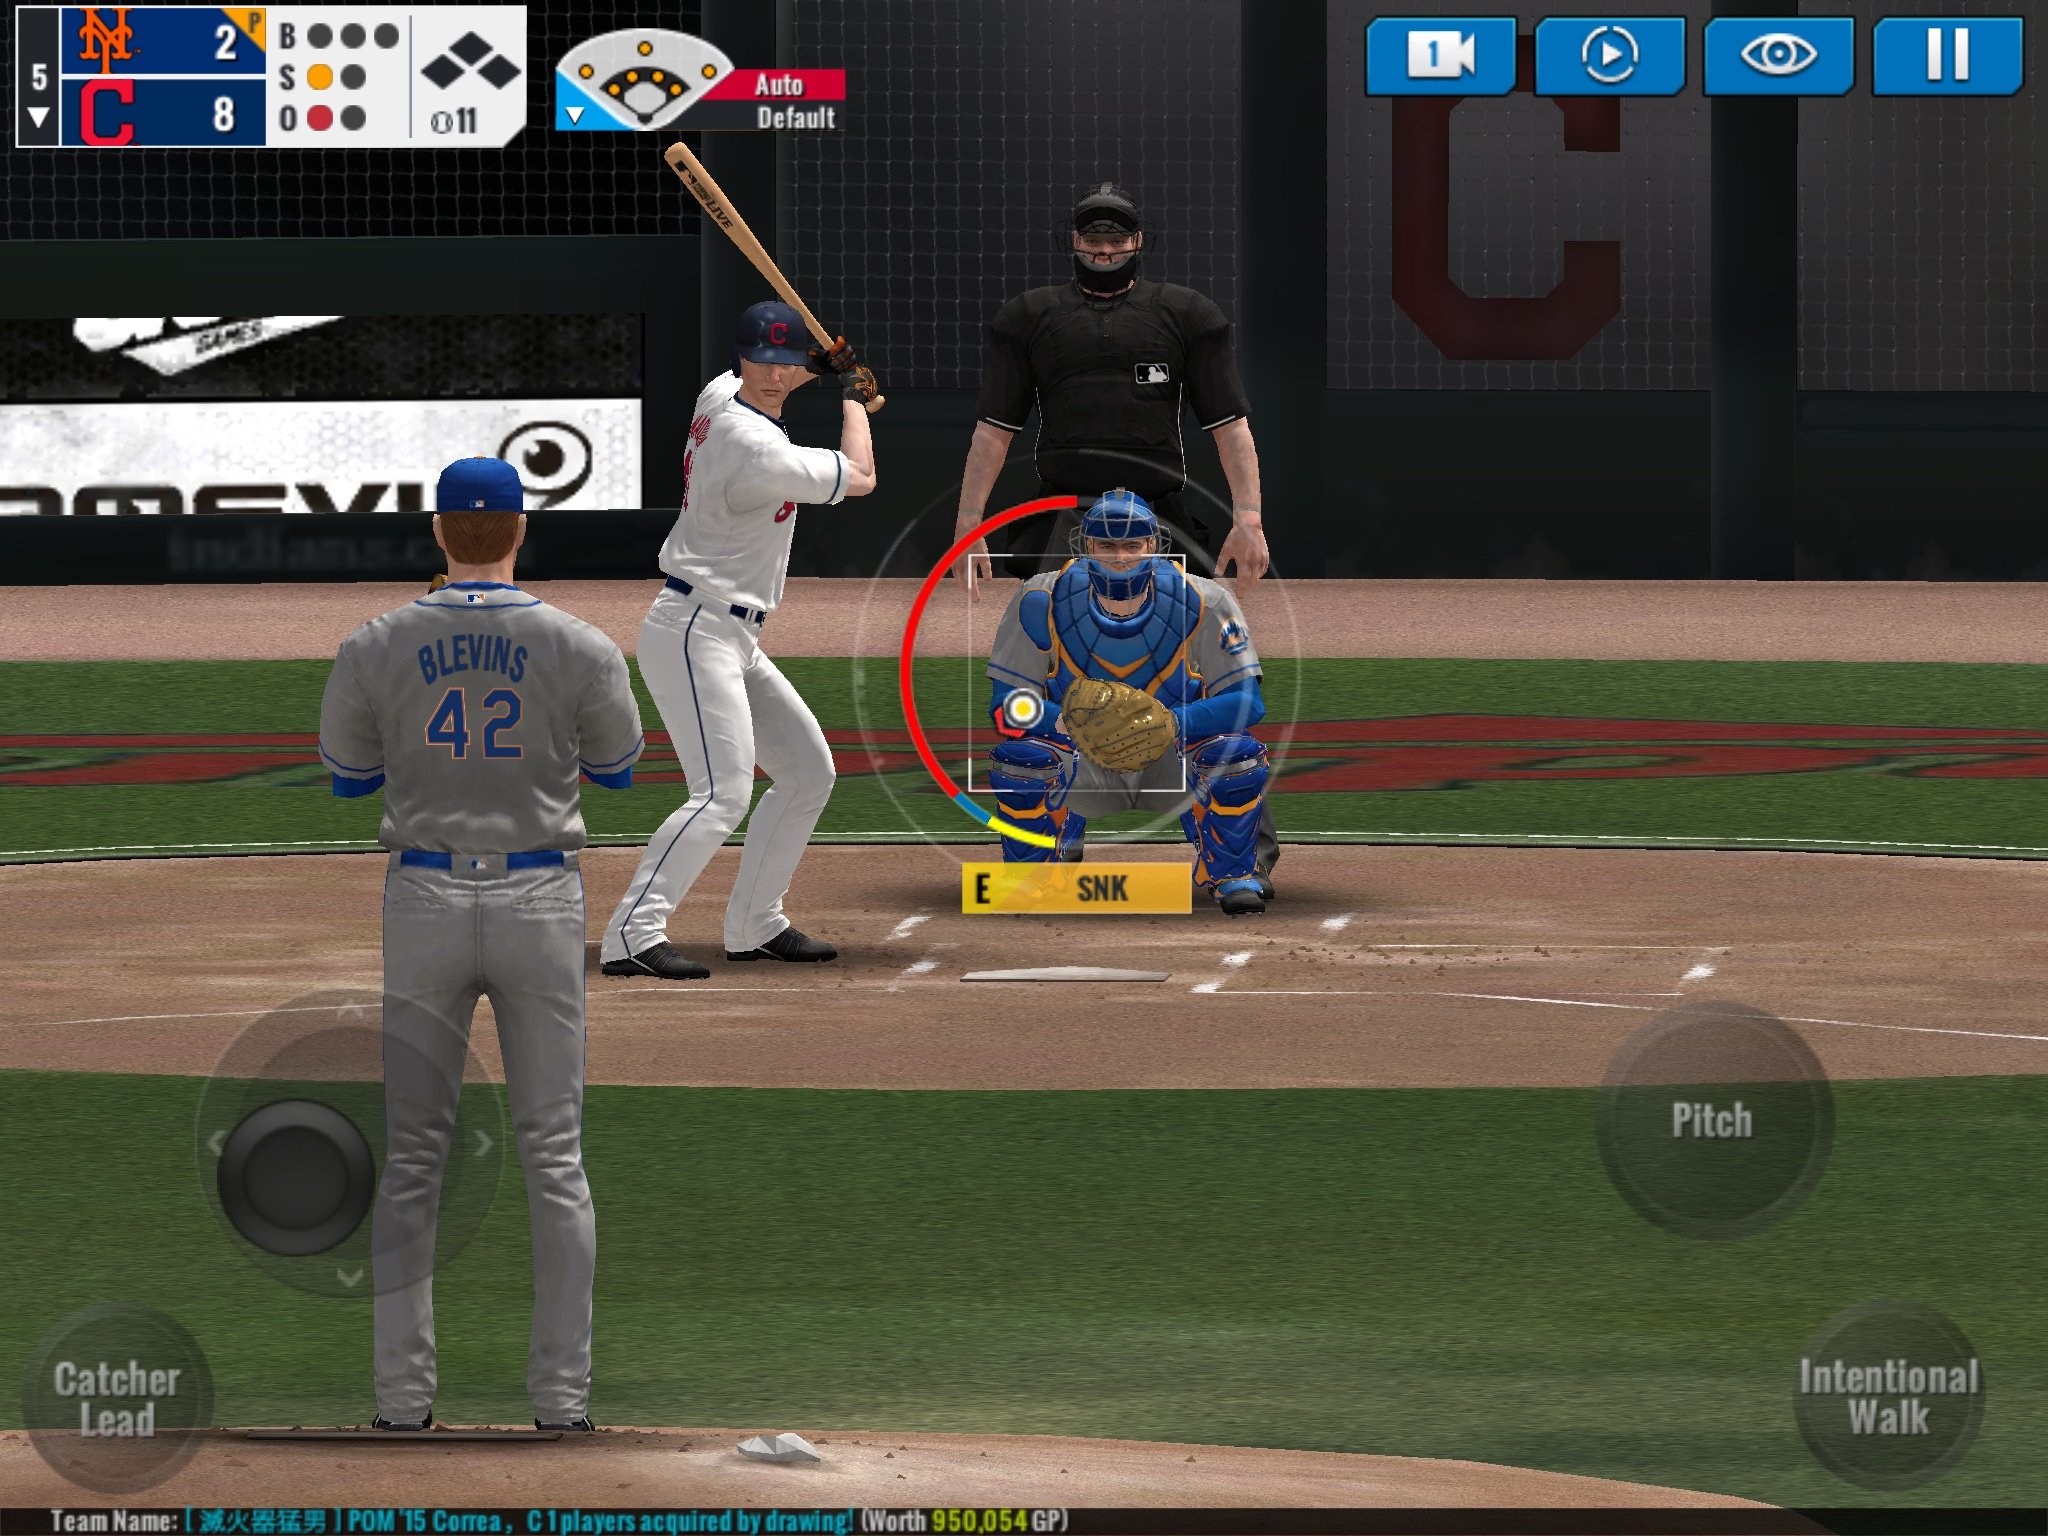
As a general rule, as soon as you start seeing the red flashing circle of sleepiness around your release circle or the normal zone takes up less than half of the whole circle you’re going to want to think about changing things up. Exactly when you’re going to make the move will depend on the specifics of your team (and your pitcher).
You can probably try stretching things out to finish the inning if you meet any of these conditions:
- There’s a bona fide superstar on the mound
- You’ve mastered your release timing so a teenie tiny best zone isn’t going to be a problem
- Your bullpen is ridiculously weak
In all other circumstances substituting sooner rather than later will likely save you some serious heartache. In the immortal words of Jimmy Dugan: “There’s no crying in baseball!”.
Taking Care of Boardroom Business
One final note – don’t forget to put yourself in the best position possible on the mound by taking care of your team in MLB Perfect Inning Live’s management section. Use Auto Lineup as a starting point and tweak your pitching depth chart from there. Develop your star pitcher(s) whenever possible.
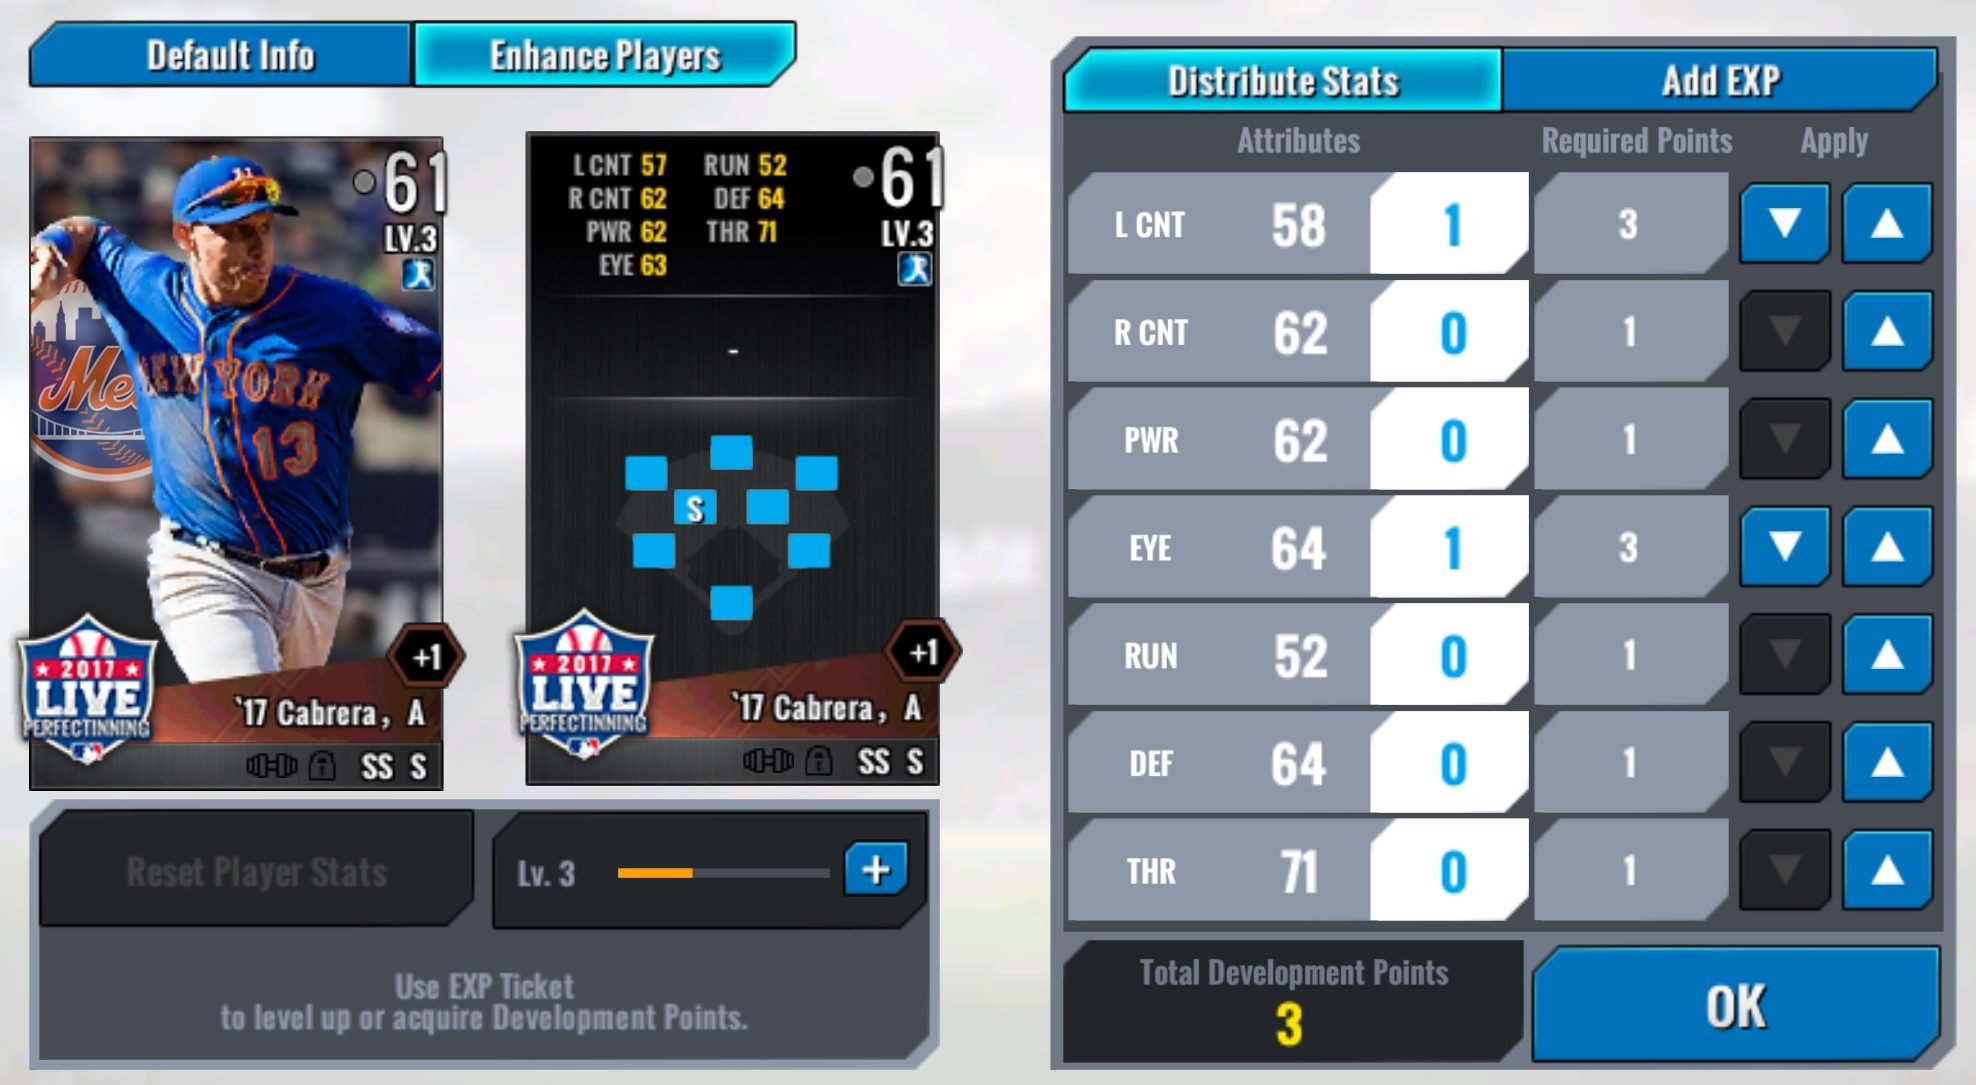
Don’t forget to put your skill points to work at the end of every single game. Great games are had on the mound but dynasties are built behind the scenes, so if you want to really get far team management can’t be neglected. Combine sound management with strategic pitching and you’ll be one step ahead of your competition, even if you can’t fork out the big bucks to improve your odds of getting big name players.
